Tutorial #018
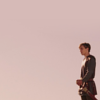
Going from this: 
to this:
Requested by HM Swanwhite on NarniaWeb.
1. Open up your base, crop, sharpen, etc.
2. Duplicate it and set the new layer to ‘Screen’ at 100%.
3. Create a new layer filled with 0b330d. Set it to ‘Overlay’ at 80%.
4. Create another new layer filled with ffd800. Set it to ‘Multiply’ at 10%.
5. Duplicate your base again and bring it to the top. Go Colour>Components>Channel Mixer:
Red: 125, -20, -30
Green: -5, 100, 0
Blue: -3, -4, 18
Check ‘Preserve Luminosity’.
Set this layer to ‘Normal’ at 60%.
6. Insert this texture:
 by me (my favourite texture I’ve ever made!) Set it to ‘Multiply’ at 85%. I flipped it horizontally.
7. And this one: 
also by me. Set it to ‘Overlay’ at 100%. I flipped it vertically.
8. This one:
 by (you guessed it!) me. Set it to ‘Overlay’ at 100% as well. I used a small fuzzy brush to erase the part that covered Peter.
9. This one:
 by me. ;) Set it to ‘Multiply’ at 100%.
10. One more:
 Yes, I shamelessly used all my own textures on this one. Set it to ‘Screen’ at 60%. I flipped it horizontally and Desaturated it.
11. I wrote ‘king’ in d5d5d5, Garamond, size 64. Then I erased the parts that covered Peter. Set it to ‘Overlay’ at 70%.
12. Oh! I forgot about this one:
 It’s by kelle (no, not me!) Set it to ‘Multiply’ at 60%. I also flipped this one horizontally.
13. Merge your layers or flatten your image.
Finished!
to this:
Requested by HM Swanwhite on NarniaWeb.
1. Open up your base, crop, sharpen, etc.
2. Duplicate it and set the new layer to ‘Screen’ at 100%.
3. Create a new layer filled with 0b330d. Set it to ‘Overlay’ at 80%.
4. Create another new layer filled with ffd800. Set it to ‘Multiply’ at 10%.
5. Duplicate your base again and bring it to the top. Go Colour>Components>Channel Mixer:
Red: 125, -20, -30
Green: -5, 100, 0
Blue: -3, -4, 18
Check ‘Preserve Luminosity’.
Set this layer to ‘Normal’ at 60%.
6. Insert this texture:

 by me (my favourite texture I’ve ever made!) Set it to ‘Multiply’ at 85%. I flipped it horizontally.
7. And this one: 

also by me. Set it to ‘Overlay’ at 100%. I flipped it vertically.
8. This one:

 by (you guessed it!) me. Set it to ‘Overlay’ at 100% as well. I used a small fuzzy brush to erase the part that covered Peter.
9. This one:

 by me. ;) Set it to ‘Multiply’ at 100%.
10. One more:

 Yes, I shamelessly used all my own textures on this one. Set it to ‘Screen’ at 60%. I flipped it horizontally and Desaturated it.
11. I wrote ‘king’ in d5d5d5, Garamond, size 64. Then I erased the parts that covered Peter. Set it to ‘Overlay’ at 70%.
12. Oh! I forgot about this one:

 It’s by kelle (no, not me!) Set it to ‘Multiply’ at 60%. I also flipped this one horizontally.
13. Merge your layers or flatten your image.
Finished!