Tutorial
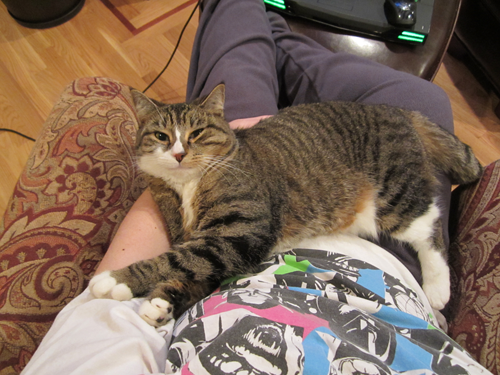
SO I BET YOU ALL WANT TO KNOW HOW TO TURN THIS
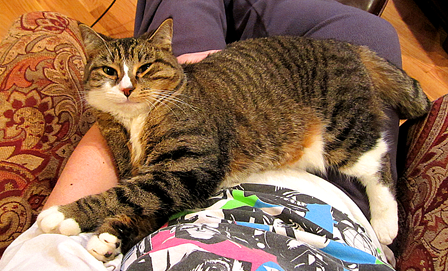
INTO THIS
At least those of you who don't already know lolol
This tutorial is for Photoshop, BUT all the tools I am using should be in all the good free imaging programs as well, maybe with the exception of auto-sharpen.
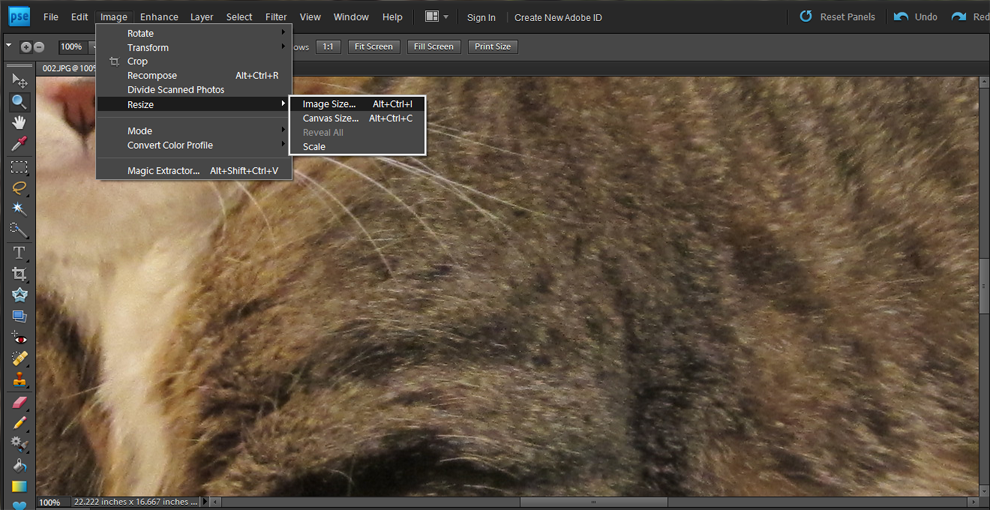
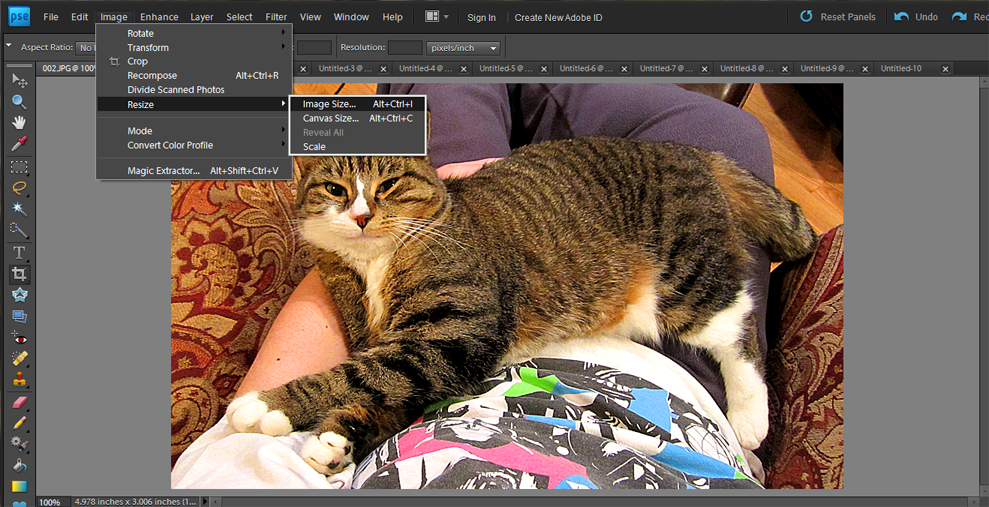
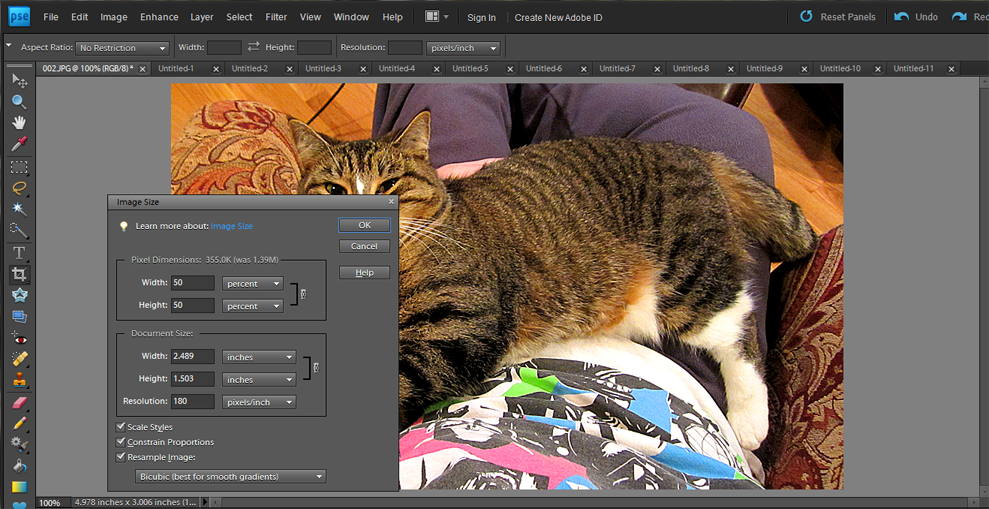
Okay now first of all the original photo is actually much larger than that so I start by resizing it. I DO NOT resize it to the final size I want it to be at; I go for more like 2x the final size or something like that.
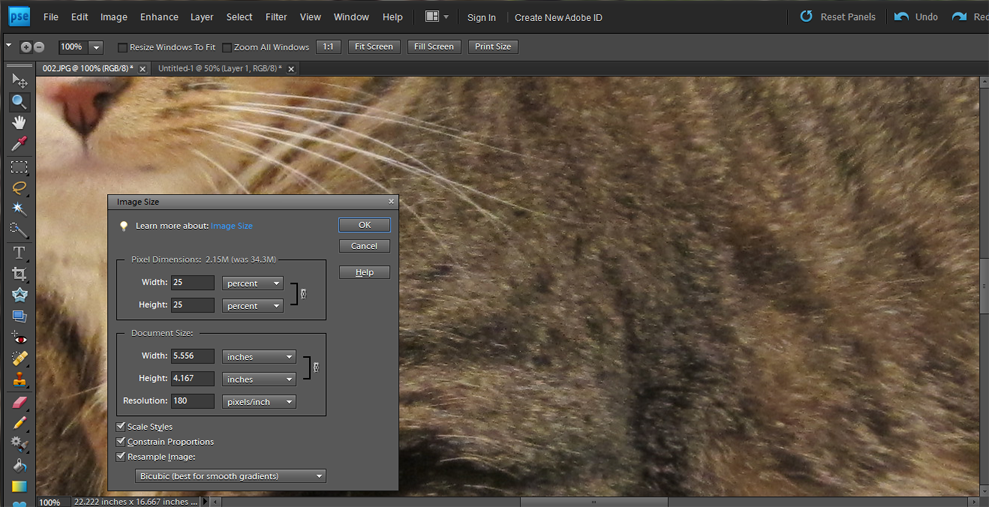
Those are the numbers I usually go with; I always use percent since it's easier than memorizing/calculating pixels, unless I'm resizing for something to fit exactly into an icon or something like that. You'll probably have to mess around a bit to find what size is best for you for this step.
Now I sharpen it. TBH for this I just use the 'auto-sharpen' function, there are probably more pro ways to do it.
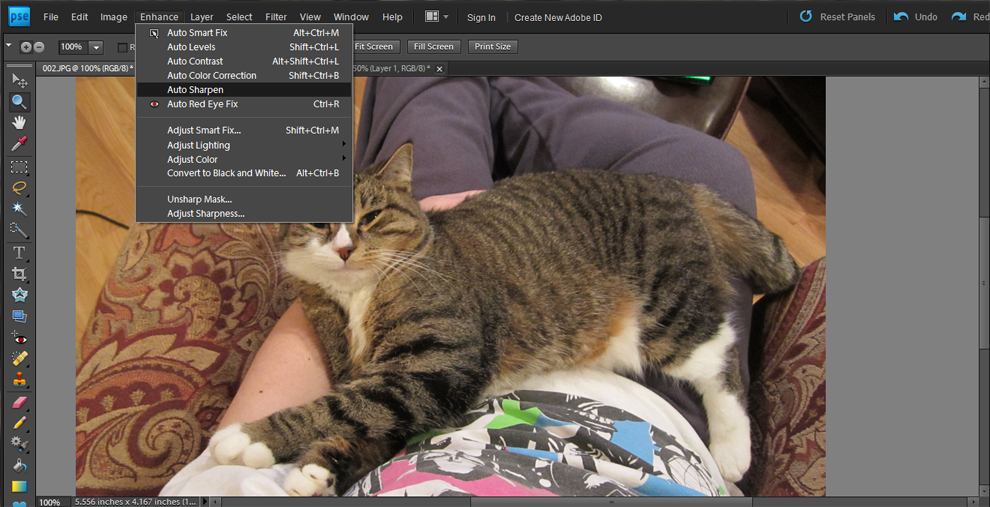
I do it two or three times, or until it looks nice enough; it's okay if it gets a little grainy at this stage - that's why we do it before the final resize.
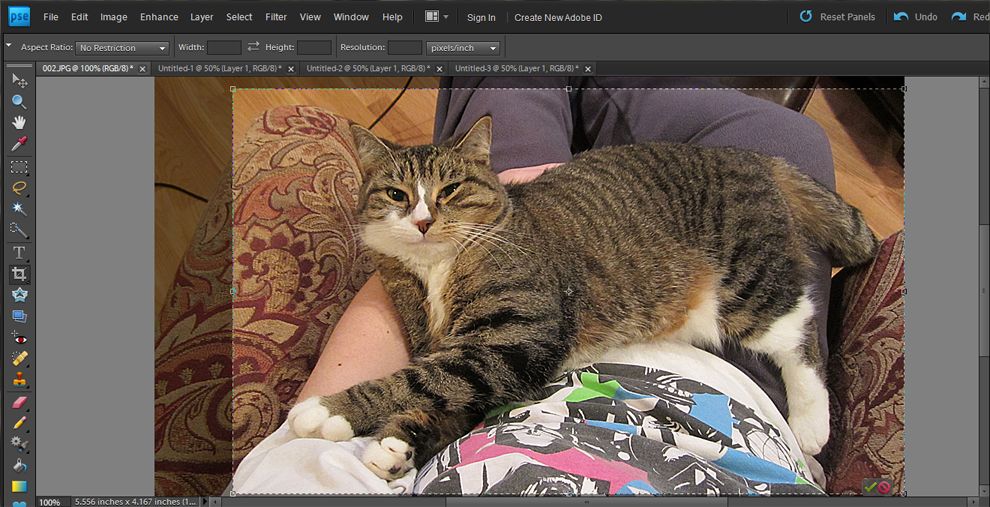
Now I crop it down to just whatever will be in the final photo. You can also do this at the ending, but if there is anything especially dark or especially light that's going to be cropped out, I recommend you do the cropping now. TBH, I just recommend you do the cropping at this point regardless.
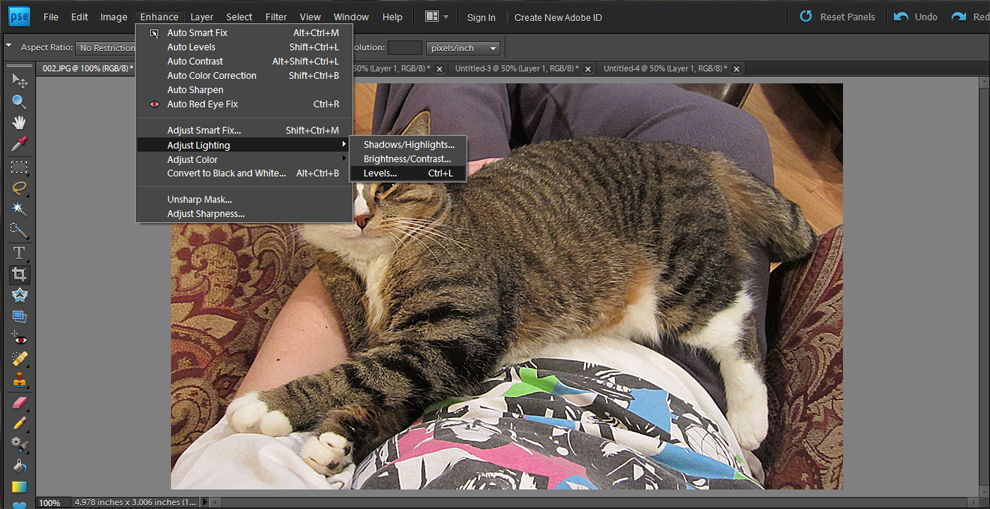
Now we're going to go mess with the LEVELS. OOOOO INTENSE MAN
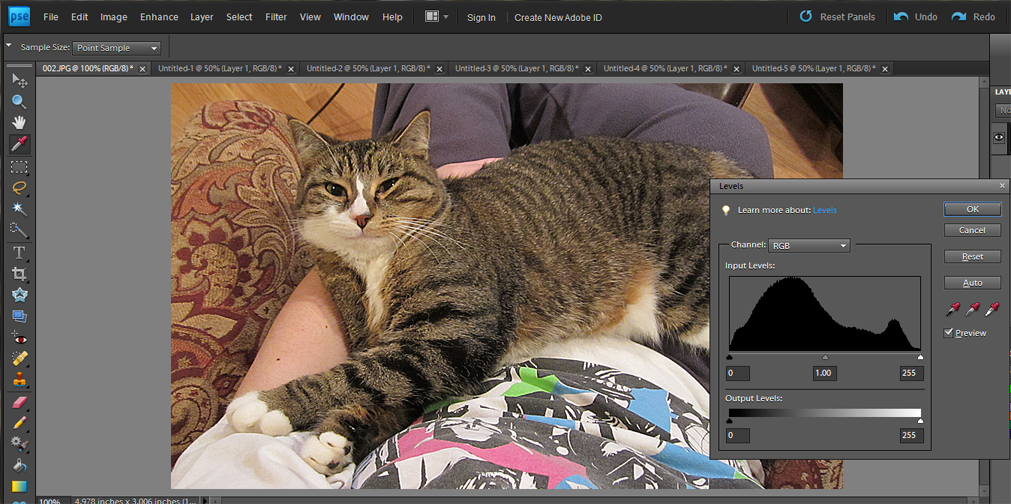
Okay so this funny-looking graph comes up. (In some programs, it may be a line graph rather than a frequency/bar graph like this). What this is showing you is basically the spread of colors across the spectrum of white to black. What's most important here is the edges of the curve; in this case, as with most cases, neither end of the curve goes to the end of the graph, except for a few colors. This means there are no or few true blacks or true whites in the image; that makes it look washed-out and not very striking.
Luckily, we can fix this! We can change WHERE THE EDGES OF THE GRAPH ARE. We change this with those triangles at the bottom of the graph. Shift them inwards to change where true white and true black are on the graph.
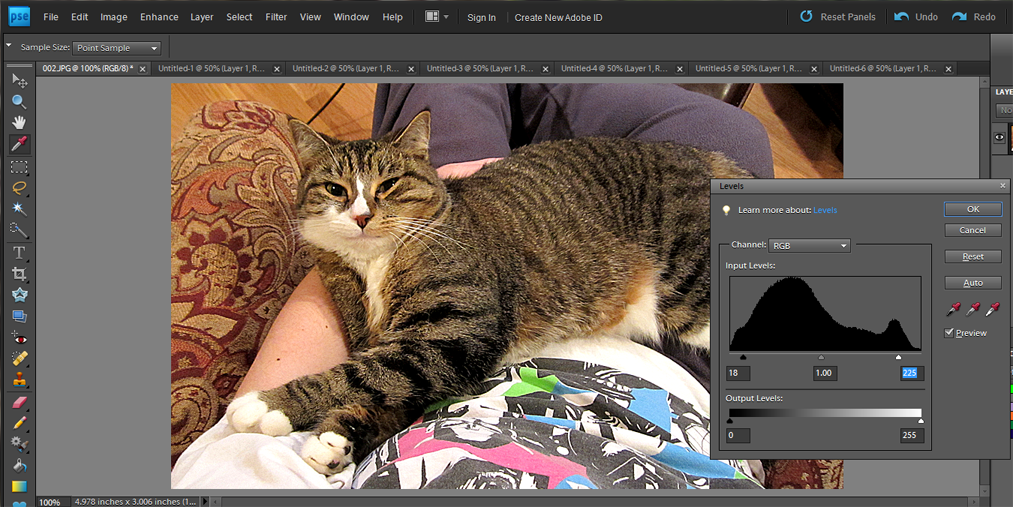
This is where I moved them for this image. It'll take some fiddling to figure out where exactly you want them. Luckily, in Photoshop at least, the image previews itself as you move the sliders, so you can see how it looks without having to click 'OK'. There's also that grey slider in the center; it LOOKS like I moved it, but in fact it automatically remains equidistant between the white and black sliders. You can shift it as well if you want; it'll shift all the colors in the direction of white or black. I only suggest using this if the photo looks too dark or too light. Play around with these, and you'll learn how to use them.
You can also see boxes underneath the sliders; those numbers correspond to where the sliders are on the graph. The white and black sliders are given numbers based on the 0-255 scale, while the grey slider is set default to 1.0, which means directly in between the two other sliders, and then the other numbers are based on its distance from that position.
Now the image looks nice and sharp, with some blacks and whites and a wider range of greys in between. But we can still do more! LET'S UP THE SATURATION
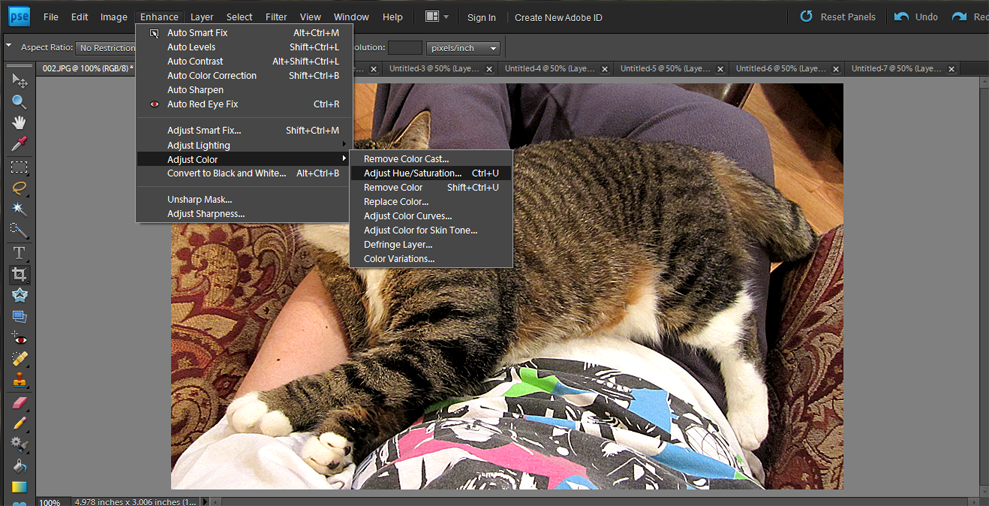
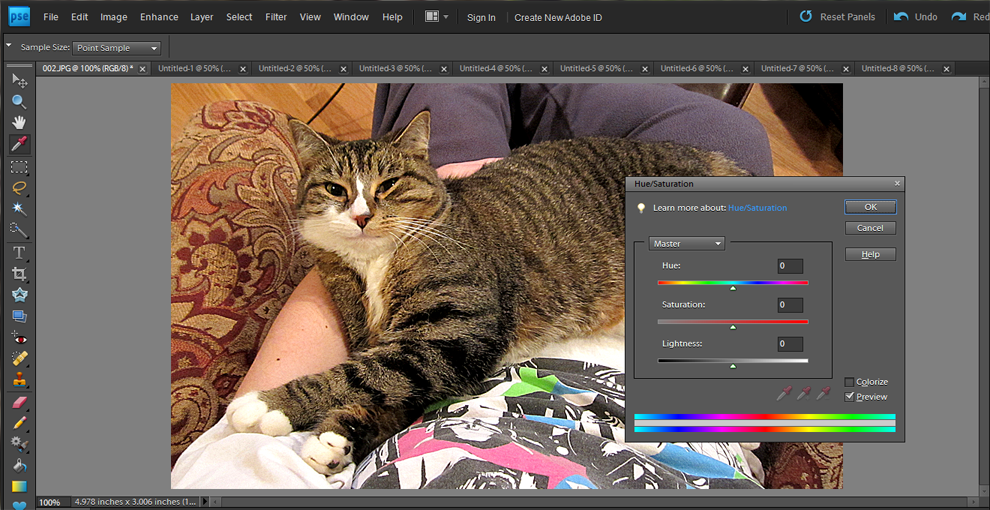
So these three sliders can mess with the colors. The only thing we're going to touch here is saturation. You can play around with the other two as well if you want to see what they do, but in just retouching a photo, there's usually no real need for them. The bottom one works exactly like the center slider in the Levels box, anyway.
The saturation slider obviously changes the saturation of the colors. If you're not sure what that means, well...take a look!
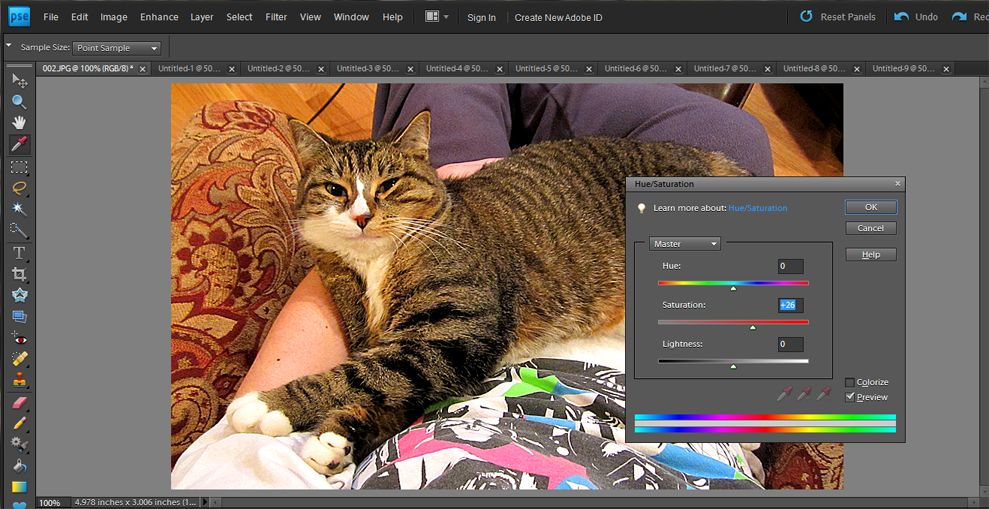
Now the colors are a bit more vibrant. Don't overdo this. Or do, I suppose, if you like how it looks!
And now we're done! Pretty much. One final resize.
And there it is! The finished photo:
I do this with all of my photos before posting them c: BUT I also save the originals in case I want them for something.
INTO THIS
At least those of you who don't already know lolol
This tutorial is for Photoshop, BUT all the tools I am using should be in all the good free imaging programs as well, maybe with the exception of auto-sharpen.
Okay now first of all the original photo is actually much larger than that so I start by resizing it. I DO NOT resize it to the final size I want it to be at; I go for more like 2x the final size or something like that.
Those are the numbers I usually go with; I always use percent since it's easier than memorizing/calculating pixels, unless I'm resizing for something to fit exactly into an icon or something like that. You'll probably have to mess around a bit to find what size is best for you for this step.
Now I sharpen it. TBH for this I just use the 'auto-sharpen' function, there are probably more pro ways to do it.
I do it two or three times, or until it looks nice enough; it's okay if it gets a little grainy at this stage - that's why we do it before the final resize.
Now I crop it down to just whatever will be in the final photo. You can also do this at the ending, but if there is anything especially dark or especially light that's going to be cropped out, I recommend you do the cropping now. TBH, I just recommend you do the cropping at this point regardless.
Now we're going to go mess with the LEVELS. OOOOO INTENSE MAN
Okay so this funny-looking graph comes up. (In some programs, it may be a line graph rather than a frequency/bar graph like this). What this is showing you is basically the spread of colors across the spectrum of white to black. What's most important here is the edges of the curve; in this case, as with most cases, neither end of the curve goes to the end of the graph, except for a few colors. This means there are no or few true blacks or true whites in the image; that makes it look washed-out and not very striking.
Luckily, we can fix this! We can change WHERE THE EDGES OF THE GRAPH ARE. We change this with those triangles at the bottom of the graph. Shift them inwards to change where true white and true black are on the graph.
This is where I moved them for this image. It'll take some fiddling to figure out where exactly you want them. Luckily, in Photoshop at least, the image previews itself as you move the sliders, so you can see how it looks without having to click 'OK'. There's also that grey slider in the center; it LOOKS like I moved it, but in fact it automatically remains equidistant between the white and black sliders. You can shift it as well if you want; it'll shift all the colors in the direction of white or black. I only suggest using this if the photo looks too dark or too light. Play around with these, and you'll learn how to use them.
You can also see boxes underneath the sliders; those numbers correspond to where the sliders are on the graph. The white and black sliders are given numbers based on the 0-255 scale, while the grey slider is set default to 1.0, which means directly in between the two other sliders, and then the other numbers are based on its distance from that position.
Now the image looks nice and sharp, with some blacks and whites and a wider range of greys in between. But we can still do more! LET'S UP THE SATURATION
So these three sliders can mess with the colors. The only thing we're going to touch here is saturation. You can play around with the other two as well if you want to see what they do, but in just retouching a photo, there's usually no real need for them. The bottom one works exactly like the center slider in the Levels box, anyway.
The saturation slider obviously changes the saturation of the colors. If you're not sure what that means, well...take a look!
Now the colors are a bit more vibrant. Don't overdo this. Or do, I suppose, if you like how it looks!
And now we're done! Pretty much. One final resize.
And there it is! The finished photo:
I do this with all of my photos before posting them c: BUT I also save the originals in case I want them for something.