Vector art tut
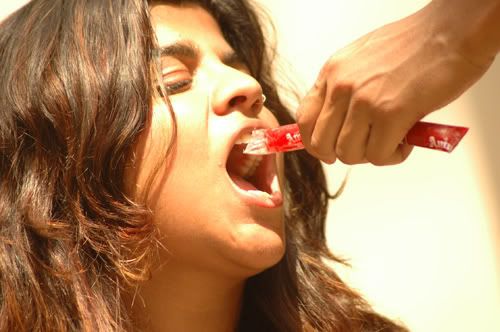
A tutorial to create fake vector art like -

Ohkk. Basics first. What is vector art?
Vector art is basically made up of mathematical values instead of pixels, which means you can enlarge them as much as you want to without pixelation. Text in Photoshop(until you rasterize it) is an example of a vector image. Jpegs for eg., are not vector images. They are raster images. Which is why they look all ewwwyy if you want to increase their size.
Vector art is something which is fun to do but it also requires a LOT of patience and skill. This tutorials teaches you a trick to do something that looks like vector art. This is not technically a vector, but you CAN enlarge it as much as you want without compromising on the quality.
1. Open your image in PS. This will work only with images which don't have a lot of detail. Works best on close ups etc. Duplicate the background layer.
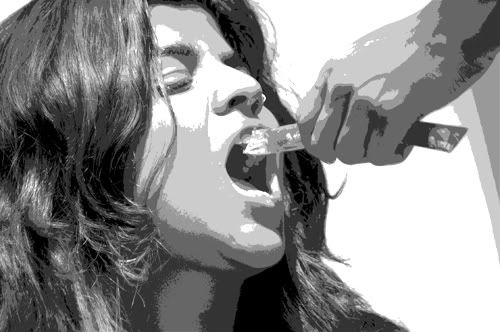
2. Desaturate it. Go to image-adjustments-posterize. Apply this with a value of anything between 4-7 to achieve a result similar to this.
3. Right, now take your magic wand tool. Make sure the tolerance is set to 1. If your image is more complex than mine, go for 3. Nothing more than 3 though.
4. The next step is pretty complicated but I'll try to explain this as best as I can. With your posterised image layer selected, click on any part of a color area with your magic wand, say white. Now, right click and click on 'similar'. After this, go to Select-Modify-Smooth and give a pixel radius of 3-5. Hit ctrl+c and ctrl+v. Your whites will get pasted in a new layer.
GO BACK TO THE POSTERIZED IMAGE LAYER. i.e., in the layer palette, select the posterized image again and repeat the process of your second color area.
5. Keep doing this till you have covered all the shades of your photograph.
6. Now, you should have the posterised image layer and a lot of other layers with different color areas in each. Hide all of them(turn off visiility) except one. You can start with any layer. Observe what areas this layer is covering. Remember it. Hide ALL the layers now except your background layer, ie. the original picture. Go to the part that the above said layer was covering and select the color there using the eye dropper tool.
7. Unhide the posterised image layer.
8. Unhide the 'above said layer' ie. the one you copy pasted and started step 6 with.
9. Go to blending options for this layer, select color overlay. The default is red. Once you go to the change color option, you can click directly on the foreground color in your toolbar to select the color you had picked in step 6.
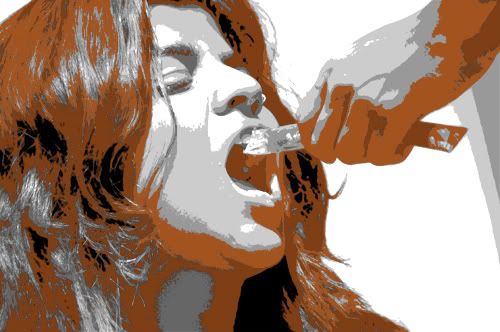
10. Repeat step 6-8 for all the layers that you copied.
11. Tada! Your vector art is ready.
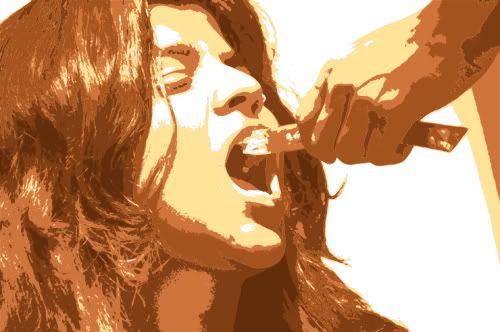
I know it sounds complicated. But try it and you'll know how easy it is. Please let me know if I haven't explained something correctly. Also, I am usually against the idea of providing a psd file, but should someone completely not get what I am talking about, ask for it.
Also, a screenshot of my layer palette to make things clearer.
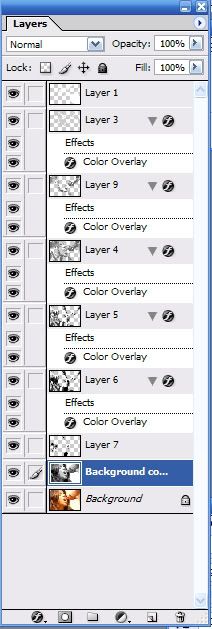
P.S. - it does not need to be monochromatic. Mine is because, well, because the starting image is monochromatic.
- Comment if this was helpful
- Friend us for more tuts
- Any question, ask.
Ohkk. Basics first. What is vector art?
Vector art is basically made up of mathematical values instead of pixels, which means you can enlarge them as much as you want to without pixelation. Text in Photoshop(until you rasterize it) is an example of a vector image. Jpegs for eg., are not vector images. They are raster images. Which is why they look all ewwwyy if you want to increase their size.
Vector art is something which is fun to do but it also requires a LOT of patience and skill. This tutorials teaches you a trick to do something that looks like vector art. This is not technically a vector, but you CAN enlarge it as much as you want without compromising on the quality.
1. Open your image in PS. This will work only with images which don't have a lot of detail. Works best on close ups etc. Duplicate the background layer.
2. Desaturate it. Go to image-adjustments-posterize. Apply this with a value of anything between 4-7 to achieve a result similar to this.
3. Right, now take your magic wand tool. Make sure the tolerance is set to 1. If your image is more complex than mine, go for 3. Nothing more than 3 though.
4. The next step is pretty complicated but I'll try to explain this as best as I can. With your posterised image layer selected, click on any part of a color area with your magic wand, say white. Now, right click and click on 'similar'. After this, go to Select-Modify-Smooth and give a pixel radius of 3-5. Hit ctrl+c and ctrl+v. Your whites will get pasted in a new layer.
GO BACK TO THE POSTERIZED IMAGE LAYER. i.e., in the layer palette, select the posterized image again and repeat the process of your second color area.
5. Keep doing this till you have covered all the shades of your photograph.
6. Now, you should have the posterised image layer and a lot of other layers with different color areas in each. Hide all of them(turn off visiility) except one. You can start with any layer. Observe what areas this layer is covering. Remember it. Hide ALL the layers now except your background layer, ie. the original picture. Go to the part that the above said layer was covering and select the color there using the eye dropper tool.
7. Unhide the posterised image layer.
8. Unhide the 'above said layer' ie. the one you copy pasted and started step 6 with.
9. Go to blending options for this layer, select color overlay. The default is red. Once you go to the change color option, you can click directly on the foreground color in your toolbar to select the color you had picked in step 6.
10. Repeat step 6-8 for all the layers that you copied.
11. Tada! Your vector art is ready.
I know it sounds complicated. But try it and you'll know how easy it is. Please let me know if I haven't explained something correctly. Also, I am usually against the idea of providing a psd file, but should someone completely not get what I am talking about, ask for it.
Also, a screenshot of my layer palette to make things clearer.
P.S. - it does not need to be monochromatic. Mine is because, well, because the starting image is monochromatic.
- Comment if this was helpful
- Friend us for more tuts
- Any question, ask.