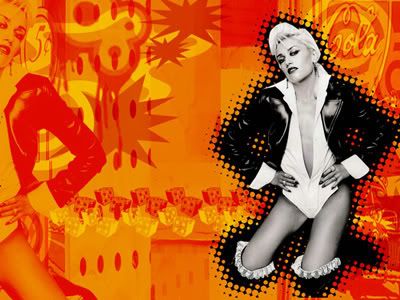
Wallpaper tut
A tutorial on making this wallpaper using Photoshop CS. Some parts might not be translatable to PSP.
Also, I am not claiming that this is beginner friendly. You might want to see for yourself.

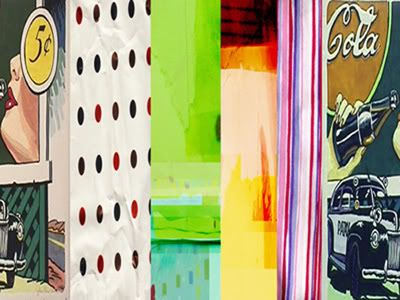
1. Take a blank canvas of your screen resolution. I took 1024x768 px. The images here have been resized for faster loading.
2. Take various pictures/photos/textures/newspaper scans, basically anything that gives you a variety and slap them together on your canvas. Merge all these into one layer. The makers for the textures that I have used are credited in my resource list.
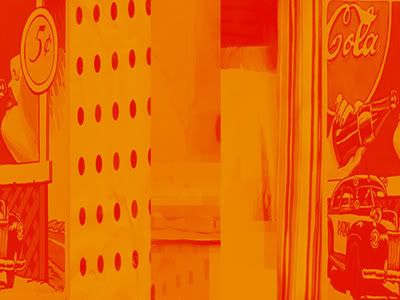
3. Choose your color pallete. I wanted reds and oranges. I set the foreground color to yellow and the background color to red and applied "Gradient Map" on this layer.(Image-adjustments-gradient map)
4. I made autoshapes all over the canvas in black and white on a new layer.
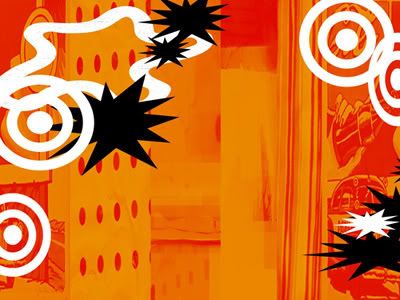
5. Setlayer on 'soft light'.

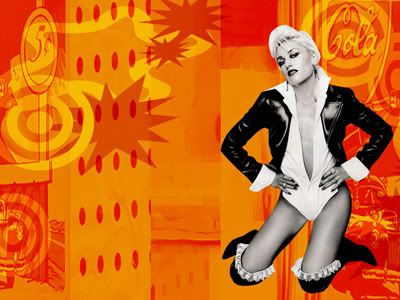
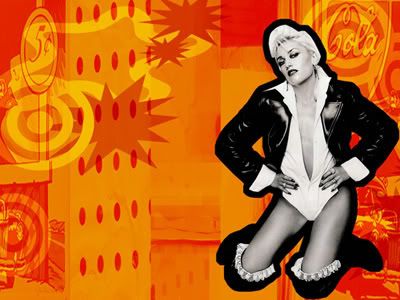
6. Next, I took a picture of Gwen Stefani with the background already removed from PSDelightful. You can take a similar thing or remove the background yourself. I would recommend doing it yourself since it improves your skills and doesn't limit you to what's available. It was 6 in the morning when I wrote this tut, I was too lazy to do it myself (which is a rare case).
7. Ctrl+click on the layer with her picture loads the selection.
8. Click on select-modify-expand and expand the selection by 15 px or so. Create a new layer and fill the selection with black. Move this layer below the layer with the pic.
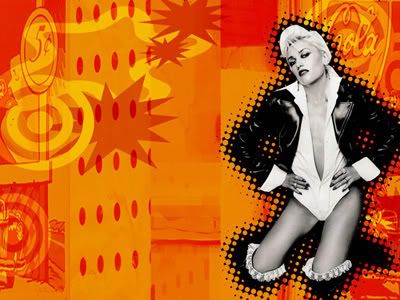
9. Make sure that your selection is on. Hit Q to enter the quick mask mode. Go to filters - pixelate - halftone and apply it on its default settings.
Apply this filter as many times as you want by pressing ctrl+f.
Hit Q again to come out of the quick mask mode. Create a new layer, with the selections still visible, fill it with black.
10. Delete the previous layer which had the black outline created in step 8.
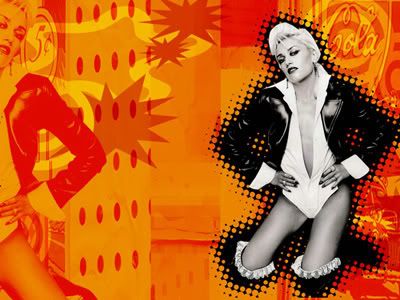
11. I then duplicated Gwen's picture, rotated it, resized it and applied the same gradient mask on it.
12. Next, I used some brushes from ewanism's retro pack in yellow and red.
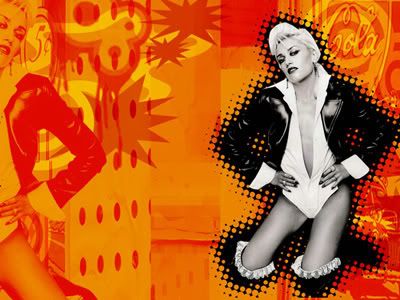
13. Put the text that you want. I gave a white stroke to the bigger text.
Done.
If you want to download the wall, here -
- Comment, it makes me grin
- Any question or doubt, ask away
- Friend us for more tutorials
- Catch the other tutorials here
Also, I am not claiming that this is beginner friendly. You might want to see for yourself.
1. Take a blank canvas of your screen resolution. I took 1024x768 px. The images here have been resized for faster loading.
2. Take various pictures/photos/textures/newspaper scans, basically anything that gives you a variety and slap them together on your canvas. Merge all these into one layer. The makers for the textures that I have used are credited in my resource list.
3. Choose your color pallete. I wanted reds and oranges. I set the foreground color to yellow and the background color to red and applied "Gradient Map" on this layer.(Image-adjustments-gradient map)
4. I made autoshapes all over the canvas in black and white on a new layer.
5. Setlayer on 'soft light'.
6. Next, I took a picture of Gwen Stefani with the background already removed from PSDelightful. You can take a similar thing or remove the background yourself. I would recommend doing it yourself since it improves your skills and doesn't limit you to what's available. It was 6 in the morning when I wrote this tut, I was too lazy to do it myself (which is a rare case).
7. Ctrl+click on the layer with her picture loads the selection.
8. Click on select-modify-expand and expand the selection by 15 px or so. Create a new layer and fill the selection with black. Move this layer below the layer with the pic.
9. Make sure that your selection is on. Hit Q to enter the quick mask mode. Go to filters - pixelate - halftone and apply it on its default settings.
Apply this filter as many times as you want by pressing ctrl+f.
Hit Q again to come out of the quick mask mode. Create a new layer, with the selections still visible, fill it with black.
10. Delete the previous layer which had the black outline created in step 8.
11. I then duplicated Gwen's picture, rotated it, resized it and applied the same gradient mask on it.
12. Next, I used some brushes from ewanism's retro pack in yellow and red.
13. Put the text that you want. I gave a white stroke to the bigger text.
Done.
If you want to download the wall, here -

- Comment, it makes me grin
- Any question or doubt, ask away
- Friend us for more tutorials
- Catch the other tutorials here