Tutorial 01 - Blaze the Cat
My 1st tutorial ever ^^; This one was requested by obakehoshi.
If you guys don't understand something you can ask me ^^
We are going from
to
using Adobe Photoshop CS2 in 9 Steps.
Starring Blaze the Cat from Sonic Rush

First take your pic and resize it to your liking

Then delete the BG if you have a pic with blank BG and add this texture under the image made by magnetboyicons

I took another texture, this time a light texture made by iris_elegance and put it over the BG used on Step 02 and set it on Screen

Now duplicate the resized pic and then set it to Hard Light. Then make a click on this HL layer, then go to Filter - Blur - Gaussian Blur and choose the radius you want, I choose 2.0 pixels, then OK

Let's add another texture made by vodkaandirony and put it on top of the resized pic and set it to Screen with 70% of opacity

Now make a new layer on top of everything and fill it with 02022d and set it to Exclusion

Add a new layer after the Exclusion layer and make a black border of 1 pixel

Gradient time! Use the gradient of your choice if you have or make one. Put this on top of all. Set this gradient to Screen or Lighten, depending on the pic you used. I choosed Lighten

Well then, you can leave it to here if you like more Textless icons. But it you want to write something then... Between the Texture used on Step 05 and the Duplicated Hard Light one make a new layer and write whatever you want, in this case I wrote "BLAZE" in Times New Roman size 14, color 7e318a. Right click this layer and select Blending Options. Select Outer Glow and choose this setting. Duplicate this layer 2 times

If you think you got lost in some part you can view my layers palette Here. I hope you liked this Tutorial ^^
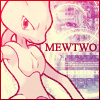
Icons using this style


If you guys don't understand something you can ask me ^^
We are going from

to

using Adobe Photoshop CS2 in 9 Steps.
Starring Blaze the Cat from Sonic Rush

First take your pic and resize it to your liking

Then delete the BG if you have a pic with blank BG and add this texture under the image made by magnetboyicons

I took another texture, this time a light texture made by iris_elegance and put it over the BG used on Step 02 and set it on Screen

Now duplicate the resized pic and then set it to Hard Light. Then make a click on this HL layer, then go to Filter - Blur - Gaussian Blur and choose the radius you want, I choose 2.0 pixels, then OK

Let's add another texture made by vodkaandirony and put it on top of the resized pic and set it to Screen with 70% of opacity

Now make a new layer on top of everything and fill it with 02022d and set it to Exclusion

Add a new layer after the Exclusion layer and make a black border of 1 pixel

Gradient time! Use the gradient of your choice if you have or make one. Put this on top of all. Set this gradient to Screen or Lighten, depending on the pic you used. I choosed Lighten

Well then, you can leave it to here if you like more Textless icons. But it you want to write something then... Between the Texture used on Step 05 and the Duplicated Hard Light one make a new layer and write whatever you want, in this case I wrote "BLAZE" in Times New Roman size 14, color 7e318a. Right click this layer and select Blending Options. Select Outer Glow and choose this setting. Duplicate this layer 2 times

If you think you got lost in some part you can view my layers palette Here. I hope you liked this Tutorial ^^
Icons using this style
