025.
to

Made in: Photoshop 7
Uses: Levels, Selective Colour, Curves
Requested by untapdtreasure
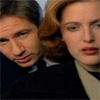
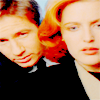
You can either start with the full image or crop it to 100x100 (or the size needed)
imagestepwhyresult

Using Levels (Channel RBG) I input the values 0, 1.5, 255This'll lighten up the image so that later layers aren't overly dark
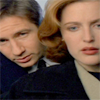
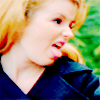
Using Selective colour I input the values:
reds: -100, -25, +25, -15
yellows: -100, +50, +100, -25
whites: +100, 0, -50, +25This will make the reds more vibrant and bring out the blue in the background

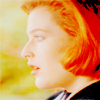
Using Levels (Channel RBG) I input the values 20, 1.5, 255This will darken up the darker areas whilst lightening the rest of the image
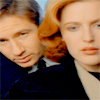
Using Selective Colour I input the values:
reds: -100, 0, -50, 0
yellows: -50, -25, 0, 50This makes the reds even more vibrant. If your reds look a little too vibrant or it has affect the skin tone too much leave it for now as after the next layer it may look better, or you can change it then
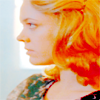
Merge all your layers. (On photoshop its Ctrl+Shift+E)This will allow the next layer to change the image as a whole
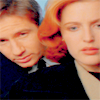
Using curves I did thisThis makes the reds incredibly more vibrant, and darkens and lightens neccessary areas of the image
Other examples
If you have any questions feel free to ask :) You can also show me what you make.