PSP8 Icon Tutorial
Haha. Nobody requested it, but I got bored today, lol.
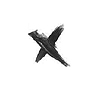
We're going to be making this icon :

Now, obviously, this tutorial won't present the same results on every image, it all depends. It's meant as a guideline, I encourage you to change it to suit your needs. =)
Now firstly, take your image. I'm using this picture of All American Rejects axeman Mike Kennerty. Now we begin :)
I cropped and resized my image to 100 x 100, and sharpened once, to get that lovely crisp look.
Then I duplicated my base three times - I set the first duplicate to soft light at 88% opacity; the second duplicate to multiply at 82% opacity; and the third duplicate to overlay at 36%.
Next, make a new raster layer, and fill it with #FFC7A2 or a similar peachy color, and set it to multiply 100% (feel free to fiddle with the opacity.)
Then, make another raster layer, and fill it with #9A9A9A, set it to soft light 100%.
Next, you'll need to make 3 new raster layers, and fill each of them with #B4ECEB. Set the first two to burn at 100% and the top layer to soft light at 52%.
Then, go back to the base, duplicate it and drag it all the way to the top; desaturate it completely, and set to soft light at 68% opacity.
We're almost done! Create a new transparent raster layer and take this brush in white:
(credit goes to my_wonderful here)
and apply it all the way along the top, to create an effect like this (your background won't be black obviously, it'll be your icon, but this is an example):

Alternatively, you could just copy and paste this example onto your icon and set the layer to screen
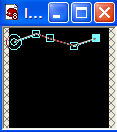
Then, take your pen tool and draw a wonky line along the top like so( again, your background won't be black obviously, it'll be your icon, but this is an example):
Then select your text button and hover the cursor over the line until you see a 'A' tilted to the side. Click and you'll be able to add text along the line. I added my text in Courier New, size 9, black. (I always make sure my text is created as "Floating"). Then go back and delete the layer with the line on it.
And there you go!! Sorry if that seemed difficult, I can elaborate further if anyone needs it.
this is what your layer palette should look like.
Final product: