(no subject)
I have my second tutorial for you all. A few people requested one these icons and since it's really very simple, I was happy to make one. This is for Photoshop and ImageReady only. I'm sure you could translate to PSP and Animation Shop but since I've never used either program, I wouldn't know how if you asked. A basic knowledge of both programs is needed because I didn't have time to write it totally for beginners. I'm sorry about that but there are plenty of tutorials out there for beginners. Check out our own collection of tutorials or the memories section of icon_tutorial if you need more information. Pretty much everything I learned how to do in PS was through tutorials found there and my own experimentation. With all that in mind, if anything in this tutorial is still unclear to you, please ask me and I'd be happy to explain further.
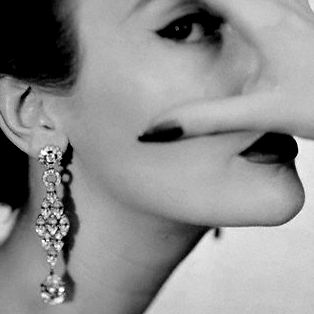
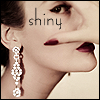
I will take you through my personal base prep and animation techniques. We should end up with something that looks like this:
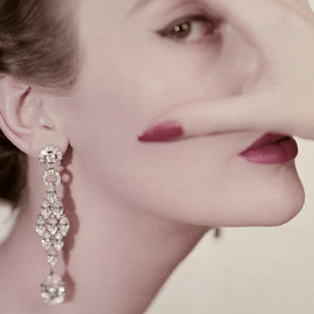
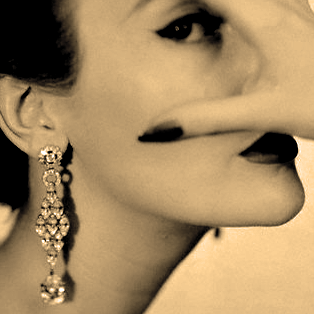
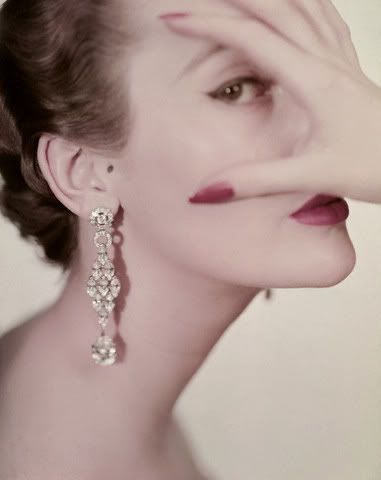
Step one: Crop image to 314x314. I like to keep the image large since it's easier to work with. Fix any flaws. I airbrushed out the mole by her ear because it was distracting since we are focusing on the earring.
Step two: Duplicate the layer and desaturate the new layer.
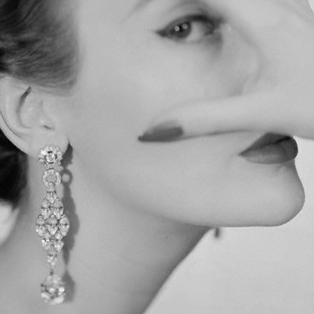
Step three: Adjust the brightness to -15 and the contrast to +49. I eyeballed those numbers because I've been using this technique for awhile and I know what I like but you can also play with this based on your own tastes and the image you're using.
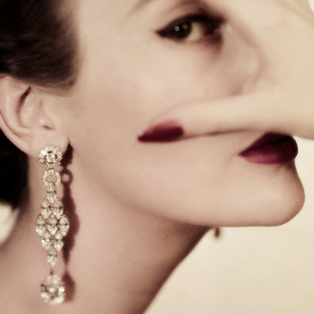
Step four: Go to Image>Adjustments>Photo Filter and set the filter to Sepia and increase the density to 100%. I use this technique when I want to give the image a vintage look. You can also play around with the different photo filter colors for some more unique effects.
Step five: Go to Filter>Blur>Gaussian Blur and set the radius at 2.0.

Step six: Set the layer to Soft Light and merge down. The sepia filter and the blur should give the image a really nice vintagey look. If the image is too blurry, adjust the opacity of the layer.
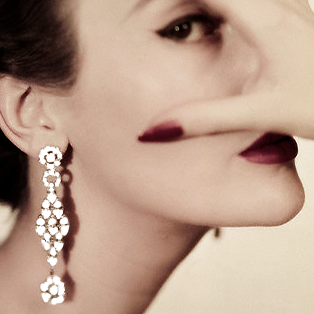
Step seven: Sharpen the image a bit and using your eraser tool, erase small sections of the earrings. Only erase where you want to see sparkle. In other words, don't go overboard! It helps me to zoom in so that I can see the individual diamonds. I then use a brush the size of the diamonds and just erase those, leaving the setting for a more realistic look. Another benefit of keeping the image large is when the image is sized down, it will hide any flaws in your erasing. ;)
Step eight: Resize the image to 100x100 and sharpen again as needed. Also add borders, brushes, text, etc...at this stage and then merge new layers. In my original set I used only a simple border brush but I thought text looked nice on this one. All of that is up to you of course. Save your icon so far as a .psd file or simple go File>Edit in Image Ready.
Step nine: You can make your own glitter of course, but I don't believe in doing that if you have don't have to. You can find great glitter graphics on this site. I chose a silver one for this icon but they have all kinds of colors and styles. You don't just have to stick with diamonds! Save the glitter to your computer as a .gif file. Open the glitter and your icon in ImageReady.

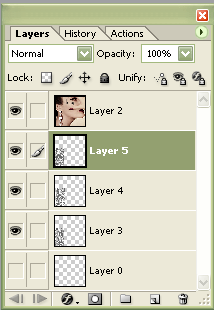
Step ten: When animating most graphics with glitter, you would use the layers as pattern fills but I found this method easier when doing these graphics. If you're familiar with the other method and prefer that....why are you here anyway?! ;) Ahem, anyway...copy the first layer of your glitter and paste it beneath your main layer. Move the glitter underneath the cut-out area. I had to rotate it once to fit. Repeat this step for all three layers. Don't flatten your image!
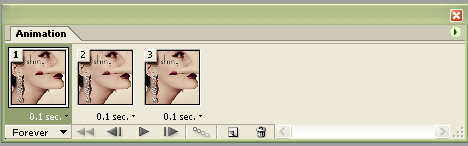
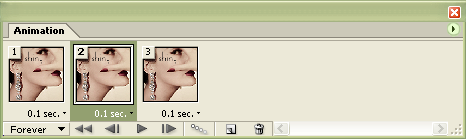
Step eleven: Now this is where you absolutely have to already know how to do animations in Image Ready. If you don't, I'll probably lose you. I suggest learning the basics before doing this. In your animation window, make two more slides and set all three to .1 second delay.
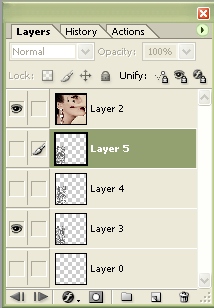
Step twelve: In your layers box, hide all but your first glitter layer, making sure that the first slide is highlighted in your animation box.
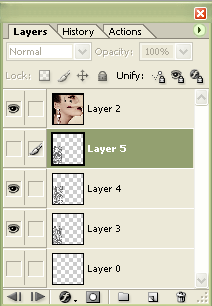
Step thirteen: Highlight the second slide in your animation box and make the next glitter layer visible.
Step fourteen: Repeat one more time with the last layer and the last slide. Test your animation! You should end up with something similar to this.
Step fifteen: Go to Save Optimized As and save as a .gif file. You're done!! Not so difficult, right? ♥
That's it! Please let me know what you think! I'd love to hear feedback and to see what you come up with. :)
I will take you through my personal base prep and animation techniques. We should end up with something that looks like this:
- Sparkle Tutorial
Step one: Crop image to 314x314. I like to keep the image large since it's easier to work with. Fix any flaws. I airbrushed out the mole by her ear because it was distracting since we are focusing on the earring.
Step two: Duplicate the layer and desaturate the new layer.
Step three: Adjust the brightness to -15 and the contrast to +49. I eyeballed those numbers because I've been using this technique for awhile and I know what I like but you can also play with this based on your own tastes and the image you're using.
Step four: Go to Image>Adjustments>Photo Filter and set the filter to Sepia and increase the density to 100%. I use this technique when I want to give the image a vintage look. You can also play around with the different photo filter colors for some more unique effects.
Step five: Go to Filter>Blur>Gaussian Blur and set the radius at 2.0.
Step six: Set the layer to Soft Light and merge down. The sepia filter and the blur should give the image a really nice vintagey look. If the image is too blurry, adjust the opacity of the layer.
Step seven: Sharpen the image a bit and using your eraser tool, erase small sections of the earrings. Only erase where you want to see sparkle. In other words, don't go overboard! It helps me to zoom in so that I can see the individual diamonds. I then use a brush the size of the diamonds and just erase those, leaving the setting for a more realistic look. Another benefit of keeping the image large is when the image is sized down, it will hide any flaws in your erasing. ;)
Step eight: Resize the image to 100x100 and sharpen again as needed. Also add borders, brushes, text, etc...at this stage and then merge new layers. In my original set I used only a simple border brush but I thought text looked nice on this one. All of that is up to you of course. Save your icon so far as a .psd file or simple go File>Edit in Image Ready.
Step nine: You can make your own glitter of course, but I don't believe in doing that if you have don't have to. You can find great glitter graphics on this site. I chose a silver one for this icon but they have all kinds of colors and styles. You don't just have to stick with diamonds! Save the glitter to your computer as a .gif file. Open the glitter and your icon in ImageReady.
Step ten: When animating most graphics with glitter, you would use the layers as pattern fills but I found this method easier when doing these graphics. If you're familiar with the other method and prefer that....why are you here anyway?! ;) Ahem, anyway...copy the first layer of your glitter and paste it beneath your main layer. Move the glitter underneath the cut-out area. I had to rotate it once to fit. Repeat this step for all three layers. Don't flatten your image!
Step eleven: Now this is where you absolutely have to already know how to do animations in Image Ready. If you don't, I'll probably lose you. I suggest learning the basics before doing this. In your animation window, make two more slides and set all three to .1 second delay.
Step twelve: In your layers box, hide all but your first glitter layer, making sure that the first slide is highlighted in your animation box.
Step thirteen: Highlight the second slide in your animation box and make the next glitter layer visible.
Step fourteen: Repeat one more time with the last layer and the last slide. Test your animation! You should end up with something similar to this.
Step fifteen: Go to Save Optimized As and save as a .gif file. You're done!! Not so difficult, right? ♥
That's it! Please let me know what you think! I'd love to hear feedback and to see what you come up with. :)