Tutorial (07)
How to make 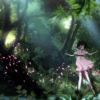
to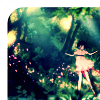
using PSP8. Translatable.
1) Sharpen your base if need be.
2) Duplicate your base two times. Set the first one to screen 100%, and the second one to overlay 100%.
3) Make a new layer. Fill it with a pale blue (#135384) and set it to exclusion 100%.
4) Make a new layer. Fill it with a light grey (#C8C8C8) and set it to burn 100%.
5) Duplicate your base and bring it to the top. Set it to softlight 100%.
6) Duplicate your base again and bring it to the top. Set it to screen 60%.
7) Make a new layer. Fill it with an medium orange (#F1AC5E) and set it to multiply 25%.
8) Duplicate your base and bring it to the top. Set it to burn 5%.
9) Merge all layers.
10) Go to Effects > Sharpen > Unsharpen Mask. Input these settings:
Radius: 100.00
Strength: 19
Clipping: 0
11) Go to Colors > Adjust > Brightness/Contrast. Input these settings:
Brightness: 18
Contrast: 13
12) Use this texture (made by me) and set it on screen 100%. Merge layers.
Play around with the opacity if your icon is too dark or too light. Please don't copy exactly. Thanks for reading :)
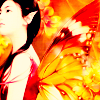
Icons made using this tutorial

Like what you see? Why don't you friend me!

to

using PSP8. Translatable.
1) Sharpen your base if need be.
2) Duplicate your base two times. Set the first one to screen 100%, and the second one to overlay 100%.
3) Make a new layer. Fill it with a pale blue (#135384) and set it to exclusion 100%.
4) Make a new layer. Fill it with a light grey (#C8C8C8) and set it to burn 100%.
5) Duplicate your base and bring it to the top. Set it to softlight 100%.
6) Duplicate your base again and bring it to the top. Set it to screen 60%.
7) Make a new layer. Fill it with an medium orange (#F1AC5E) and set it to multiply 25%.
8) Duplicate your base and bring it to the top. Set it to burn 5%.
9) Merge all layers.
10) Go to Effects > Sharpen > Unsharpen Mask. Input these settings:
Radius: 100.00
Strength: 19
Clipping: 0
11) Go to Colors > Adjust > Brightness/Contrast. Input these settings:
Brightness: 18
Contrast: 13
12) Use this texture (made by me) and set it on screen 100%. Merge layers.
Play around with the opacity if your icon is too dark or too light. Please don't copy exactly. Thanks for reading :)
Icons made using this tutorial


Like what you see? Why don't you friend me!