Tutorial #10; Dawn
We're learning to make from:
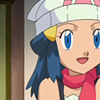
to
Program: Adobe Photoshop CS2
Difficulty: Kinda advanced, with so many selective coloring and such.
Translatable: Depends on your image
PSD file included! (Geez, I never made any of it, y/y?)
1. First, set off your base and set it to screen around 50%. It's actually manual. So play with yours.
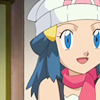
2. Selective coloring time!
REDS
Cyan: -100
Yellows: +80

3. Hue/saturation layer time!
MASTERS
Saturation: +13
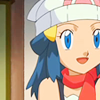
4. New color fill layer: #000033. Set to exculsion at 70%

5. Channel Mixer layer:
REDS
Red: +128
Green: +28
Blue: -62

6. Time for EXTREME more selective coloring. Oh glee.
REDS:
Cyan: -50
Magenta: +11
Yellow: -26
YELLOWS:
Cyan: +66
Magenta: +13
Yellow: -14
WHITES:
Cyan: -15
Magenta: +12
Yellow: -14
Black: -14
NEUTRALS:
Cyan: +9
Magenta: -7
Yellow: -6
Black: -5

7. Another new color fill layer with #cccc99. Set to soft light at 70%

8. Then, for making the image a bit darker (Yeah, mine's a bit too light after the color fill) go to new adjustment layer > curves
INPUTS: 33
OUTPUTS: 40

9. You can add texture too! I used this texture.

Other results with this tutorial:


.PSD FILE HERE.

to

Program: Adobe Photoshop CS2
Difficulty: Kinda advanced, with so many selective coloring and such.
Translatable: Depends on your image
PSD file included! (Geez, I never made any of it, y/y?)
1. First, set off your base and set it to screen around 50%. It's actually manual. So play with yours.

2. Selective coloring time!
REDS
Cyan: -100
Yellows: +80

3. Hue/saturation layer time!
MASTERS
Saturation: +13

4. New color fill layer: #000033. Set to exculsion at 70%

5. Channel Mixer layer:
REDS
Red: +128
Green: +28
Blue: -62

6. Time for EXTREME more selective coloring. Oh glee.
REDS:
Cyan: -50
Magenta: +11
Yellow: -26
YELLOWS:
Cyan: +66
Magenta: +13
Yellow: -14
WHITES:
Cyan: -15
Magenta: +12
Yellow: -14
Black: -14
NEUTRALS:
Cyan: +9
Magenta: -7
Yellow: -6
Black: -5

7. Another new color fill layer with #cccc99. Set to soft light at 70%

8. Then, for making the image a bit darker (Yeah, mine's a bit too light after the color fill) go to new adjustment layer > curves
INPUTS: 33
OUTPUTS: 40

9. You can add texture too! I used this texture.

Other results with this tutorial:


.PSD FILE HERE.