Yet another fabulous knitting pattern
This was inspired by a challenge from my knitting group to a)figure out what to do with the little bits of pieces of yarn that accumulate in your stash and reproduce when you aren't looking and b)also figure out what to do with all the sparkly, fringey, fluffy novelty yarn we've all been seduced by, brought home, and then woke up the next morning, looked at, and thought "what on earth am I going to do with you?"
So here is a basic recipe to use up those odd (and sometimes VERY odd) bits, and keep your beer cool and festive-looking at the same time (NOTE: you could use these for non-beer canned beverages, say, soft drinks, if you felt so inclined. and then you wouldn't get kicked out of conservative knitting groups).
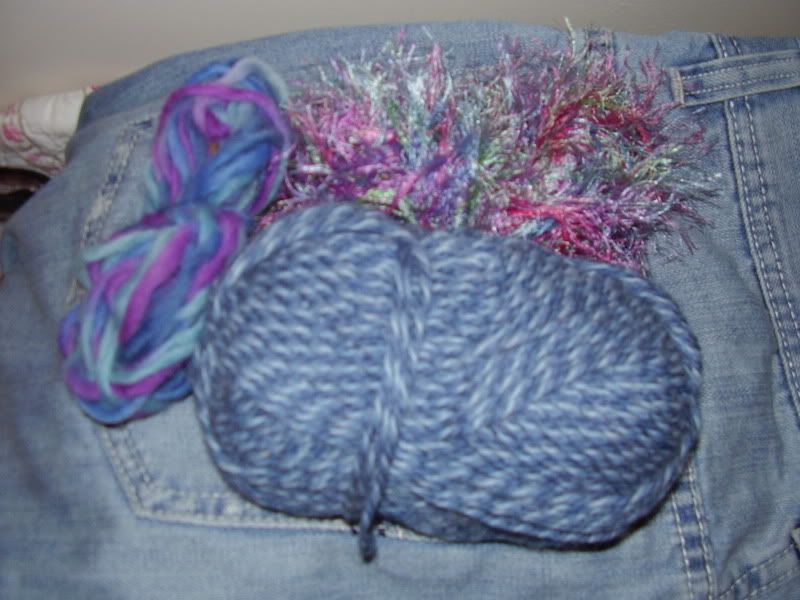
1: Rummage through your stash and find some bits of worsted weight yarn that look halfway decent together: (I'm sorry the photos are so blurry, y'all. I think the funfur yarn deranged my camera).
OK, I'm not trying to be patronizing here, but remember that they have to be wool (and not superwash wool) or they won't felt and you will wind up with a floppy useless sack (ugh.)
It is OK if the novelty yarn is not wool; if you double it up with a wool yarn, it will felt into the fabric of the coozy (more about this later).
If you want to use bulky yarn, that is cool, but you will need to cast on more stitches because you'll be making a thicker fabric. Check out my other coozy pattern, which was made with bulky yarn.
The basic recipe is this: take your double pointed size 9 (5.5 mm) needles, cast on 36 stitches (if you don't like math, I already figured it out for you, it's 9 stitches per needle -- and if you remind me one day I'll show you a neat mnemonic device for remembering your 9's tables, in case you flunked elementary math, like me). Cast on with your preferred method -- knit on cast on, long tail cast on -- whatever you like, it doesn't really matter. Then you knit about 30 rows, switching colors as you like, and then you make the bottoms like this:
row 1: Knit 4, k2tog (all the way around)
Row 2: Knit 3, k2tog
Row 3: Knit 2, k2tog
Row 4: Knit 1, K2tog
Row 5: K2tog.
Then cut the yarn, and pull it through the remaining stitches (I think there should be 6 left?) and voila, you have a shapeless thing that you will then felt and make a joyful beer cozy of happiness.
What? You want more pictures and a better pattern? Well, all right then.
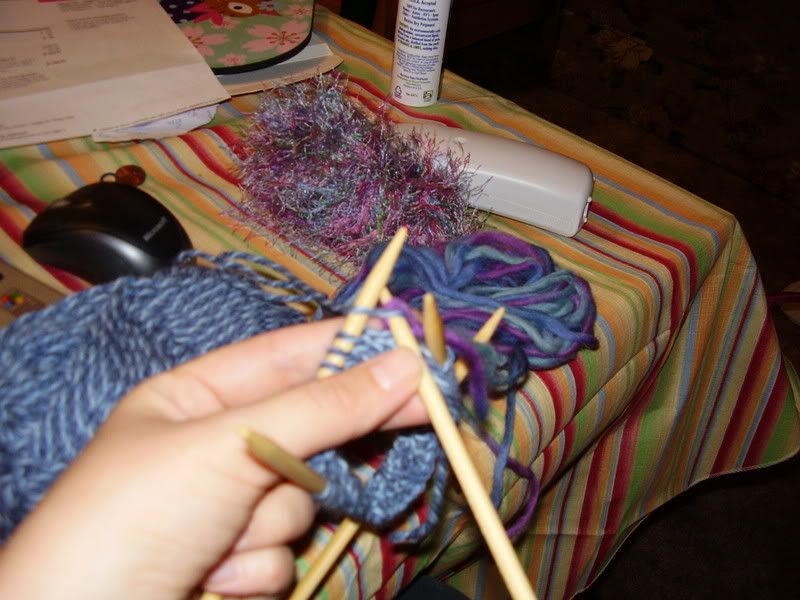
If you look at the above photo of yarn, I have a fair bit of Paton's wool, so that will be my main color. I also have a bit of blue/purple wool left over (why yes, that is the wool that caused the Great Gauge Disaster of 2007, but I am giving it another chance), and then I have this fluffy stuff that I think might be Lion Brand Fun Fur. Anyway, I cast on 36 stitches of the main color, and knit 5 rows. Then I added on the other wool and knit 6 rows. And by the way, when I am knitting in the round and want to add another color, I just make a slip knot and pull it through as the first stitch, as demonstrated in the following blurry photo:
I don't know if that's the textbook way of doing it, but it works. And, in particular, when you are going to felt something, it doesn't matter if you don't do it exactly right; once it's felted no-one will ever know.
Once the other wool ran out, I took back up with the Paton's wool, and knit 3 rows. Then I added the eyelash yarn. As you can see, I just held it along with the wool and knit the 2 of them together. It's actually easier than just knitting with the eyelash yarn would be, because you can actually see the stitches, and again, if you don't hold them together, the eyelash yarn won't felt and you'll have a strangely non-felted bit in the middle of your feltiness.
I knit about 8 rows like that, and then the fluffy yarn ran out so I continued with the plain wool for 7 more rows, and then worked the bottom as explained above. Then I took my hairbrush and brushed the part with the eyelash yarn because an awful lot of the eyelashes had gotten twisted into the knitting stitches, or wanted to poke out the wrong side, and so it was looking kind of sparse. Brushing gently helped pull them to the front and made it nice and fluffy*.
This is as good a point as any to mention that I would NOT put the eyelash yarn too much towards the top of the coozy, because you don't want to get fluff in your mouth. And yes, I pulled apart the first prototype coozy because I didn't think of that until I had it about half knitted.
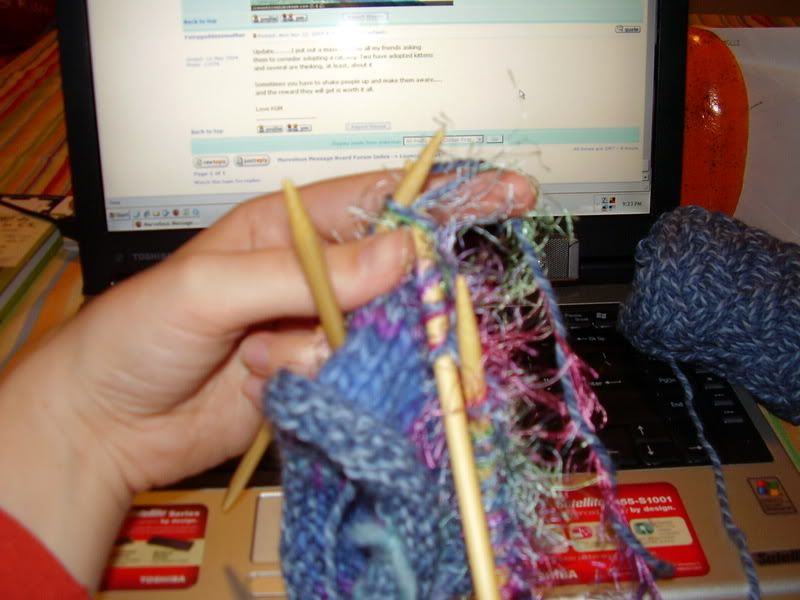
When I was done knitting, I had this strange little thing:

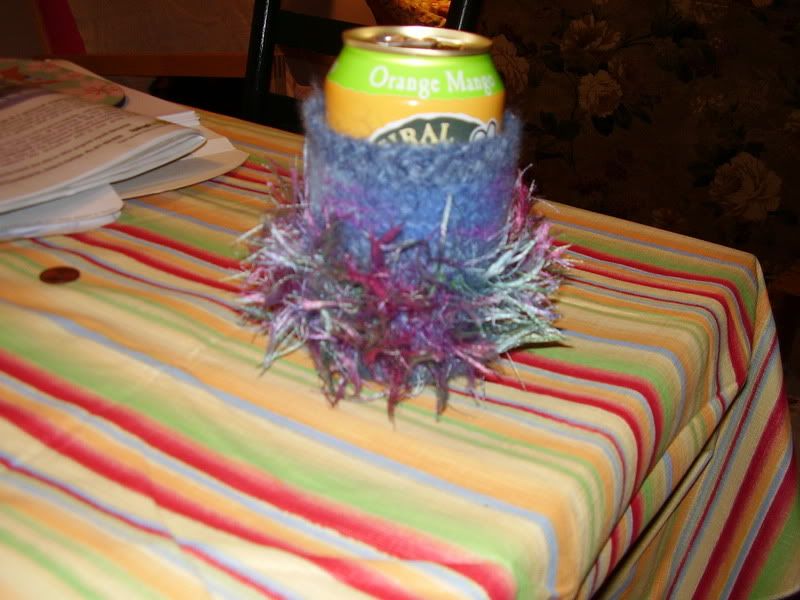
Then, I felted it (see previous patternif you want to learn more about felting), and pulled it on a can to shape it, and left it to dry. Now, environmental responsibility forces me to point out that most of the Southeast is in the midst of a horrible drought with resultant water restrictions. Therefore you should combine your felting with another water/soap/heat consuming task, such as laundry, or even bathing. Now I'm not saying that I did this (mostly because nobody wants to know that they coozy they're using was rubbed on my butt), but you COULD put a bar of soap in this coozy and use it as a sponge and that would felt it very nicely while you bathed. It's just a thought. I would not, however, combine dish-washing and felting, because getting bits of food and grease in your coozy would just be nasty.
And here is my festive (and guess what, Sarah, it's TASTY!) beverage!
*Yes, it got fluff in my hairbrush which will ultimately transfer to my hair. But if you knit with any kind of enthusiasm, you probably already have fluff in your hair.
Inspiration: Wouldn't it look awesome with googly eyes? Teeth? Ears?
What if you had green fun fur and made your beer a hula skirt?
P.S. I will design something other than a beer coozy someday, I swear. Actually, I think the gloves I'm making have deviated so far from the original pattern that they now qualify as an original design; I just need to go through my notes and figure out how to turn them into a pattern that will make sense to someone other than me.
So here is a basic recipe to use up those odd (and sometimes VERY odd) bits, and keep your beer cool and festive-looking at the same time (NOTE: you could use these for non-beer canned beverages, say, soft drinks, if you felt so inclined. and then you wouldn't get kicked out of conservative knitting groups).
1: Rummage through your stash and find some bits of worsted weight yarn that look halfway decent together: (I'm sorry the photos are so blurry, y'all. I think the funfur yarn deranged my camera).
OK, I'm not trying to be patronizing here, but remember that they have to be wool (and not superwash wool) or they won't felt and you will wind up with a floppy useless sack (ugh.)
It is OK if the novelty yarn is not wool; if you double it up with a wool yarn, it will felt into the fabric of the coozy (more about this later).
If you want to use bulky yarn, that is cool, but you will need to cast on more stitches because you'll be making a thicker fabric. Check out my other coozy pattern, which was made with bulky yarn.
The basic recipe is this: take your double pointed size 9 (5.5 mm) needles, cast on 36 stitches (if you don't like math, I already figured it out for you, it's 9 stitches per needle -- and if you remind me one day I'll show you a neat mnemonic device for remembering your 9's tables, in case you flunked elementary math, like me). Cast on with your preferred method -- knit on cast on, long tail cast on -- whatever you like, it doesn't really matter. Then you knit about 30 rows, switching colors as you like, and then you make the bottoms like this:
row 1: Knit 4, k2tog (all the way around)
Row 2: Knit 3, k2tog
Row 3: Knit 2, k2tog
Row 4: Knit 1, K2tog
Row 5: K2tog.
Then cut the yarn, and pull it through the remaining stitches (I think there should be 6 left?) and voila, you have a shapeless thing that you will then felt and make a joyful beer cozy of happiness.
What? You want more pictures and a better pattern? Well, all right then.
If you look at the above photo of yarn, I have a fair bit of Paton's wool, so that will be my main color. I also have a bit of blue/purple wool left over (why yes, that is the wool that caused the Great Gauge Disaster of 2007, but I am giving it another chance), and then I have this fluffy stuff that I think might be Lion Brand Fun Fur. Anyway, I cast on 36 stitches of the main color, and knit 5 rows. Then I added on the other wool and knit 6 rows. And by the way, when I am knitting in the round and want to add another color, I just make a slip knot and pull it through as the first stitch, as demonstrated in the following blurry photo:
I don't know if that's the textbook way of doing it, but it works. And, in particular, when you are going to felt something, it doesn't matter if you don't do it exactly right; once it's felted no-one will ever know.
Once the other wool ran out, I took back up with the Paton's wool, and knit 3 rows. Then I added the eyelash yarn. As you can see, I just held it along with the wool and knit the 2 of them together. It's actually easier than just knitting with the eyelash yarn would be, because you can actually see the stitches, and again, if you don't hold them together, the eyelash yarn won't felt and you'll have a strangely non-felted bit in the middle of your feltiness.
I knit about 8 rows like that, and then the fluffy yarn ran out so I continued with the plain wool for 7 more rows, and then worked the bottom as explained above. Then I took my hairbrush and brushed the part with the eyelash yarn because an awful lot of the eyelashes had gotten twisted into the knitting stitches, or wanted to poke out the wrong side, and so it was looking kind of sparse. Brushing gently helped pull them to the front and made it nice and fluffy*.
This is as good a point as any to mention that I would NOT put the eyelash yarn too much towards the top of the coozy, because you don't want to get fluff in your mouth. And yes, I pulled apart the first prototype coozy because I didn't think of that until I had it about half knitted.
When I was done knitting, I had this strange little thing:
Then, I felted it (see previous patternif you want to learn more about felting), and pulled it on a can to shape it, and left it to dry. Now, environmental responsibility forces me to point out that most of the Southeast is in the midst of a horrible drought with resultant water restrictions. Therefore you should combine your felting with another water/soap/heat consuming task, such as laundry, or even bathing. Now I'm not saying that I did this (mostly because nobody wants to know that they coozy they're using was rubbed on my butt), but you COULD put a bar of soap in this coozy and use it as a sponge and that would felt it very nicely while you bathed. It's just a thought. I would not, however, combine dish-washing and felting, because getting bits of food and grease in your coozy would just be nasty.
And here is my festive (and guess what, Sarah, it's TASTY!) beverage!
*Yes, it got fluff in my hairbrush which will ultimately transfer to my hair. But if you knit with any kind of enthusiasm, you probably already have fluff in your hair.
Inspiration: Wouldn't it look awesome with googly eyes? Teeth? Ears?
What if you had green fun fur and made your beer a hula skirt?
P.S. I will design something other than a beer coozy someday, I swear. Actually, I think the gloves I'm making have deviated so far from the original pattern that they now qualify as an original design; I just need to go through my notes and figure out how to turn them into a pattern that will make sense to someone other than me.