Paramore Tutorial
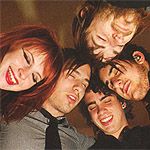
go from this
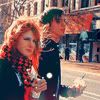
to this

1. Crop image and resize to 150px by 150px
2. Sharpen Image: Filters > Sharpen > Sharpen
3. Add a new fill layer of #000C2D and set to exclusion 100%

4. Add new selective coloring layer
REDS: -100, 0, +100, 0
YELLOWS: +100, 0, -100, +100
NEUTRALS: +20, 0, -10, -5
5. Add a new fill layer of #D7D7D7 and set to color burn 100%

6. Add new selective coloring layer
REDS: -100, 0, +100, 0
YELLOWS: +100, 0, -100, 0
NEUTRALS: +10, 0, -10, -10
7. Resize image to 100px by 100px and Sharpen again.
8. Add this texture

and set to lighten 100% (sorry don't know who made it)
You may have to rotate it a bit to get the right look
FINISHED!
Hope ya like it ;)
Others I made like this:


Share your results if you want.
Paramore icons courtesy of forsaken_dream2 's scans :)