(no subject)
A tutorial was requested for this icon.

I started out with this picture , taken from myfanbase.I cropped and sharpend it.

Now you have your base.Leave it like this.

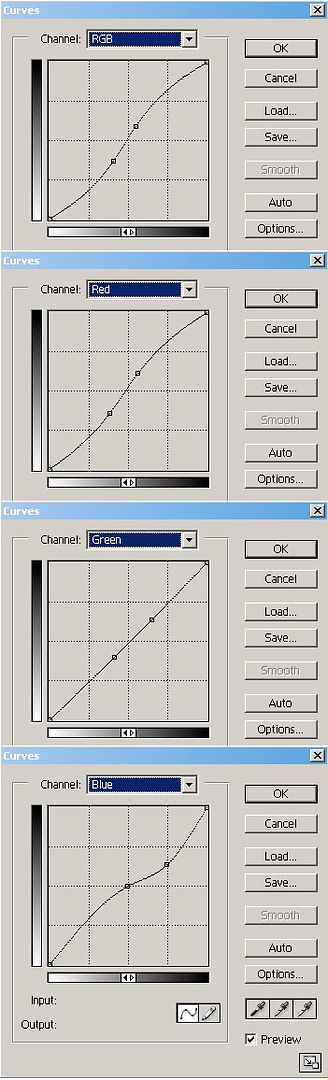
Make a new curves layer.Click on the second picture to see the curves options.

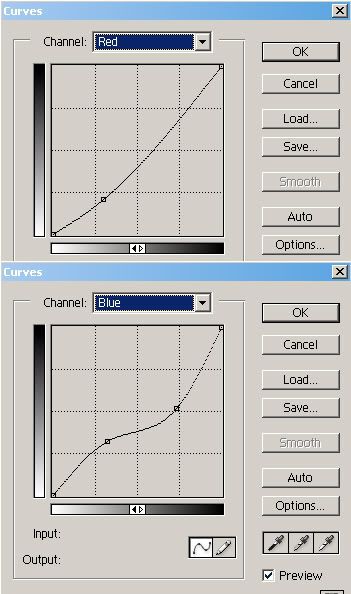
Next step, new curves layer ,again click on the second picture to view the options.

Now open your base in a new file. duplicate it and set it to screen.Add a new blue layer and change the mode to Exclusion.


New Layer again.Fill it with a #6DCFF6.Set the mode to Color burn


New Layer.Fill it with a pinkish color.Set the mode to Soft Light


Again one new Layer lol fill it with a beige color and set the blend mode to Multiply , change the opacity to 35 %


One last new color layer.Fill it with the color on the left <-.Blend mode to Soft Light

Duplicate your base layer and drag it on top of everything.Send the mode to Screen and change the opacity a bit.


Now copy all layers and go back to your curves file.Pase it into it and change the opacity a bit so that it looks nice , and you're done :)
I hope it helped!
Oh and I'm taking requests for icons so if you want one or two, post your picture(s) ( good quality please ) here and I'll make them for you!!