[AERIA] - Tutorial - Ange Ushiromiya
Going from this: 
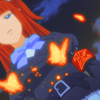
to this: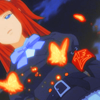
in ADOBE PHOTOSHOP CS2.
Difficulty: Easy like breathing.
# Of Steps: six
WARNING: TL;DR and lots of babbling, feel free to just do the steps 8D and then read my notes at the bottom...
one; Crop your base. I chose Ange from Umineko no Naku Koro ni.

I didn't do anything to my base aside from crop.
two; Layer > New Adjustment Layer > Selective Color.
The base on it's own is boring; it's flat and not very interesting to look at it. However... there is a lot of black and blue in this shot, so let's work with that.
REDS:
CYAN: -100
MAGENTA: 0
YELLOW: +40
BLACK: 0
Getting rid of the cyans/blues in red brings more brightness into the red, making it stick out more. There is a ring of orange around the gold butterflies, and this makes them more noticeable. In addition, Ange's hair will benefit from this.
YELLOWS:
CYAN: -100
MAGENTA: 0
YELLOW: -45
BLACK: 0
Once more, the lack of cyans/blues in the yellow brings out the butterflies more. Since only Ange's skin and the butterflies are yellow, we don't need a lot of yellow. -45 makes Ange's skin more pink, and the butterflies more of a fiery color, which I like.
Skip the greens and cyans. There's nothing green in this shot, and Ange's bow doesn't look like it needs touching up. With that, we're at the BLUES.
BLUES:
CYAN: +100
MAGENA: +100
YELLOW: -100
BLACK: 0
Bring out the brightness with cyan. Cyan is just a brighter form of blue, I think, so the lightness brings the blue out. Magenta deepens the shade to a midnight blueish color, and yellow gets rid of... well, yellows, in the blue.
MAGENTAS:
CYAN: +100
MAGENA: -100
YELLOW: 0
BLACK: 0
...i'm not even sure there's magenta in this shot rofl. I think it alters Ange's hair a bit, but not much.
WHITES:
CYAN: +100
MAGENTA: 0
YELLOW: 0
BLACK: 0
The addition of cyan in the whites brings out the shading more. It brightens the whites of the eyes and the highlights on the face.
NEUTRALS:
CYAN: +25
MAGENTA: 0
YELLOW: 0
BLACK: 0
I said it before, but there is a lot of blue in this shot... Ange's uniform, the sky... hell, her eyes are blue too. Deepen all the blue.
BLACKS:
CYAN: +100
MAGENTA: 0
YELLOW: 0
BLACK: +100
Deepens the blacks. Which means her uniform and the sky, and the lines that shape her are more noticeable.
Click ok.
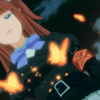
It looks a little... blegh, I know. Don't worry!!
three; Layer > New Adjustment Layer > Selective Color once more.
Now, Ange's hair is getting lost in the blue. Grr. :< Okay, let's bring it out more.
REDS:
CYAN: -100
MAGENTA: +16
YELLOW: -14
BLACK: 0
Ange's hair color is a little better now. It's a little pinkish, but I like it~
YELLOWS:
CYAN: -100
MAGENTA: 0
YELLOW: 0
BLACK: 0
All we want is for the butterflies and Ange's skin to be brighter, so get rid of the cyan to get rid of the blue on both.
Skip Greens and go to Cyans.
CYANS:
CYAN: +100
MAGENTA: +100
YELLOW: -100
BLACK: 0
We went more blue, so put cyans all the way up. Magenta brightens the blue, makes it more icy colored. The yellow deepens that, making it almost a greenish color.
BLUES:
CYAN: +100
MAGENTA: 0
YELLOW: 0
BLACK: 0
Just brighten the blues up!
Skip Magentas and got to Whites.
WHITES:
CYAN: -23
MAGENTA: 0
YELLOW: 0
BLACK: -7
Okay, so things were a little too dark. When you get rid of cyan, it makes things more reddish, and the black does that too, so try that.
Skip Neutrals, since we don't want to continue to change the entirety of the image. That takes us to Blacks.
BLACKS:
CYAN: +100
MAGENTA: 0
YELLOW: 0
BLACK: +100
Darkens the lines and whatnot. I already explained this~
Click ok.

...still... boring. hm!
step four; Layer > New Adjustment Layer > Selective Color...again.
REDS:
CYAN: -100
MAGENTA: 0
YELLOW: +100
BLACK: 0
Ange's hair is a little dull for me. I couldn't careless about the butterflies, which were bright enough for me, but Ange's hair... urk... Brighten the reds by getting rid of the cyan, and then brighten them more with yellow.
YELLOWS:
CYAN: -100
MAGENTA: 0
YELLOWS: -18
BLACK: 0
Ange's skin isn't bright enough, so get rid of the blues further! Getting rid of a little yellow brings more pink out in her face.
Skip Greens and Cyans and go to Blues.
BLUES:
CYAN: +100
MAGENTA: +100
YELLOW: -100
Brighten the blues with cyan, make them darker with magenta and make them a deeper blue by getting rid of the yellows.
Click OK.

Getting there---!!
four; Layer > New Fill Layer > Solid Color!
Fill it with #76554b. It's a boring brown, I know. But it deepens the reds, and lightens up the blues!! Which is just what we want~

five; Click on the base, then do one of the following:
CTRL+J
or
right click > duplicate layer.
Drag it to the top and set it to LUMINOSITY 100%. We're using Luminosity because Soft Light... well, brightens everything up. We like the shading used in the original cap, because we've already worked tirelessly to brighten it up. Additionally, Soft Light sharpens the blacks and makes them more noticeable. Luminosity doesn't.
six; Layer > New Adjustment Layer > Curves
Last step--!!
Click on the line in the box and little boxes you can type in will come up. Type these in the appropriate boxes:
INPUT: 208
OUTPUT: 222
Click OK!

ALL DONE 8D
OTHER EXAMPLES OF THIS COLORING:


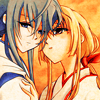

notes about this coloring; As you can see, it works on a variety of images-- HOWEVER. It completely gets rid of purple!! If you have a lot of purple in your icon, THIS TUTORIAL WILL MAKE IT LOOK BLEGH. Case in point:

No offense if you like this coloring, but it doesn't appeal to me at all, so I personally wouldn't reccomend this coloring to images with a lot of pink/purple. :(
Otherwise, this is a really versatile coloring I use a lot these days. The more blue in it, the better it looks. The brown color fill layer CAN be excluded, but be sure to edit your Curves layer accordingly, okay?? YEAH!!
And like all tutorials: don't follow this one to the T. 8D It works with a lot of different styles, BUT. It looks hideous on real people.

DEAR GOD I AM SO SORRY, MISUTAH RADUCRIFFE. except not!! KUKUKU
So stick to drawn stuff, okay? OKAY!!
Enjoy >3

to this:

in ADOBE PHOTOSHOP CS2.
Difficulty: Easy like breathing.
# Of Steps: six
WARNING: TL;DR and lots of babbling, feel free to just do the steps 8D and then read my notes at the bottom...
one; Crop your base. I chose Ange from Umineko no Naku Koro ni.

I didn't do anything to my base aside from crop.
two; Layer > New Adjustment Layer > Selective Color.
The base on it's own is boring; it's flat and not very interesting to look at it. However... there is a lot of black and blue in this shot, so let's work with that.
REDS:
CYAN: -100
MAGENTA: 0
YELLOW: +40
BLACK: 0
Getting rid of the cyans/blues in red brings more brightness into the red, making it stick out more. There is a ring of orange around the gold butterflies, and this makes them more noticeable. In addition, Ange's hair will benefit from this.
YELLOWS:
CYAN: -100
MAGENTA: 0
YELLOW: -45
BLACK: 0
Once more, the lack of cyans/blues in the yellow brings out the butterflies more. Since only Ange's skin and the butterflies are yellow, we don't need a lot of yellow. -45 makes Ange's skin more pink, and the butterflies more of a fiery color, which I like.
Skip the greens and cyans. There's nothing green in this shot, and Ange's bow doesn't look like it needs touching up. With that, we're at the BLUES.
BLUES:
CYAN: +100
MAGENA: +100
YELLOW: -100
BLACK: 0
Bring out the brightness with cyan. Cyan is just a brighter form of blue, I think, so the lightness brings the blue out. Magenta deepens the shade to a midnight blueish color, and yellow gets rid of... well, yellows, in the blue.
MAGENTAS:
CYAN: +100
MAGENA: -100
YELLOW: 0
BLACK: 0
...i'm not even sure there's magenta in this shot rofl. I think it alters Ange's hair a bit, but not much.
WHITES:
CYAN: +100
MAGENTA: 0
YELLOW: 0
BLACK: 0
The addition of cyan in the whites brings out the shading more. It brightens the whites of the eyes and the highlights on the face.
NEUTRALS:
CYAN: +25
MAGENTA: 0
YELLOW: 0
BLACK: 0
I said it before, but there is a lot of blue in this shot... Ange's uniform, the sky... hell, her eyes are blue too. Deepen all the blue.
BLACKS:
CYAN: +100
MAGENTA: 0
YELLOW: 0
BLACK: +100
Deepens the blacks. Which means her uniform and the sky, and the lines that shape her are more noticeable.
Click ok.

It looks a little... blegh, I know. Don't worry!!
three; Layer > New Adjustment Layer > Selective Color once more.
Now, Ange's hair is getting lost in the blue. Grr. :< Okay, let's bring it out more.
REDS:
CYAN: -100
MAGENTA: +16
YELLOW: -14
BLACK: 0
Ange's hair color is a little better now. It's a little pinkish, but I like it~
YELLOWS:
CYAN: -100
MAGENTA: 0
YELLOW: 0
BLACK: 0
All we want is for the butterflies and Ange's skin to be brighter, so get rid of the cyan to get rid of the blue on both.
Skip Greens and go to Cyans.
CYANS:
CYAN: +100
MAGENTA: +100
YELLOW: -100
BLACK: 0
We went more blue, so put cyans all the way up. Magenta brightens the blue, makes it more icy colored. The yellow deepens that, making it almost a greenish color.
BLUES:
CYAN: +100
MAGENTA: 0
YELLOW: 0
BLACK: 0
Just brighten the blues up!
Skip Magentas and got to Whites.
WHITES:
CYAN: -23
MAGENTA: 0
YELLOW: 0
BLACK: -7
Okay, so things were a little too dark. When you get rid of cyan, it makes things more reddish, and the black does that too, so try that.
Skip Neutrals, since we don't want to continue to change the entirety of the image. That takes us to Blacks.
BLACKS:
CYAN: +100
MAGENTA: 0
YELLOW: 0
BLACK: +100
Darkens the lines and whatnot. I already explained this~
Click ok.

...still... boring. hm!
step four; Layer > New Adjustment Layer > Selective Color...again.
REDS:
CYAN: -100
MAGENTA: 0
YELLOW: +100
BLACK: 0
Ange's hair is a little dull for me. I couldn't careless about the butterflies, which were bright enough for me, but Ange's hair... urk... Brighten the reds by getting rid of the cyan, and then brighten them more with yellow.
YELLOWS:
CYAN: -100
MAGENTA: 0
YELLOWS: -18
BLACK: 0
Ange's skin isn't bright enough, so get rid of the blues further! Getting rid of a little yellow brings more pink out in her face.
Skip Greens and Cyans and go to Blues.
BLUES:
CYAN: +100
MAGENTA: +100
YELLOW: -100
Brighten the blues with cyan, make them darker with magenta and make them a deeper blue by getting rid of the yellows.
Click OK.

Getting there---!!
four; Layer > New Fill Layer > Solid Color!
Fill it with #76554b. It's a boring brown, I know. But it deepens the reds, and lightens up the blues!! Which is just what we want~

five; Click on the base, then do one of the following:
CTRL+J
or
right click > duplicate layer.
Drag it to the top and set it to LUMINOSITY 100%. We're using Luminosity because Soft Light... well, brightens everything up. We like the shading used in the original cap, because we've already worked tirelessly to brighten it up. Additionally, Soft Light sharpens the blacks and makes them more noticeable. Luminosity doesn't.

six; Layer > New Adjustment Layer > Curves
Last step--!!
Click on the line in the box and little boxes you can type in will come up. Type these in the appropriate boxes:
INPUT: 208
OUTPUT: 222
Click OK!

ALL DONE 8D
OTHER EXAMPLES OF THIS COLORING:


notes about this coloring; As you can see, it works on a variety of images-- HOWEVER. It completely gets rid of purple!! If you have a lot of purple in your icon, THIS TUTORIAL WILL MAKE IT LOOK BLEGH. Case in point:

No offense if you like this coloring, but it doesn't appeal to me at all, so I personally wouldn't reccomend this coloring to images with a lot of pink/purple. :(
Otherwise, this is a really versatile coloring I use a lot these days. The more blue in it, the better it looks. The brown color fill layer CAN be excluded, but be sure to edit your Curves layer accordingly, okay?? YEAH!!
And like all tutorials: don't follow this one to the T. 8D It works with a lot of different styles, BUT. It looks hideous on real people.

DEAR GOD I AM SO SORRY, MISUTAH RADUCRIFFE. except not!! KUKUKU
So stick to drawn stuff, okay? OKAY!!
Enjoy >3