Tutorial: How to blend pictures with GIMP?
I’m doing this as a favor for the lovely roadrunner1896 and everyone else who is interested to know how to do this.
First of all, I have to say that I wasn’t able to change the language of my GIMP version. So all the options on the pictures are in German, sorry. I’m trying to translate them as good as I can but I’m not sure if they are used in an English version. Um, what else should be mentioned… Ah, yes. The last time I have read any tutorial is long ago and I have no experiences in making one at all. I will try my best, though.
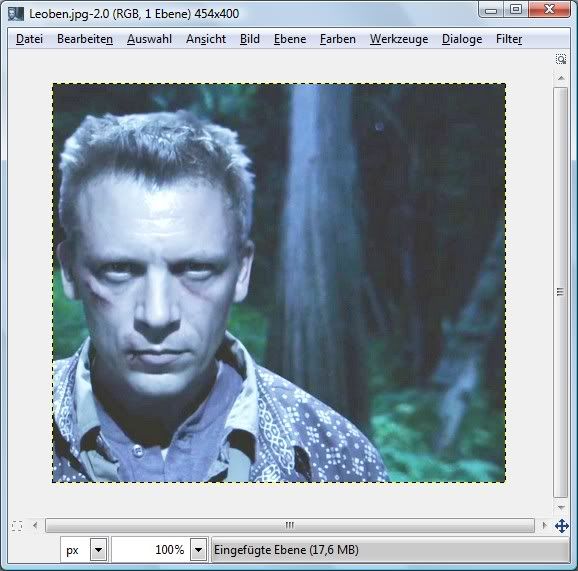
First you need a picture. And I have chosen Leoben for our purpose. Yummy, eh?
Then, of course, you need another picture to blend with the first one. I took this one:
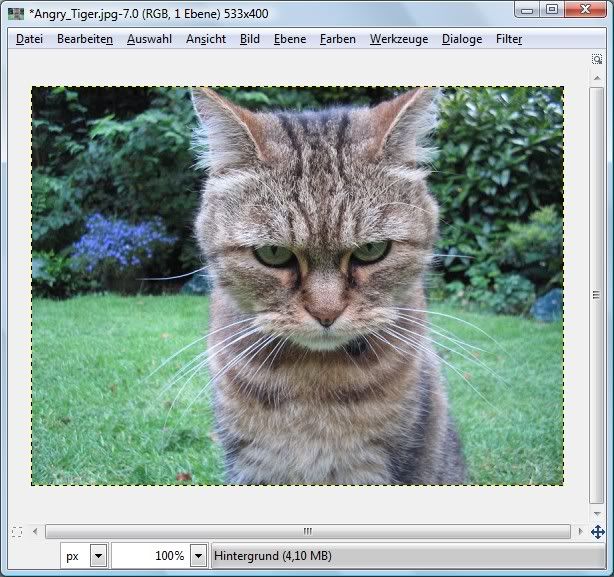
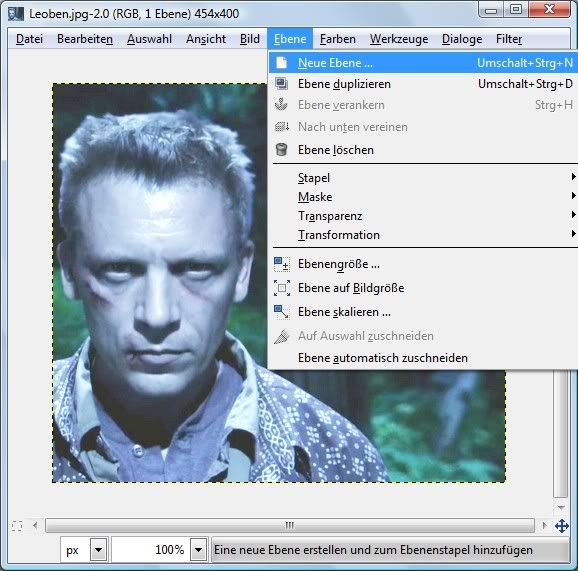
Don’t laugh!!! They look almost like twins. :P Copy the picture (Edit -> Copy) and then go back to the first picture (Leoben) and create a new layer (Layers -> New Layer) like I did:
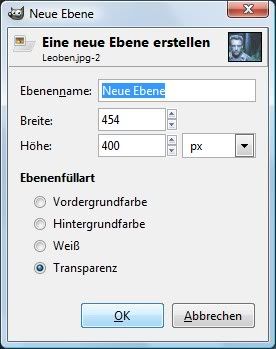
You will get this window. Just make sure the new layer is transparent and click OK.
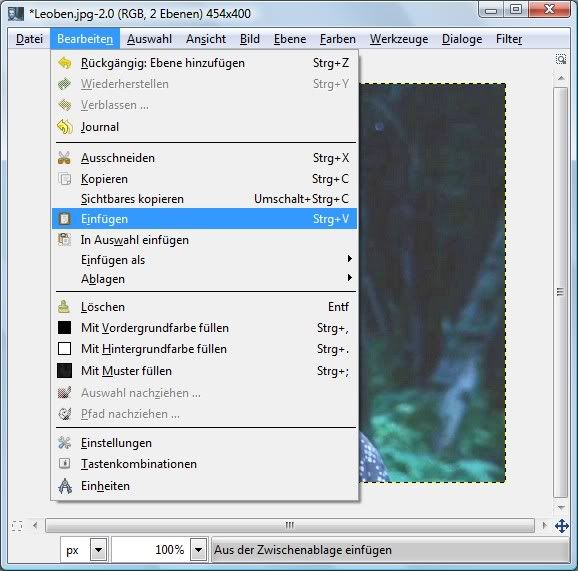
Now we have to paste the other picture (Cat) on this transparent layer. (Edit -> Paste)
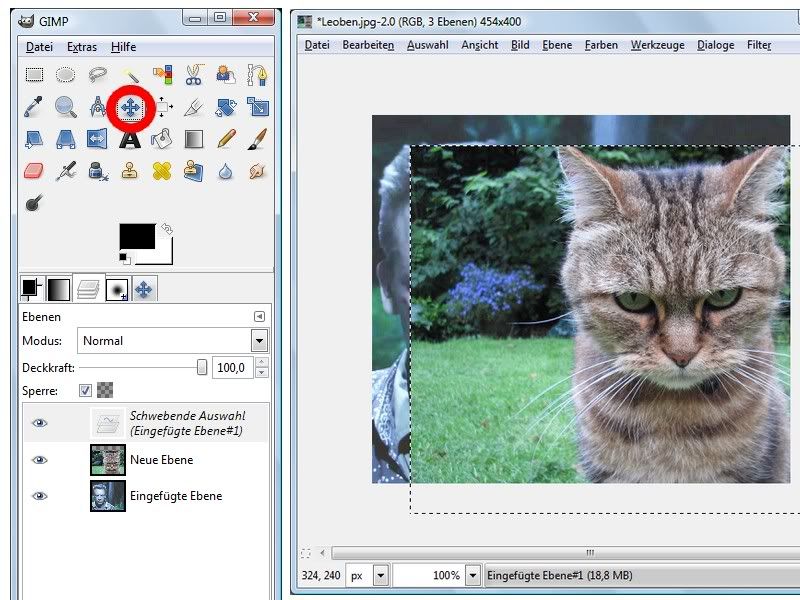
The second picture is hovering now but we are able to move it with this tool to the place where we want it:
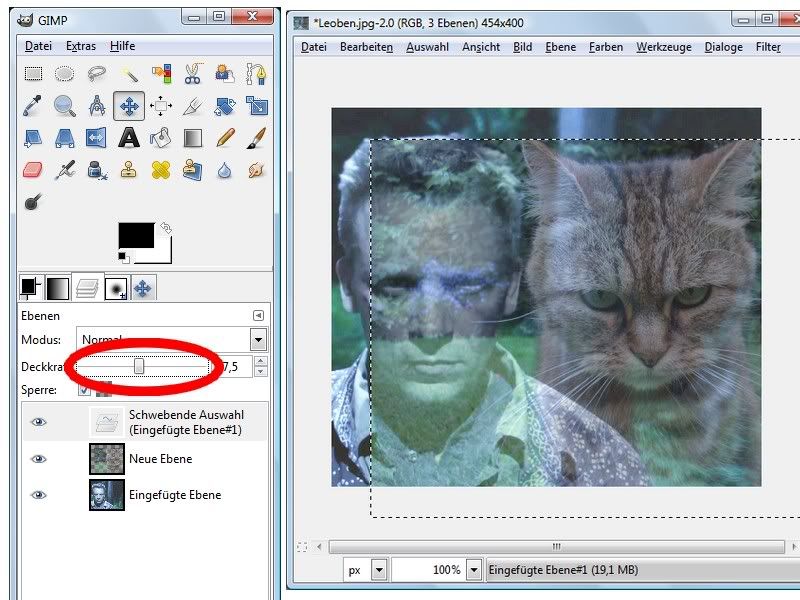
It’s likely that we can’t see if it’s on the right spot. But that’s no problem because we can change the transparency of the layer with this tool. Lookie:
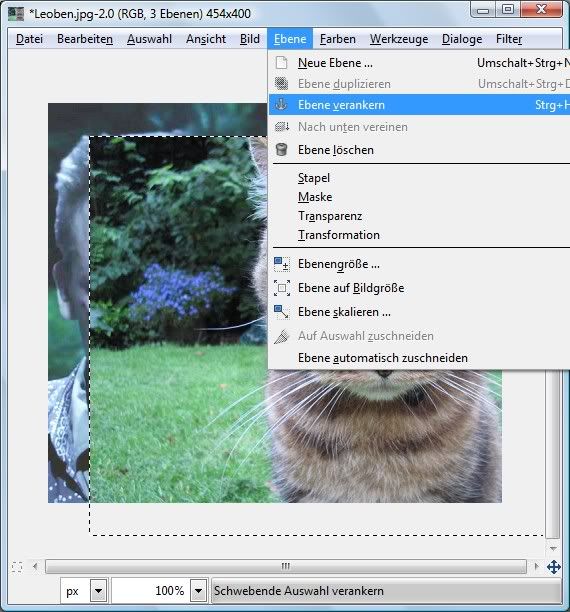
And once it’s there where we want it, we have to embed this layer but don’t forget to undo the transparency. Just like here:
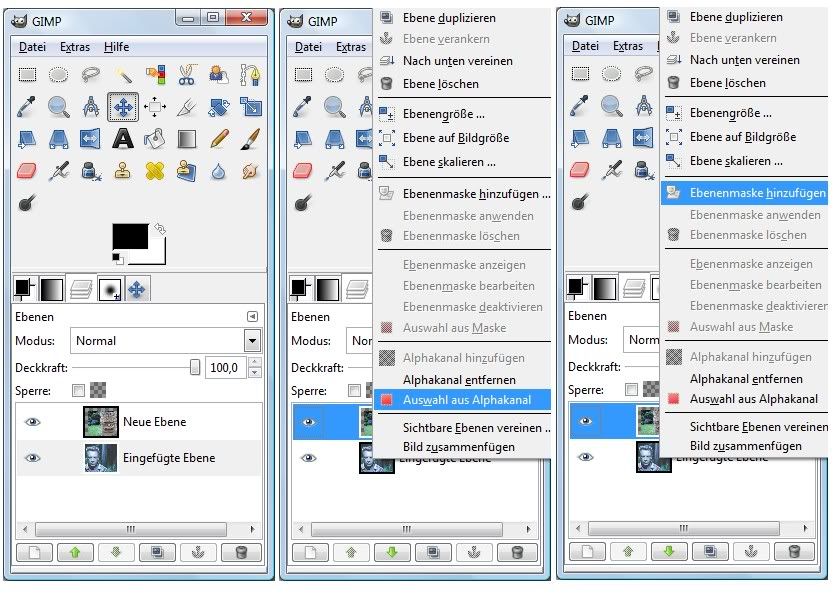
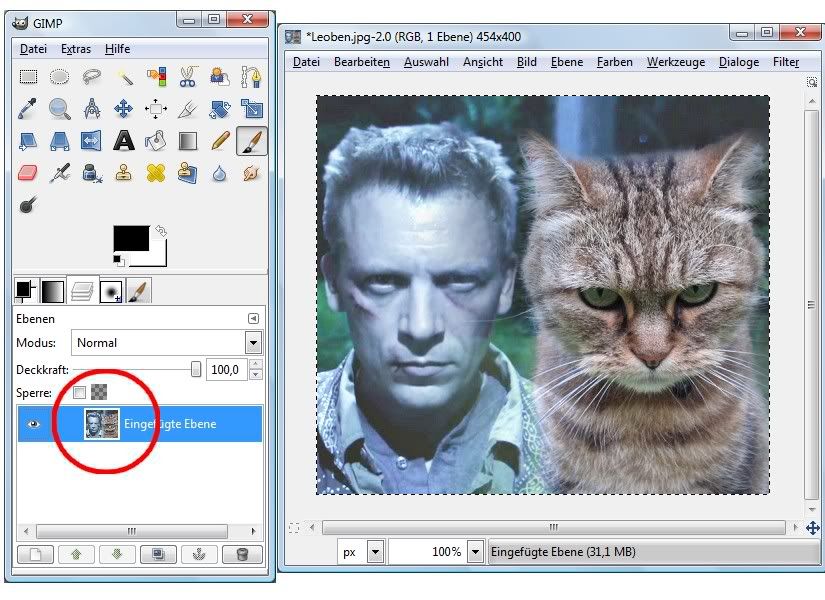
Now we got two layers. Leoben and the cat. (Picture 1) Before we are able to blend them, we have to make a few steps.
Click on the Cat and choose with the right mouse click the option: replace alpha selection. (Picture 2). Then pick the option: add layer mask. (Picture 3)
If you did the last step, this new window is going to appear.
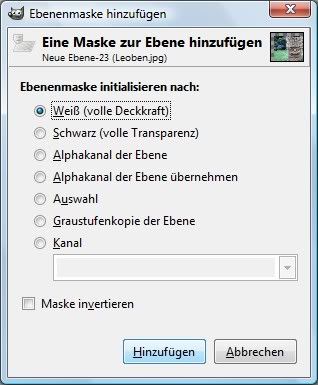
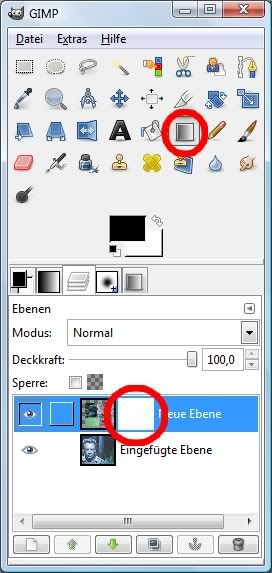
The option we need, white (full opacity), should be already activated. Click OK! As a result, you can see the white layer mask next to the cat. (Picture 1) Go back to the first layer (Leoben) and choose with the right mouse click: replace alpha selection. (Picture 2)

So far, so good. Now click on the white layer mask and choose the gradient-dialog in the tool box.
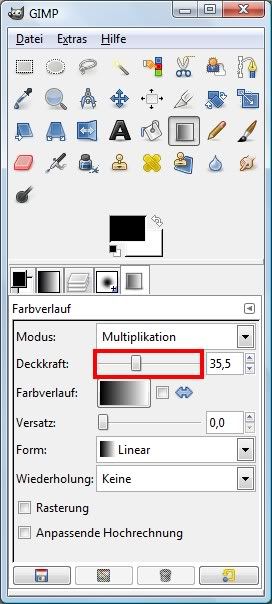
The best way to blend pictures is to reduce the capacity of this tool. In this case, I used 35,5. And make sure the multiplication mode is activated because this is essential for this tool and the fore- and background color are black and white like in the next picture. Also the other options should be the same like here.
I know this looks like it’s complicated and a lot of work. It’s not. Believe me. Once you are used to it, you are able to do this in a few seconds. And now, with the gradient tool, are we able to blend our pics.
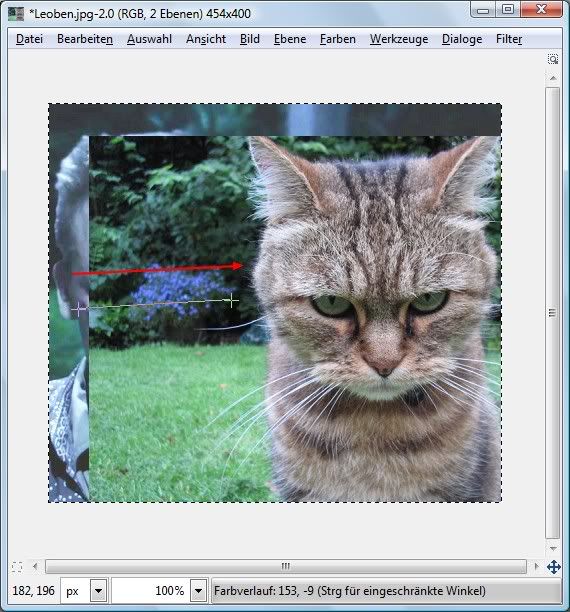
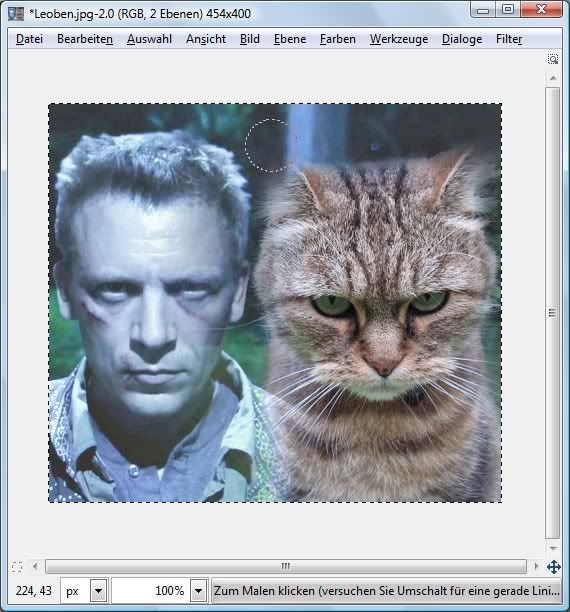
Go back to the pictures and click with the mouse on Leoben and move the mouse (keep clicking the mouse) over to the cat. Just like I did here:
After one try, it could look like this:
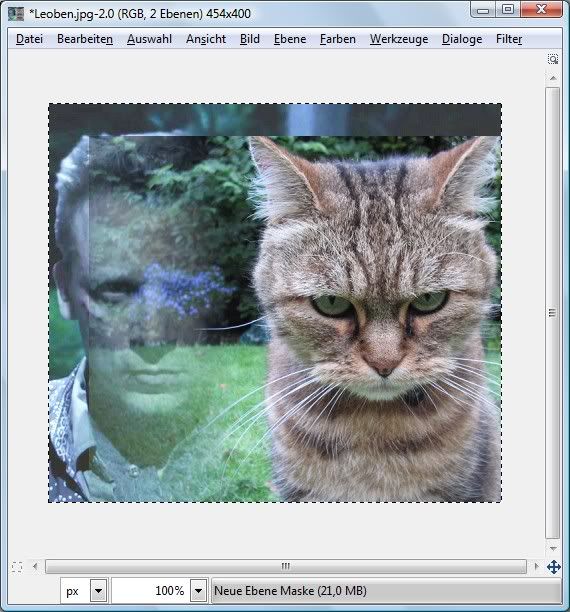
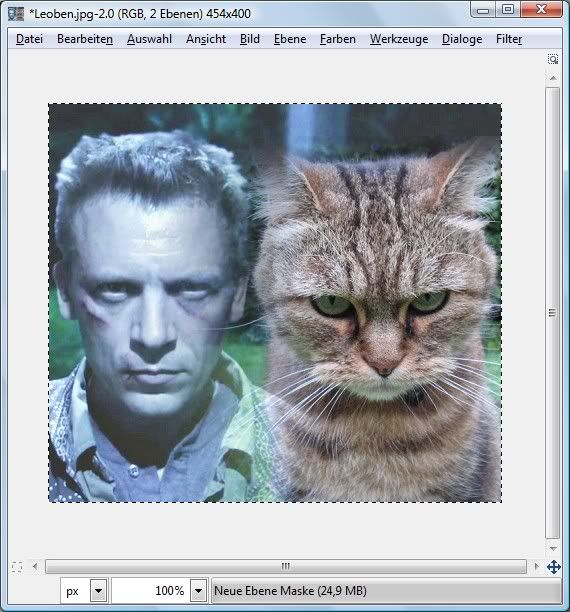
You can do this as many times you want. Also it doesn’t matter from which side or if you did delete something. You are able to make it visible again. I'm going to explain this after a few more steps. That’s my result:
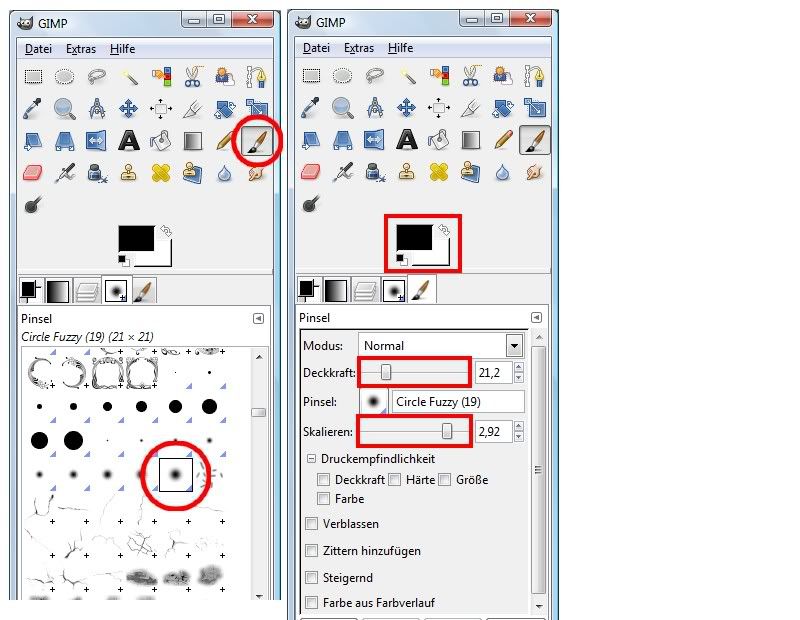
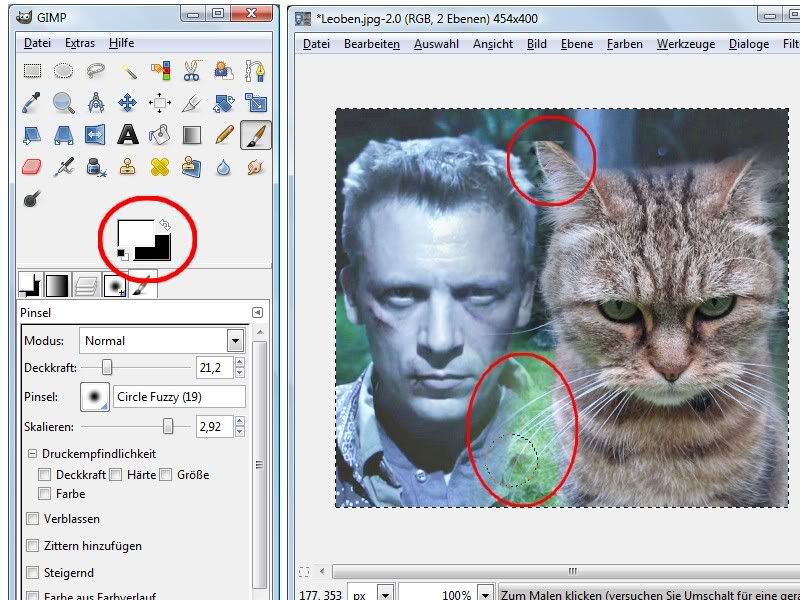
For the finishing touch will we use the brush. It works just like the gradient tool but with this one are we able to take care of the details. The best one for this kind of work is the circle fuzzy brush (19)! (Picture 1) After you picked the brush, change the settings. (Picture 2)
The mode should be normal and the capacity shouldn’t be too high. If needed, scale the brush. It’s hard to explain which size or capacity the best is, but you will get a knack after some time. The fore- and backgroundcolor should be still black and white.
I have deleted the left ear of the cat. We will use the brush to undo this mistake.
All we have to do is to change the fore- and backgroundcolor. Black is usually the foregroundcolor and white the backgroundcolor. We use the arrow to replace them. And if we use the brush on the picture now, the things we have deleted by accident will be back.
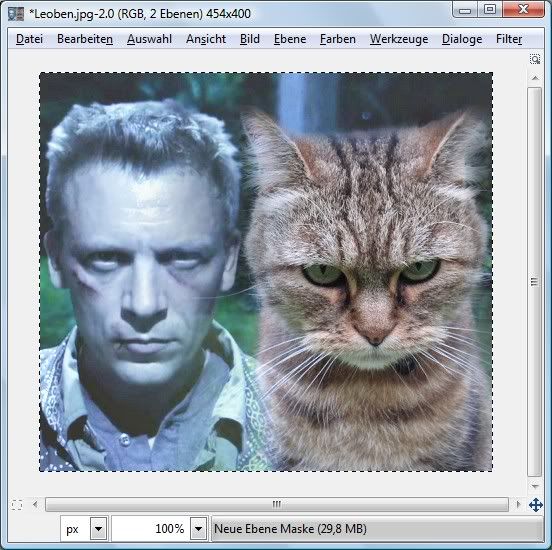
Now you have to use the brush to do all the finishing touch. Either to remove parts or to make them visible again. It can be tough if the two pictures have rough differences. You have to practice this blending work. Just play with the brush or the gradient tool and you will figure out how this works. That’s my result, it’s not perfect but who cares?
If you are satisfied with your result, you have to embed the two layers. Just click on the second layer with the right mouse button and pick: layer merge down, or you can always use the options in the window of the picture.
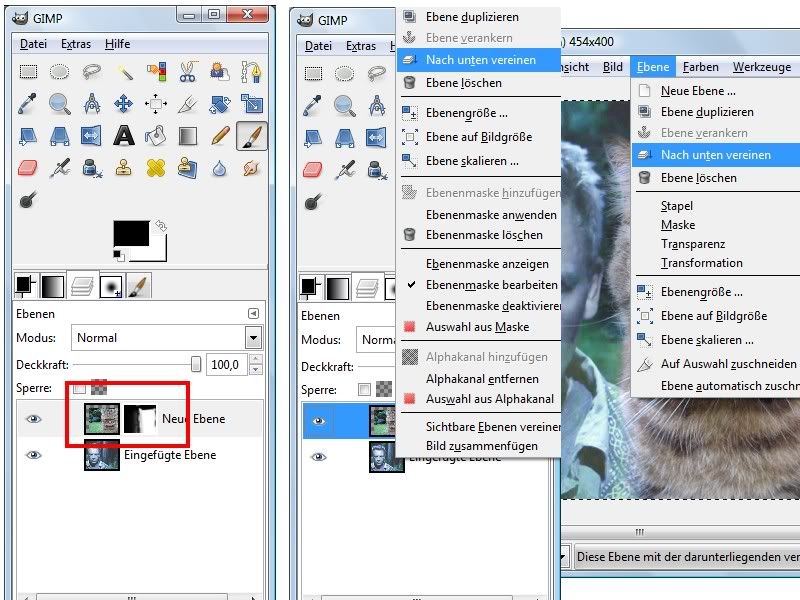
Then you have only one layer, in other words one picture.
Done! See, they look like twins, don’t they? ^_^
Don’t forget to save it as a new picture. Otherwise you will override the first picture.
You are able to make this not with just two pics but with many more. Just add for every new picture a new layer, embed it and choose always the options as I said before. And in the end you have to embed all the pictures in this pile. That’s all. And remember to use the multiplication mode for the gradient tool and the normal mode for the work with the brushes.
I hope I didn’t make it too complicated and it's easy to try this by yourself. If you have any more questions, feel free to ask me.
Good luck and have fun with GIMP! :D
First of all, I have to say that I wasn’t able to change the language of my GIMP version. So all the options on the pictures are in German, sorry. I’m trying to translate them as good as I can but I’m not sure if they are used in an English version. Um, what else should be mentioned… Ah, yes. The last time I have read any tutorial is long ago and I have no experiences in making one at all. I will try my best, though.
First you need a picture. And I have chosen Leoben for our purpose. Yummy, eh?
Then, of course, you need another picture to blend with the first one. I took this one:
Don’t laugh!!! They look almost like twins. :P Copy the picture (Edit -> Copy) and then go back to the first picture (Leoben) and create a new layer (Layers -> New Layer) like I did:
You will get this window. Just make sure the new layer is transparent and click OK.
Now we have to paste the other picture (Cat) on this transparent layer. (Edit -> Paste)
The second picture is hovering now but we are able to move it with this tool to the place where we want it:
It’s likely that we can’t see if it’s on the right spot. But that’s no problem because we can change the transparency of the layer with this tool. Lookie:
And once it’s there where we want it, we have to embed this layer but don’t forget to undo the transparency. Just like here:
Now we got two layers. Leoben and the cat. (Picture 1) Before we are able to blend them, we have to make a few steps.
Click on the Cat and choose with the right mouse click the option: replace alpha selection. (Picture 2). Then pick the option: add layer mask. (Picture 3)
If you did the last step, this new window is going to appear.
The option we need, white (full opacity), should be already activated. Click OK! As a result, you can see the white layer mask next to the cat. (Picture 1) Go back to the first layer (Leoben) and choose with the right mouse click: replace alpha selection. (Picture 2)
So far, so good. Now click on the white layer mask and choose the gradient-dialog in the tool box.
The best way to blend pictures is to reduce the capacity of this tool. In this case, I used 35,5. And make sure the multiplication mode is activated because this is essential for this tool and the fore- and background color are black and white like in the next picture. Also the other options should be the same like here.
I know this looks like it’s complicated and a lot of work. It’s not. Believe me. Once you are used to it, you are able to do this in a few seconds. And now, with the gradient tool, are we able to blend our pics.
Go back to the pictures and click with the mouse on Leoben and move the mouse (keep clicking the mouse) over to the cat. Just like I did here:
After one try, it could look like this:
You can do this as many times you want. Also it doesn’t matter from which side or if you did delete something. You are able to make it visible again. I'm going to explain this after a few more steps. That’s my result:
For the finishing touch will we use the brush. It works just like the gradient tool but with this one are we able to take care of the details. The best one for this kind of work is the circle fuzzy brush (19)! (Picture 1) After you picked the brush, change the settings. (Picture 2)
The mode should be normal and the capacity shouldn’t be too high. If needed, scale the brush. It’s hard to explain which size or capacity the best is, but you will get a knack after some time. The fore- and backgroundcolor should be still black and white.
I have deleted the left ear of the cat. We will use the brush to undo this mistake.
All we have to do is to change the fore- and backgroundcolor. Black is usually the foregroundcolor and white the backgroundcolor. We use the arrow to replace them. And if we use the brush on the picture now, the things we have deleted by accident will be back.
Now you have to use the brush to do all the finishing touch. Either to remove parts or to make them visible again. It can be tough if the two pictures have rough differences. You have to practice this blending work. Just play with the brush or the gradient tool and you will figure out how this works. That’s my result, it’s not perfect but who cares?
If you are satisfied with your result, you have to embed the two layers. Just click on the second layer with the right mouse button and pick: layer merge down, or you can always use the options in the window of the picture.
Then you have only one layer, in other words one picture.
Done! See, they look like twins, don’t they? ^_^
Don’t forget to save it as a new picture. Otherwise you will override the first picture.
You are able to make this not with just two pics but with many more. Just add for every new picture a new layer, embed it and choose always the options as I said before. And in the end you have to embed all the pictures in this pile. That’s all. And remember to use the multiplication mode for the gradient tool and the normal mode for the work with the brushes.
I hope I didn’t make it too complicated and it's easy to try this by yourself. If you have any more questions, feel free to ask me.
Good luck and have fun with GIMP! :D