Tutorial: Garden State
How to go from:
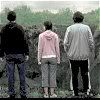
this:
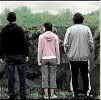
to this:
For PSP 7
1.) Take the base picture (capped by xintothewestx) and go to Effects >Enhance Photo > Automatic Contrast Enhancement, and make sure it's set to: Lighter, Normal, and Flat.
2.) Duplicate your base and set the duplicate to 'Soft Light.'
3.) Click your background layer and go to Colors> Adjust> Hue/Saturation/Lightness (Shift + H). Bring the saturation down to -12.

4.) Create a layer inbetween the two and fill it with a dark navy blue, then set it to 'Exclusion'

5.) Create a new layer and place it above the three others. Fill it with #F1DFC9 and set the layer to 'Multiply.' Then change the layer's opacity to 50%

6.) Make another new layer and fill it with black, then set the opacity to 20%

7.) On another new layer use this texture made by spaceyme
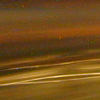
and set the layer to screen.
Your image should look like this:
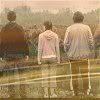
add whatever text you would like.
this:
to this:
For PSP 7
1.) Take the base picture (capped by xintothewestx) and go to Effects >Enhance Photo > Automatic Contrast Enhancement, and make sure it's set to: Lighter, Normal, and Flat.
2.) Duplicate your base and set the duplicate to 'Soft Light.'
3.) Click your background layer and go to Colors> Adjust> Hue/Saturation/Lightness (Shift + H). Bring the saturation down to -12.
4.) Create a layer inbetween the two and fill it with a dark navy blue, then set it to 'Exclusion'
5.) Create a new layer and place it above the three others. Fill it with #F1DFC9 and set the layer to 'Multiply.' Then change the layer's opacity to 50%
6.) Make another new layer and fill it with black, then set the opacity to 20%
7.) On another new layer use this texture made by spaceyme
and set the layer to screen.
Your image should look like this:
add whatever text you would like.