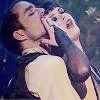
Color Tutorial
How to go
from this:
to this:
for PSP7
1.) Take your base image, I used this one:
, capped by lvlwing and go to the Red/Green/Blue Menu. (Colors ->Adjust->Red/Green/Blue, or Shift + U)
2.) Set it to %Red: -15, %Green: -25, and %Blue: -50. Your image should look like this.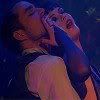
3.) Duplicate the layer twice, and set both duplicates to Screen:
4.) Merge all of the layers, and reopen the Red/Green/Blue Menu. Use the same settings as before: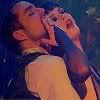
5.) Duplicate the layer and set the duplicate to Screen.
6.) Merge both layers. The duplicate it again and set the duplicate to Soft Light .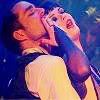
7.) Take the bottom layer (The one that isn't at Soft Light) and go to Colors -> Adjust -> Hue/Saturation/Lightness, or Shift + H).
8.) Set the saturation to -61, and merge the layers.
from this:

to this:

for PSP7
1.) Take your base image, I used this one:

, capped by lvlwing and go to the Red/Green/Blue Menu. (Colors ->Adjust->Red/Green/Blue, or Shift + U)
2.) Set it to %Red: -15, %Green: -25, and %Blue: -50. Your image should look like this.

3.) Duplicate the layer twice, and set both duplicates to Screen:

4.) Merge all of the layers, and reopen the Red/Green/Blue Menu. Use the same settings as before:

5.) Duplicate the layer and set the duplicate to Screen.

6.) Merge both layers. The duplicate it again and set the duplicate to Soft Light .

7.) Take the bottom layer (The one that isn't at Soft Light) and go to Colors -> Adjust -> Hue/Saturation/Lightness, or Shift + H).
8.) Set the saturation to -61, and merge the layers.
