Underwater & Fade Effect: PSP8, AS
This: 
to this:
Requirements:
- PSP8
- Animation Shop
- Patience (for you)
- Chocolate (for me)
For this tutorial, I shall refer to what you have selected for animation as "Image1".
1. Crop, resize, contrast, border, etc. Add all text that you want.

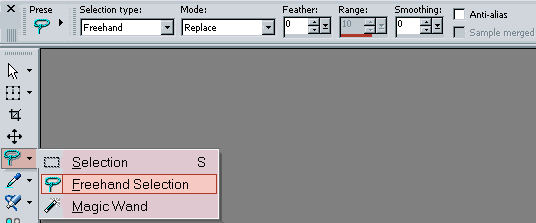
2. Click on Freehand Selection and make sure that you have it set to Freehand and Replace, as shown on the diagram below.
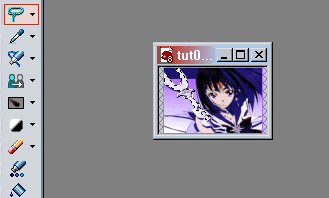
3. Outline the object that you wish to animate.
4. Copy and paste Image1 as a new image, preferably about 100x100 larger.
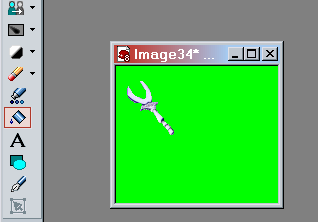
5. Click on Flood Fill and fill the areas around Image1 with a solid colour.
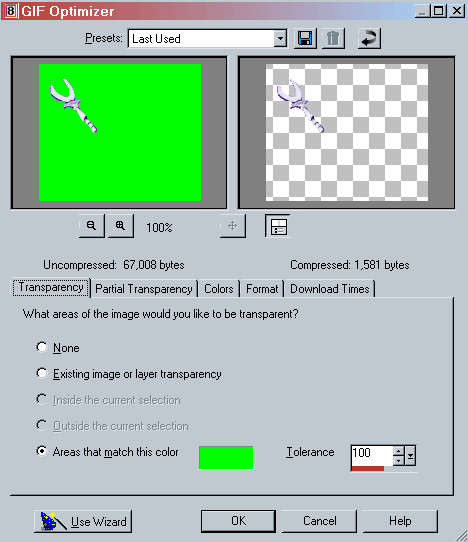
6. Go to File>Export>Gif Optimizer, and set your options to what is on the diagram below.
7. Press OK and export Image1 as a new picture.
8. Open Animation Shop and open Image1 as a new file.
9. Right click Image1 and select Insert Image Effect.
10. Change the scroll down menu to Underwater and the other details to what is on the diagram below.
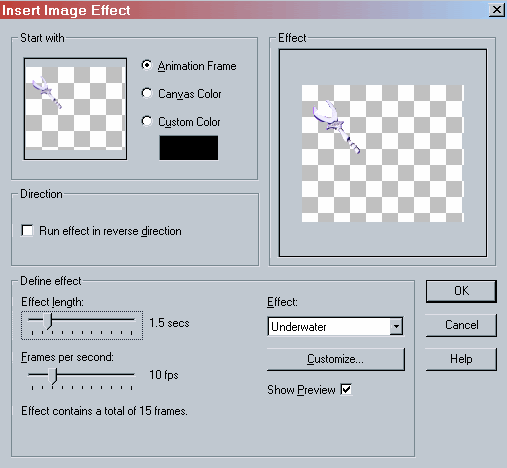
11. Click on Customise and change the details to what is on the diagram below.
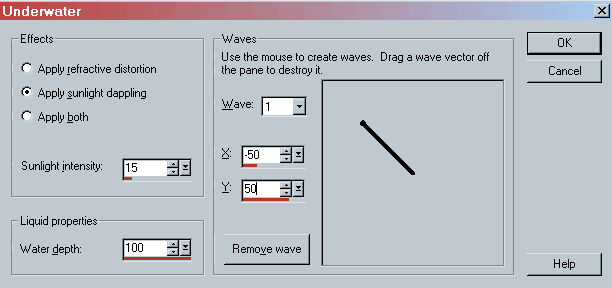
12. Run your animation a few times and delete any unnecessary frames. Fiddle around with speeds until you are happy.
**THIS NEXT PART IS OPTIONAL. YOU MAY FINISH AT STEP 12 AND CONTINUE ONTO STEP 17.**
13. Copy the first frame of the animation and paste it after your last frame.
14. Right click the (now) second last frame and select Insert Image Transition.
15. Change the scroll down menu to Fade and the other details to what is on the diagram below.
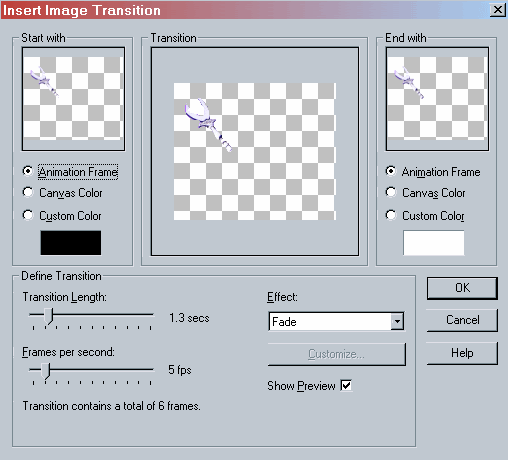
16. Repeat Step 12 again.
17. Now, open up your original image (that is, the pre-made icon with your text and whatnot on it) as a new file in Animation Shop.
18. Copy and paste the first frame until it has the same amount of frames as your animation.
19. Select all frames in both files and drag the animation until it is on top of your original file.
20. When you are satisfied with your animation, click the 'X' and save. Animation Shop will automatically optimise your animation. Make sure that the file is no bigger than 40kB (standard LJ icon size) and that you are happy with how it looks.

And that's it! I hope this was helpful to some people. ^_^
Examples of this animation on icons:
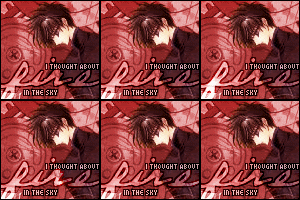

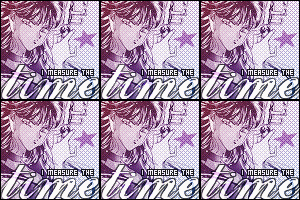
Any questions, criticism, broken links? Leave me a comment!
Edited to added: A similar tutorial for this effect for Photoshop and ImageReady, made by comeback, can be found here.

to this:

Requirements:
- PSP8
- Animation Shop
- Patience (for you)
- Chocolate (for me)
For this tutorial, I shall refer to what you have selected for animation as "Image1".
1. Crop, resize, contrast, border, etc. Add all text that you want.

2. Click on Freehand Selection and make sure that you have it set to Freehand and Replace, as shown on the diagram below.

3. Outline the object that you wish to animate.

4. Copy and paste Image1 as a new image, preferably about 100x100 larger.
5. Click on Flood Fill and fill the areas around Image1 with a solid colour.

6. Go to File>Export>Gif Optimizer, and set your options to what is on the diagram below.

7. Press OK and export Image1 as a new picture.
8. Open Animation Shop and open Image1 as a new file.
9. Right click Image1 and select Insert Image Effect.
10. Change the scroll down menu to Underwater and the other details to what is on the diagram below.

11. Click on Customise and change the details to what is on the diagram below.

12. Run your animation a few times and delete any unnecessary frames. Fiddle around with speeds until you are happy.
**THIS NEXT PART IS OPTIONAL. YOU MAY FINISH AT STEP 12 AND CONTINUE ONTO STEP 17.**
13. Copy the first frame of the animation and paste it after your last frame.
14. Right click the (now) second last frame and select Insert Image Transition.
15. Change the scroll down menu to Fade and the other details to what is on the diagram below.

16. Repeat Step 12 again.
17. Now, open up your original image (that is, the pre-made icon with your text and whatnot on it) as a new file in Animation Shop.
18. Copy and paste the first frame until it has the same amount of frames as your animation.
19. Select all frames in both files and drag the animation until it is on top of your original file.
20. When you are satisfied with your animation, click the 'X' and save. Animation Shop will automatically optimise your animation. Make sure that the file is no bigger than 40kB (standard LJ icon size) and that you are happy with how it looks.

And that's it! I hope this was helpful to some people. ^_^
Examples of this animation on icons:


Any questions, criticism, broken links? Leave me a comment!
Edited to added: A similar tutorial for this effect for Photoshop and ImageReady, made by comeback, can be found here.