Spike tutorial
xtatiq requested a tutorial for this icon:

It's SO easy and there's hardly any steps.
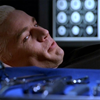
Get your base. Mine comes from a screencap from screencap-paradise.com
It's very very dark and blurry, so my next step is to duplicate the base and set it to screen, sharpen it, and duplicate that layer 3 times. There should be 4 screened layers above your base now.

Underneath the very top screen layer, make a new layer and fill it with #011537. Set it to exclusion.

On top of the exclusion layer, but still underneath the top screen layer, make a new layer and fill it with #E4D7BE. Set it to multiply.

Now, flatten the image, or merge all layers together, so that you have 1 layer.
Duplicate that layer and set it to soft light. I also took some red out of it by going to "color variations" and clicking "decrease red" once. You don't have to do that, though.

Underneath the soft light layer, make a new layer and fill it with #ADD8E7. Then set it to color-burn. Then duplicate the blue color burn layer and set the opacity to 32%.

On top of the blue color-burn layers, but still underneath the soft light layer, make a new layer and fill it with #DADADA. Set it to color-burn with the opacity set to 73%.
There you go!
Please don't copy this step by step on this screencap; this is meant to teach you techniques. I hope it helps you!
It's SO easy and there's hardly any steps.
Get your base. Mine comes from a screencap from screencap-paradise.com
It's very very dark and blurry, so my next step is to duplicate the base and set it to screen, sharpen it, and duplicate that layer 3 times. There should be 4 screened layers above your base now.
Underneath the very top screen layer, make a new layer and fill it with #011537. Set it to exclusion.
On top of the exclusion layer, but still underneath the top screen layer, make a new layer and fill it with #E4D7BE. Set it to multiply.
Now, flatten the image, or merge all layers together, so that you have 1 layer.
Duplicate that layer and set it to soft light. I also took some red out of it by going to "color variations" and clicking "decrease red" once. You don't have to do that, though.
Underneath the soft light layer, make a new layer and fill it with #ADD8E7. Then set it to color-burn. Then duplicate the blue color burn layer and set the opacity to 32%.
On top of the blue color-burn layers, but still underneath the soft light layer, make a new layer and fill it with #DADADA. Set it to color-burn with the opacity set to 73%.
There you go!
Please don't copy this step by step on this screencap; this is meant to teach you techniques. I hope it helps you!