tutorial #10, .psd file #5
This was made in Adobe Photoshop CS 8.0. and uses selective coloring and channel mixer.
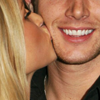
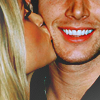
>>
1. Lighten your base. I duplicated the image and set it to SCREEN 39%.
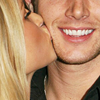
2. Selective coloring! Go to Layer >> New Adjustment Layer >> Selective Color. Input these settings at 100%.
REDS
Cyan: -68
Magenta: +26
Yellow: +76
Black: -12
YELLOWS
Cyan: +100
Magenta: +17
Yellow: -51
Black: -20
WHITES
Cyan: +100
Magenta: 0
Yellow: -23
Black: -10
NEUTRALS
Cyan: +9
Magenta: -10
Yellow: -6
Black: +6
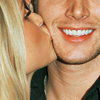
3. Go to Layer >> New Adjustment Layer >> Channel Mixer. Input these settings at 100%.
RED
Red: +112
Green: -12
Blue: -12
GREEN
Red: 0
Green: +100
Blue: 0
BLUE
Red: 0
Green: -12
Blue: +124
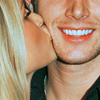
4. The white parts pf the icon, like Jensen's teeth, are turning a little bluish right now, so I used another selective coloring layer to fix that.
WHITES
Cyan: -70
Magenta: 0
Yellow: +6
Black: 0
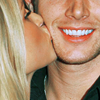
5. Make a new layer and fill it with #AAAAAA. Set that to COLOR BURN 73%.
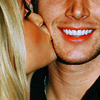
6. Place this texture by xswaniconsx on top at LIGHTEN 100%.


To sharpen I usually go all the way to the bottom of my layer pallete, duplicate my base, go to Filter >> Sharpen >> Sharpen, and set that to around 40%, or whatever looks sharp enough. I always sharpen at the end, because you keep duplicating sharpened layers, your icon will come out looking more and more jagged.
That's all! Play around with the settings and you'll probably come up with something really cool.
+.psd
icons made with similar settings:


+ feel free to watch the community :D
>>
1. Lighten your base. I duplicated the image and set it to SCREEN 39%.
2. Selective coloring! Go to Layer >> New Adjustment Layer >> Selective Color. Input these settings at 100%.
REDS
Cyan: -68
Magenta: +26
Yellow: +76
Black: -12
YELLOWS
Cyan: +100
Magenta: +17
Yellow: -51
Black: -20
WHITES
Cyan: +100
Magenta: 0
Yellow: -23
Black: -10
NEUTRALS
Cyan: +9
Magenta: -10
Yellow: -6
Black: +6
3. Go to Layer >> New Adjustment Layer >> Channel Mixer. Input these settings at 100%.
RED
Red: +112
Green: -12
Blue: -12
GREEN
Red: 0
Green: +100
Blue: 0
BLUE
Red: 0
Green: -12
Blue: +124
4. The white parts pf the icon, like Jensen's teeth, are turning a little bluish right now, so I used another selective coloring layer to fix that.
WHITES
Cyan: -70
Magenta: 0
Yellow: +6
Black: 0
5. Make a new layer and fill it with #AAAAAA. Set that to COLOR BURN 73%.
6. Place this texture by xswaniconsx on top at LIGHTEN 100%.
To sharpen I usually go all the way to the bottom of my layer pallete, duplicate my base, go to Filter >> Sharpen >> Sharpen, and set that to around 40%, or whatever looks sharp enough. I always sharpen at the end, because you keep duplicating sharpened layers, your icon will come out looking more and more jagged.
That's all! Play around with the settings and you'll probably come up with something really cool.
+.psd
icons made with similar settings:
+ feel free to watch the community :D