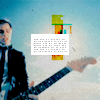
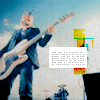
Tutorial #8

to

using Photoshop 7.
1) Crop your image, ect..
2) Go to Layer> New Adjustment Layer> Curves and follow these settings
RBG
Input: 70
Output: 120
RED
Input: 120
Output: 138
GREENS
Input: 148
Output: 129
BLUES
Input: 136
Output: 137
3) Go to Layer> New Adjustment Layer> Selective Color
REDS -58/-14/+100/0
YELLOWS -100/+24/-100/0
NEUTRALS +17/-16/-22/0
4) Layer> New Adjustment Layer> Selective Color
REDS -4/+11/+100/0
YELLOWS -100/0/-100/0
NEUTRALS +7/+10/-19/-14
5) Layer> New Adjustment Layer> Selective Color
REDS +100/-20/0/0
YELLOWS -100/+100/+100/0
NEUTRALS 0/-13/-17/+10
6) Layer> New Adjustment Layer> Selective Color
REDS -100/+17/+70/0
YELLOWS -100/0/-100/0
NEUTRALS 0/-13/-15/+5
7) Go to Layer> New Adjustment Layer> Color Balance
MIDTONES +10/+10/+10
SHADOWS +20/+10/+10
HIGHLIGHTS -10/0/+5
Make sure Preserve Luminosity is checked.
8) Go to Layer> New Adjustment Layer> Selective Color
REDS -56/+16/0/0
YELLOWS -100/-100/-34/0
NEUTRALS 0/-17/-15/+5
9) Layer> New Adjustment Layer> Selective Color
WHITES +94/-32/-29/0
10) You can brushes or textures. I pasted this texture (by peoplemachines)

and set it to multiply 100%.
11) Paste this texture (by sanami276)

and set it to Color Burn 100%.
12) You can add text or small text if you like. I added a small text box.

and you're done. If you need any help please let me know. Hope you like it. :)
PSD file-
http://www.box.net/shared/fdq3ajuvz4
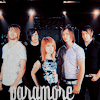
Other icons made with this tutorial:


