Tutorial #2 - Tom Fletcher, McFly (PSE 2.0)
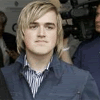
1. First of all, use a very pretty base, like this one I made. (Image Credit: Getty Images)
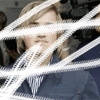
2. Next, create a new layer (name it Light Effect) and select any brush of your choosing. Then, using white, scribble over the base until you get something which looks a bit like this:
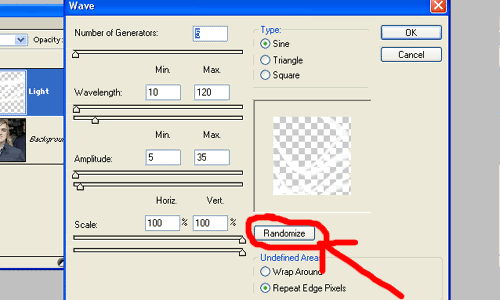
3. Here's the bit where it gets interesting. Go to 'Filter' near the top, go down to 'Distort' and click on Wave. The bit circled in red is where you need to click and basically it randomises where the wave will go. Try clicking it a few times to see the different results you get, then choose one. (Note: If you want, it may help if you use a more visible colour so you can see the results. I just used white because I was rushing.)
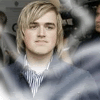
4. After you try out different patterns, click on 'Filter', 'Blur', then 'Gaussian Blur'. Set the pxiels to 3.5 - 4, then click okay. The 'light trail' should look a bit more realistic, like this:
5. Hide your light layer, and create a new layer named 'Screen'. Fill this with a deep navy blue (I used #4A4B82) and change the layer settings to Exclusion at about 40 - 45%

6. Create another new layer called 'Patterns', underneath the 'Screen' layer. Here, choose a similar colour (eg. #B8B8D3) and decorate using different brushes you may have. I'm using brushes bymiggy found here (she has an amazing talent for brushes.) and experiment. Here, I made a new layer for the text blob down the right hand side. Put back on the 'Light Effect' layer and put it above the 'Text Blob' and 'Patterns' layers.
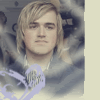
7. Add text in Book Antiqua, sixe 10 down the side in black, and use Transform to flip this to make it vertical. Then, use the same font (but size 2) to create smaller, non-readable text with lyrics/letters/hate messages/etc... to create something like this:

8. Now personally, I think this is a bit dark, so I merged all the layers together, then duplicated it and set it to Overlay at 70 - 80%. Fiddle around until you fins eomthing you like.

And we have a finished icon! As always, feel free to take it, comment and credit to eitherhelena_rw or masquerade_101.