On My Workbench: Wild Rose Squadron
"Ladies, I'd like to introduce you to your CO, Lieutenant Ranma Saotome. She's the best pilot in Skull and I'm sorry to be losing her, but I wanted to give her a chance to maximize her potential. She's a shit-hot pilot with more brass than an ammo factory and flew combat in F/A-18E's for sixteen months before coming here. She has six air-to-air kills, two DFCs and a Navy Cross. She has my utmost respect and every confidence. I expect Rose Squadron to do great things."
―Commander Roy Fokker, The Dragon Lady of Macross
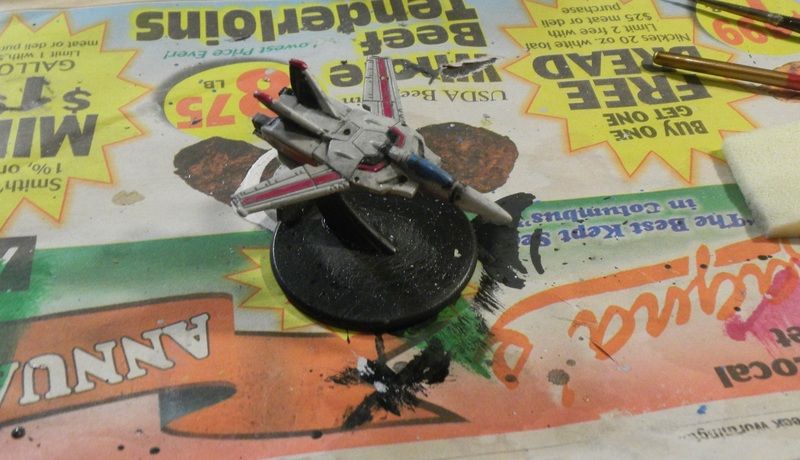
I've finished my first VT! Details of paint colors and techniques will be added below the fold once I get back from Hobbyland with some Testors Dullcote, but meanwhile here she is:
I began by changing my mind again and going back to Testors Model Master FS36495 Light Gray for the base color, instead of flat white. FS36495 is a very light gray, so the difference is subtle, but I felt that white looked a little too artificial. I saw a fanmade Robotech movie on YouTube, using CGI valks, and despite otherwise very good VFX work they just didn't look real, and I think the pure white color is the reason why.
According to "The Dragon Lady of Macross", the minor trim color for Rose VTs was black (I used Tamiya XF-1 Flat Black), and the major trim color was "dark pink". That turned out to be a challenging color. Looking over the entire range of Testors, Tamiya, Citadel and Gunze Sangyo at the local Hobbyland, I mostly found bright neon or bubblegum pinks, or else colors I considered to have crossed the line into purple. I ultimately chose to go with Testors Model Master #2757 Panther Pink, from their car model line, as the best compromise. I think it's a little too dark, but it was the least "too dark" I could come up with.
For the wing stripes, chest panel and vertical stab tips I used the panel lines engraved on the model as a guide. I think the wing stripes are a little too wide and swallow up the UEDF insignia. The stripes on the nose had to be hand-painted because there were no panel lines. The engine nacelles are supposed to fade aft from white to solid dark pink―Rose Squadron was originally the UEDF's aerobatic demo squadron, so they were entitled to be a little colorful―but I didn't feel up to painting that on such a tiny miniature. If I ever spring for Hasegawa's 1/48 scale VF-1A/J, I'll try it there.
In addition to the trim colors, I painted the engine exhausts and GU-11 gun pod with Testors Model Master #1795 Gunmetal, and used Citadel Lothern Blue for the canopy.
Following the advice of this classic scale modeling article, I waited 48 hours for the paint job to completely cure, and then gave the entire miniature a clear coat of Future floor polish. I then waited another 48 hours for that to cure. Then, yesterday I went to apply decals.
Which were frustrating and difficult. I'm not sure if my setting solution was stale or the decals are crappy, but they absolutely would not lie down flat. I went and got fresh bottles of Micro Set and Micro Sol, and my second attempt went a little better, at least where the UEDF arrowheads were concerned. The one squadron number I tried to apply, on the other hand, separated into its component layers and fell apart. I didn't try again. Ideally there should also be a dark pink rose on the vertical stabs, but the decal sheets don't include any squadron markings―certainly not for an AU squadron from a fanfic!
The sludge washes, on the other hand, went very well. Especially considering I haven't used this technique in about 9 years. The article I got it from is here (PDF link), but in short it's a mix of water, paint, and dish soap. It's the last ingredient that gives the sludge wash its name. The idea is that the soap will make the wash lift off flat surfaces easier, leaving paint only in the cracks. It's important to use acrylic paints and apply the wash over a smooth gloss finish. I counted on the Future to provide the latter, but I'm going to try Testors Model Master #1961 Gloss Lacquer on the next one.
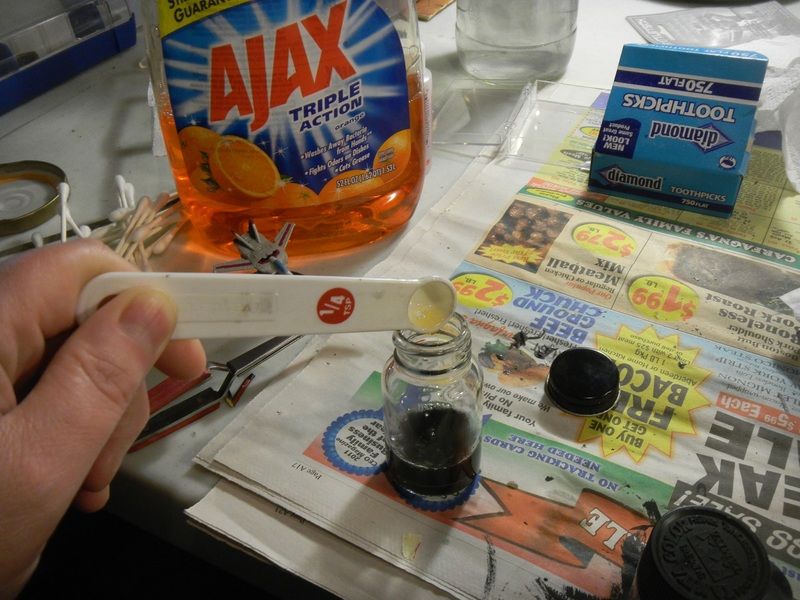
I mixed four parts water, two parts Tamiya XF-53 Neutral Gray, and three parts dish soap. The article suggests five parts water, but notes the ratio isn't an exact science, and I think Tamiya paints are slightly thinner than the Polly S the author used. Ideally the wash should just be applied to panel lines, but these miniatures are so tiny it was pretty much impossible to avoid slathering it over the entire model. After 30 minutes I then swabbed it off again using a combination of Q-tips and makeup sponges.

I think it came out very well. Black would have been too stark and artificial-looking; the medium gray complemented the light gray base coat very nicely without being overpowering. I did mix up a black sludge wash as well―and that's the one I took photos of―but it was only used for the air intakes, canopy frame, the anti-glare panel in front of the cockpit, and the boundary panel line separating the black and pink stripes on the chest panel.
In the photos above there's still a bit of shiny from the Future coat, because as mentioned I didn't have any clear flat. I went to get some today, and instead of Dullcote I sprang for the slightly costlier Testors Model Master #1960 Lusterless Lacquer. Buying cheap has bitten me on the ass more than once.
But other than the flat coat, she's done! Now I just need to do the other 23....
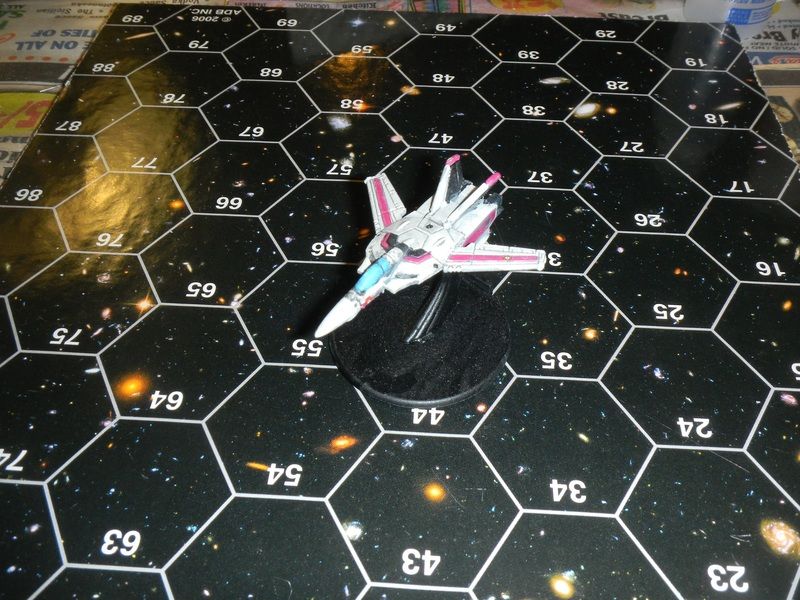
ETA: here's two more photos, after adding the clear flat sealant:

―Commander Roy Fokker, The Dragon Lady of Macross
I've finished my first VT! Details of paint colors and techniques will be added below the fold once I get back from Hobbyland with some Testors Dullcote, but meanwhile here she is:
I began by changing my mind again and going back to Testors Model Master FS36495 Light Gray for the base color, instead of flat white. FS36495 is a very light gray, so the difference is subtle, but I felt that white looked a little too artificial. I saw a fanmade Robotech movie on YouTube, using CGI valks, and despite otherwise very good VFX work they just didn't look real, and I think the pure white color is the reason why.
According to "The Dragon Lady of Macross", the minor trim color for Rose VTs was black (I used Tamiya XF-1 Flat Black), and the major trim color was "dark pink". That turned out to be a challenging color. Looking over the entire range of Testors, Tamiya, Citadel and Gunze Sangyo at the local Hobbyland, I mostly found bright neon or bubblegum pinks, or else colors I considered to have crossed the line into purple. I ultimately chose to go with Testors Model Master #2757 Panther Pink, from their car model line, as the best compromise. I think it's a little too dark, but it was the least "too dark" I could come up with.
For the wing stripes, chest panel and vertical stab tips I used the panel lines engraved on the model as a guide. I think the wing stripes are a little too wide and swallow up the UEDF insignia. The stripes on the nose had to be hand-painted because there were no panel lines. The engine nacelles are supposed to fade aft from white to solid dark pink―Rose Squadron was originally the UEDF's aerobatic demo squadron, so they were entitled to be a little colorful―but I didn't feel up to painting that on such a tiny miniature. If I ever spring for Hasegawa's 1/48 scale VF-1A/J, I'll try it there.
In addition to the trim colors, I painted the engine exhausts and GU-11 gun pod with Testors Model Master #1795 Gunmetal, and used Citadel Lothern Blue for the canopy.
Following the advice of this classic scale modeling article, I waited 48 hours for the paint job to completely cure, and then gave the entire miniature a clear coat of Future floor polish. I then waited another 48 hours for that to cure. Then, yesterday I went to apply decals.
Which were frustrating and difficult. I'm not sure if my setting solution was stale or the decals are crappy, but they absolutely would not lie down flat. I went and got fresh bottles of Micro Set and Micro Sol, and my second attempt went a little better, at least where the UEDF arrowheads were concerned. The one squadron number I tried to apply, on the other hand, separated into its component layers and fell apart. I didn't try again. Ideally there should also be a dark pink rose on the vertical stabs, but the decal sheets don't include any squadron markings―certainly not for an AU squadron from a fanfic!
The sludge washes, on the other hand, went very well. Especially considering I haven't used this technique in about 9 years. The article I got it from is here (PDF link), but in short it's a mix of water, paint, and dish soap. It's the last ingredient that gives the sludge wash its name. The idea is that the soap will make the wash lift off flat surfaces easier, leaving paint only in the cracks. It's important to use acrylic paints and apply the wash over a smooth gloss finish. I counted on the Future to provide the latter, but I'm going to try Testors Model Master #1961 Gloss Lacquer on the next one.
I mixed four parts water, two parts Tamiya XF-53 Neutral Gray, and three parts dish soap. The article suggests five parts water, but notes the ratio isn't an exact science, and I think Tamiya paints are slightly thinner than the Polly S the author used. Ideally the wash should just be applied to panel lines, but these miniatures are so tiny it was pretty much impossible to avoid slathering it over the entire model. After 30 minutes I then swabbed it off again using a combination of Q-tips and makeup sponges.
I think it came out very well. Black would have been too stark and artificial-looking; the medium gray complemented the light gray base coat very nicely without being overpowering. I did mix up a black sludge wash as well―and that's the one I took photos of―but it was only used for the air intakes, canopy frame, the anti-glare panel in front of the cockpit, and the boundary panel line separating the black and pink stripes on the chest panel.
In the photos above there's still a bit of shiny from the Future coat, because as mentioned I didn't have any clear flat. I went to get some today, and instead of Dullcote I sprang for the slightly costlier Testors Model Master #1960 Lusterless Lacquer. Buying cheap has bitten me on the ass more than once.
But other than the flat coat, she's done! Now I just need to do the other 23....
ETA: here's two more photos, after adding the clear flat sealant: