Ask the maker filled request 6 of 7
This is for round 6 of ATM, requested by dixon.

[Will]
This is the screencap you will need. From season 2 episode 2
I don't remember what I did with the base for this other than brightening it up like below,

I sharpened it, stamped a new layer and set to Screen at 36%. This is the final base we'll be working with,
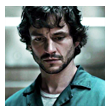
So edit the base to your liking.
Create a levels layer and change the settings to 9, 1.17, 229. Erase on the mask form the white lights in the background like so,

Take this color #8eb8b2 and paint the background
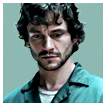
Set to Multiply, copy the layer and set to Overlay at 45%.
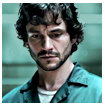
Next, download this gradient map. Set to Subtract at 36%
Download another gradient map. Set to Overlay at 25%.

Go back to the Levels layer, copy it and move it to the top of your layers.
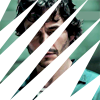
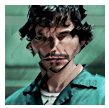
Next stamp your layers and using the Polygonal Lasso tool make some jagged cutouts like below then move the image to the right (or which ever direction looks best with your version)
>>
Next take this texture and set to Divide at 38%
I don't know where this is from, it looks like I edited it from something.
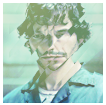
Then add this texture. Set to Hard Light at 84%
>>
Create a Hue/Saturation layer and set it to Color. Set the Saturation to +28
Make a Color Balance layer, set to color and roughly cut out everything except for his head and neck,

Check Preserve Luminosity. Change the settings to +8, -24, -36.
Create another Color Balance layer and erase the mask from his head and neck. Change the settings to -22, -6, +37

Make a Vibrance layer and set to Color. Change the settings to +34 and +11.
Create a Brightness/Contrast layer and set to -2 and 40.
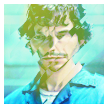
Make a Levels layer and set to 22, 1.07, 255.
Add this texture, set to Multiply at 60%.

Add this texture to the left side, set to Screen at 78%
Make a Color Balance layer set to Color at 80% change the settings to +6, -29, -8.
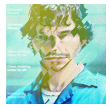
Create another Vibrance layer set to Color and roughly erase like below,

Flatten, save and you're done!


[Bedelia]
This is the screencap you will need. From season 2 episode 12
I can't tell if I did anything with the base but this is what I have,

Make a layer mask and erase the background.
The first layer (as the background behind Bedelia) is this cropped texture (I think)
And this next one which is a cropped part of this (by makomoriss @ tumblr?). Set to Multiply at 58%

Make a new layer and a black slightly blurry shape of Bedelia, set to Overlay and moved to the left a bit to create a shadow.
Copy the layer of Bedelia and resize down a bit so there's more space above her.
This is what we have so far,

Next you'll need this image of roses (by longlongwaydown @ tumblr?).
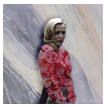
Take your image and resize like below then mask it so it's only covering her shirt. Set to Hard Light at 69%.
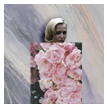
>>
Next take a yellow color and paint her hair. Set to Multiply at 25%.
Next create a layer and with a red about this color #b22126 use a small splatter brush and paint over her face. Use a mask to edit cleanly around her hair.

Then add some shadows with a small soft brush with black to give her shirt some shadows and depth. Set to Overlay at 57%.
Create a Brightness/Contrast layer over her shirt only and change the settings to 29 and 80
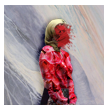
Make another Brightness/Contrast layer and change the settings to 4 and 29
Next download this gradient map, set to Hard Light.
Create a new layer and with a soft brush on low opacity, paint over the left side and use Gaussian Blur to blend it out a little more. Set to Overlay.
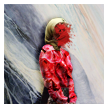
Create a new Curves layer and erase from her shirt. Change the settings to Output: 138 Input: 114 in RGB mode, set opacity to 56%.
Stamp all the layers and sharpen to your liking. This is my result,
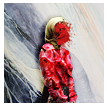
Add this texture and set to Hard Light at 23%

Create a black and white gradient map and set it to 47% opacity
Make a Levels layer and change the settings to 12, 1.17, 247
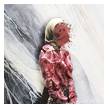
Copy the last texture layer and bring it up to the top. Set to Multiply at 23%
Add this texture, set to Subtract at 26%
This texture next on Screen
Current look
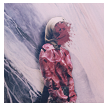
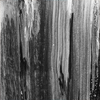
Next find a texture that has lines through it like below. I don't know where the original for this is from. So try to find something similar. I have this one set on Screen at 59%
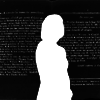
Add this texture on Soft Light at 40%
Make a Levels layer and change the settings to 17, 1.14, 246

Create a Brightness/Contrast layer and change the settings to 4 and 10
Next with a soft brush use black to paint over the paint splatter on her face. Set to Soft Light at 46%.
Add this texture and set to Linear Dodge at 38%
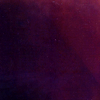
Add this texture and rotate it like below and erase from around her. Set to Screen at 79%
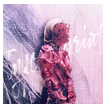
Create a Levels layer and change the settings to 0, 1.00, 252
Flatten, save and you're done!


[Will]
This is the screencap you will need. From season 2 episode 2
I don't remember what I did with the base for this other than brightening it up like below,

I sharpened it, stamped a new layer and set to Screen at 36%. This is the final base we'll be working with,
So edit the base to your liking.
Create a levels layer and change the settings to 9, 1.17, 229. Erase on the mask form the white lights in the background like so,
Take this color #8eb8b2 and paint the background
Set to Multiply, copy the layer and set to Overlay at 45%.
Next, download this gradient map. Set to Subtract at 36%
Download another gradient map. Set to Overlay at 25%.
Go back to the Levels layer, copy it and move it to the top of your layers.
Next stamp your layers and using the Polygonal Lasso tool make some jagged cutouts like below then move the image to the right (or which ever direction looks best with your version)
>>
Next take this texture and set to Divide at 38%
I don't know where this is from, it looks like I edited it from something.
Then add this texture. Set to Hard Light at 84%
>>
Create a Hue/Saturation layer and set it to Color. Set the Saturation to +28
Make a Color Balance layer, set to color and roughly cut out everything except for his head and neck,
Check Preserve Luminosity. Change the settings to +8, -24, -36.
Create another Color Balance layer and erase the mask from his head and neck. Change the settings to -22, -6, +37
Make a Vibrance layer and set to Color. Change the settings to +34 and +11.
Create a Brightness/Contrast layer and set to -2 and 40.
Make a Levels layer and set to 22, 1.07, 255.
Add this texture, set to Multiply at 60%.
Add this texture to the left side, set to Screen at 78%
Make a Color Balance layer set to Color at 80% change the settings to +6, -29, -8.
Create another Vibrance layer set to Color and roughly erase like below,
Flatten, save and you're done!


[Bedelia]
This is the screencap you will need. From season 2 episode 12
I can't tell if I did anything with the base but this is what I have,

Make a layer mask and erase the background.
The first layer (as the background behind Bedelia) is this cropped texture (I think)
And this next one which is a cropped part of this (by makomoriss @ tumblr?). Set to Multiply at 58%
Make a new layer and a black slightly blurry shape of Bedelia, set to Overlay and moved to the left a bit to create a shadow.
Copy the layer of Bedelia and resize down a bit so there's more space above her.
This is what we have so far,
Next you'll need this image of roses (by longlongwaydown @ tumblr?).
Take your image and resize like below then mask it so it's only covering her shirt. Set to Hard Light at 69%.
>>
Next take a yellow color and paint her hair. Set to Multiply at 25%.
Next create a layer and with a red about this color #b22126 use a small splatter brush and paint over her face. Use a mask to edit cleanly around her hair.
Then add some shadows with a small soft brush with black to give her shirt some shadows and depth. Set to Overlay at 57%.
Create a Brightness/Contrast layer over her shirt only and change the settings to 29 and 80
Make another Brightness/Contrast layer and change the settings to 4 and 29
Next download this gradient map, set to Hard Light.
Create a new layer and with a soft brush on low opacity, paint over the left side and use Gaussian Blur to blend it out a little more. Set to Overlay.
Create a new Curves layer and erase from her shirt. Change the settings to Output: 138 Input: 114 in RGB mode, set opacity to 56%.
Stamp all the layers and sharpen to your liking. This is my result,
Add this texture and set to Hard Light at 23%
Create a black and white gradient map and set it to 47% opacity
Make a Levels layer and change the settings to 12, 1.17, 247
Copy the last texture layer and bring it up to the top. Set to Multiply at 23%
Add this texture, set to Subtract at 26%
This texture next on Screen
Current look
Next find a texture that has lines through it like below. I don't know where the original for this is from. So try to find something similar. I have this one set on Screen at 59%
Add this texture on Soft Light at 40%
Make a Levels layer and change the settings to 17, 1.14, 246
Create a Brightness/Contrast layer and change the settings to 4 and 10
Next with a soft brush use black to paint over the paint splatter on her face. Set to Soft Light at 46%.
Add this texture and set to Linear Dodge at 38%
Add this texture and rotate it like below and erase from around her. Set to Screen at 79%
Create a Levels layer and change the settings to 0, 1.00, 252
Flatten, save and you're done!
