Tutorial #3
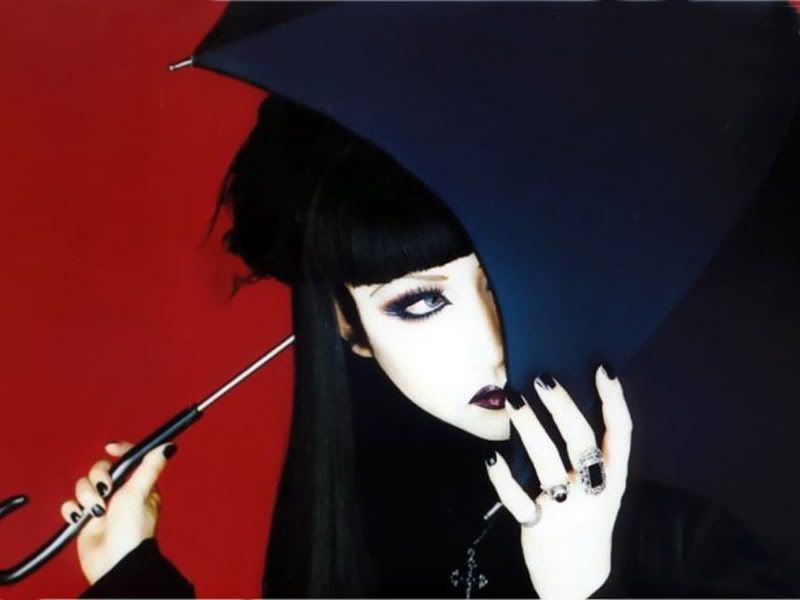
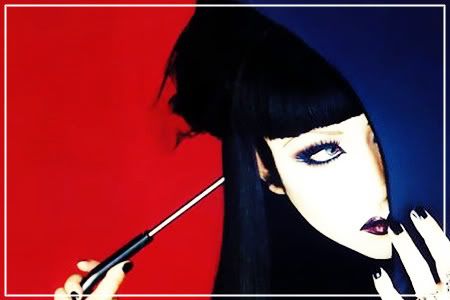
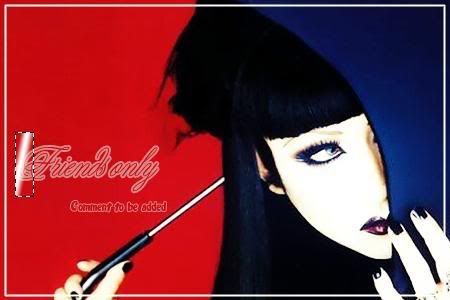
We are going to go from this

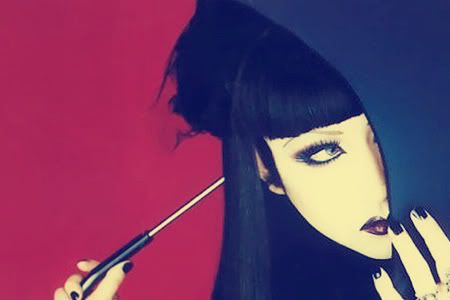
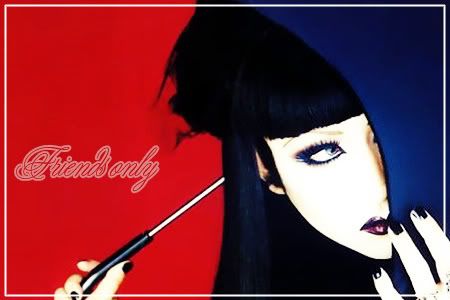
to this

♥ Some of you guys requested this and asked how I did mana's FO banner, so here is the tutorial ^_^
♥ I used Adobe photoshop 7, but I'm sure it will work with other programs and versions as well.
♥ I worked on one of Mana's pics he is japanese guitarist.
♥ Sorry English is not my first language, so I think there is some grammar mistakes or even spelling mistakes ^^;;
♥ Lets start~
- I took this pic and resized it, sharpen once, (filter>sharpen> shapren) so it looked like this.

- Duplicate the base layer and set it screen 50%

- Add new fill layer, (layer> new layer) then fill it with #071151 (Very dark blue) set it exclusion 100%
- Add new fill layer, (layer> new layer) then fill it with #CCCCCC (light gray) set it soft light (opacity 50%)
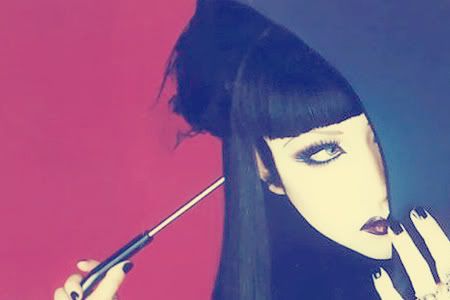
- Duplicate the base and drag it to the top, set it overlay (opacity 100%)
- Looking good? now make new layer, then take the selection tool, the rectangle one, and draw with it a border.

- After making the rectangle selection go to (Select> modify> border)
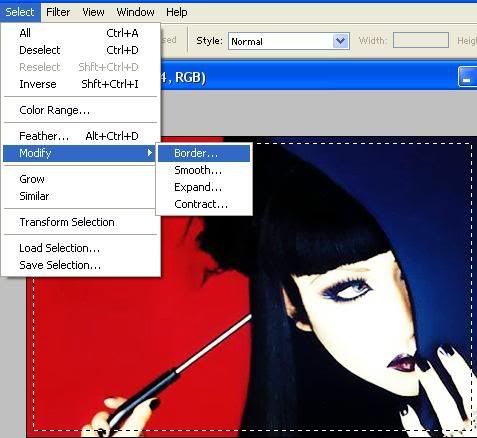
- You will see a small table asking you about the width in pixels, make it 1 pixel then press ok.
- Nothing will change infront of you, you just take the brush tool and select a color, I prefer white on this pic, then color on top of the selection, and you will see that you get border because of the selection.
- Now write whatever you want and do any effects on the font. I used Young Baroque LET font, the size is 48 and strong, the font color is #CC080F and I set it normal, in the blending options I made stroke, the size 2px and position outside and the opacity 100%, the color of the stroke is #D98989
- Take the selection rectangle again, draw small rectangle.(ps. you can write anything else too but dont applay the rectangle on it) make it like this.

- Now after writing another words, we will use the gradient tool, and you can find it under the bucket. we will need this effect. you make it.
opacity 0% , opacity 100%, opacity 0%
nothing, white, white.
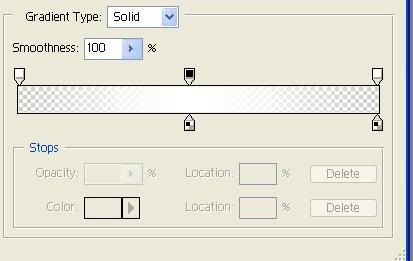
- Make new layer (make sure its above the friend only layer) and applay the gradient like this then click ctrl+G or (Layer> group with previous) then disselect the rectangle we dont need it now (select> deselect) so our pic looks like this now, see the white gradient, its inside the font.

- Now we go to the image ready make new layer in the animation bar.

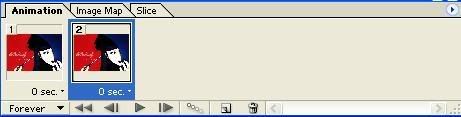
- Click on the gradient layer, as we are on the 2nd layer in the animation bar, move the gradient layer to the end of the words. like this. and make both frames delay 0.1 seconds

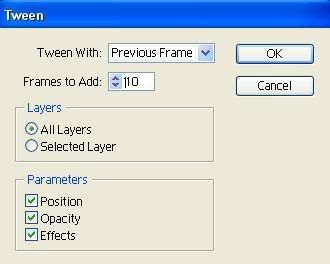
- Click on the tween, and make it like this
- View it, and if you liked it go to (File> save optimized as) It should be gif.
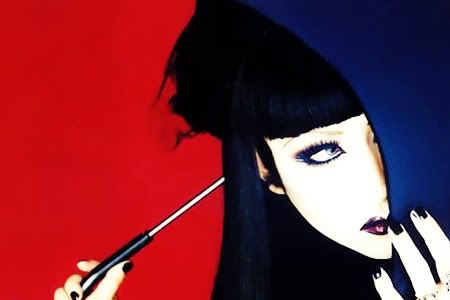
- Tada~ here is what we made ^_^

I hope this tutorial wasn't hard for you guys~ ♥
♥ For more Icons, graphics and tutorials watch my graphic community @ luvyuyu_graphic
♥ Want to request something? you can ask for graphics or even tutorials here
♥ Comment please, I dont want to feel that I waste my time for nothing..