Tutorials #13 & #14
from 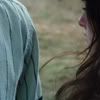
to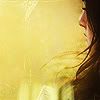
requested by shylove07
Icon from this batch.
Created using Adobe Photoshop CS3
Note: This is a re-creation, not exactly identical to the icon from the original post.
01. I took this cap of mine and resized it to 150px height. Then hit STRG+A to select the image, STRG+C to copy and on a new 100x100 canvas hit STRG+V to paste the image as a new layer. Move the image around until you find an interesting crop.
result:
02. For this icon I wanted to concentrate on Kristen Stewart, so using the smudge tool, I carefully removed Robert Pattinson and smoothed the background around Kristen.
Make sure to leave some texture in the icon. That'll make it more interesting in the end.
Once you're done with the smudge tool go to Filter > Sharpen > Sharpen
result: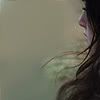
03. Duplicate this layer and set it to Screen 100%
Duplicate this layer again and set it to Soft Light 60%
result: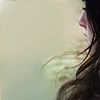
04. Your base is finished. Now, we can try and get some color into the icon. Here comes the tricky part though.
This is something that I like to do in order to get some more color and texture variety into an icon. I duplicated the soft layer that is currently on top.
Rotate the layer. Edit > Transform > Rotate 90 CW
Go to Adjustments > Brightness/Contrast and set Brightness to +59 and Contrast to +10
Set the layer to Normal 100% and move it around a bit. Here's what I ended up with.
result: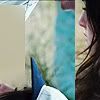
05. Using the smudge tool I erased the part of this layer that covered Kristen's hair.
result: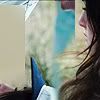
06. Now set this layer to Lighten 100%
And sharpen it. Filter > Sharpen > Sharpen
Go to Edit > Fade Sharpen and set to 62%
result: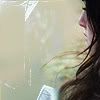
07. Go to Layer > New Fill Layer > Gradient
Load up this layer (sorry, I couldn't reproduce my settings because I have no idea what I was doing with this layer *lol*) and hit OK.
result:
08. Paste this
texture (by ??) and set the layer to Multiply 51%
result: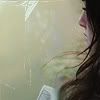
09. Paste this
gradient (my own) as a new layer and set it to Lighten 66%
result:
10. Paste this
gradient (my own) as a new layer and set it to Lighten 33%
result: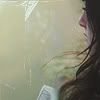
11. Paste this
texture (my own) as a new layer and set it to Multiply 100%
result: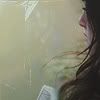
12. Paste this
texture (by spookyzangel) and set the layer to Soft Light 100%
Note: I used the smudge tool on the original texture to get rid of a bit of the lilac in the bottom left corner.
result: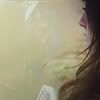
13. Go to Layer > New Adjustment Layer > Levels
settings:
Input Levels 0 1,10 250
Output Levels 0 255
Set this layer to Normal 61%
result: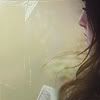
14. Paste this
texture (by spinspiderspin) and set the layer to Multiply 44%
Erase the parts on the right that cover Kristen's face.
result: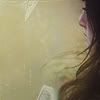
15. Go to Layer > New Adjustment Layer > Brightness/Contrast
settings:
Brightness 0
Contrast +25
result: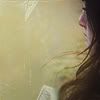
16. Go to Layer > New Adjustment Layer > Brightness/Contrast
settings:
Brightness +26
Contrast +57
result:
17. Go to Layer > New Adjustment Layer > Selective Colors
settings:
Reds -1 0 0 0
Neutrals -30 -10 +16 -2
result:
18. Go to Layer > New Adjustment Layer > Levels
settings:
Input Levels 0 0,89 240
Output Levels 0 255
result: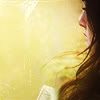
19. Paste this
texture (my own) and set the layer to Multiply 60%
result:
20. Paste this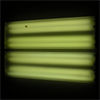
texture (by spinspiderspin) and set the layer to Screen 100%
Rotate the layer. Edit > Transform > Rotate 90 CW and move the layer around to the bottom of the icon.
Using the smudge tool, smooth around the edges a bit.
Merge all layers and sharpen your icon.
Filter > Sharpen > Sharpen
Go to Edit > Fade Sharpen and set to 51%
And you're done!
finale result:
DOWNLOAD PSD
from
to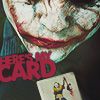
requested by loveshot
Icon from this batch.
Created using Adobe Photoshop CS3
01. I took this cap and resized it to 170px height. Then hit STRG+A to select the image, STRG+C to copy and on a new 100x100 canvas hit STRG+V to paste the image as a new layer. Move the image around until you find an interesting crop.
result:
02. Using the smudge tool, I smoothed the bottom of the picture.
Once you're done with the smudge tool go to Filter > Sharpen > Sharpen
result: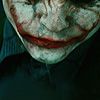
03. Duplicate your this layer and set it to Screen 100%
Got to Filter > Sharpen > Sharpen
Then Edit > Fade Sharpen and set to 39%
result: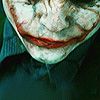
04. Next I took this cap and resized it to 250px height.
Using the lasso tool with a 5px feather, I drew around the joker card, then hit STRG+C to copy my new selection.
Then go back to your original canvas and hit STRG+V to paste your selection as a new layer. Move it around until you find the perfect placement for it.
result: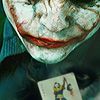
05. On this layer go to Filter > Sharpen > Sharpen and then Edit > Fade Sharpen 40%
Set the layer to Lighten 100%
Using the smudge tool, carefully remove the Joker's eyes
result:
06. Go to Layer > New Adjustment Layer > Brightness Contrast
Set Contrast to +9
result: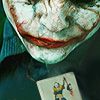
07. Paste this
texture (my own) and set the layer to Lighten 66%
result:
08. Paste this
texture (my own) and set the layer to Lighten 33%
result: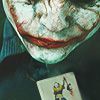
09. Go to Layer > New Adjustment Layer > Selective Colors
Reds +67 +10 -71 0
Neutrals -9 +9 0 +6
result: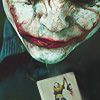
10. Paste this
texture (my own) as a new layer and set it to Multiply 100%
result: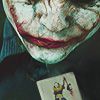
11. Paste this
texture (by spookyzangel) and set the layer to Soft Light 47%
Note: I used the smudge tool on the original texture to get rid of a bit of the lilac in the bottom left corner.
result: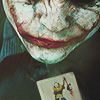
12. Go to Layer > New Adjustment Layer > Levels
settings:
Input Levels 0 1,10 250
Output Levels 0 255
Set this layer to Normal 61%
result: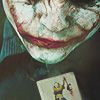
13. Paste this
texture (by spinspiderspin) and set the layer to Multiply 33%
result: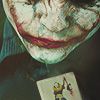
14. Next, I added the text. I used the font FolksBlack in the color #903240.
After writing the text, I went to Edit > Transform > Rotate and rotated the layer a bit.
Go to Layer > Layer Style > Stroke. I used the following settings:
Size: 1px
Position: Outside
Blend Mode: Normal
Opacity: 61%
Fill Type: Color
Color: #313131
result: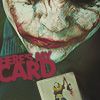
15. Go to Layer > New Adjustment Layer > Brightness/Contrast
settings:
Brightness 0
Contrast +25
result: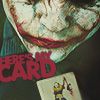
16. Go to Layer > New Adjustment Layer > Curves
RGB 1st Point: 45 (Input) 42 (Output), 2nd Point: 174 (Input) 189 (Output)
Red 183 (Input) 182 (Output)
Green 180 (Input) 176 (Output)
Blue 168 (Input) 178 (Output)
Merge all layers and you're done!
final result:
DOWNLOAD PSD

to

requested by shylove07
Icon from this batch.
Created using Adobe Photoshop CS3
Note: This is a re-creation, not exactly identical to the icon from the original post.
01. I took this cap of mine and resized it to 150px height. Then hit STRG+A to select the image, STRG+C to copy and on a new 100x100 canvas hit STRG+V to paste the image as a new layer. Move the image around until you find an interesting crop.
result:

02. For this icon I wanted to concentrate on Kristen Stewart, so using the smudge tool, I carefully removed Robert Pattinson and smoothed the background around Kristen.
Make sure to leave some texture in the icon. That'll make it more interesting in the end.
Once you're done with the smudge tool go to Filter > Sharpen > Sharpen
result:

03. Duplicate this layer and set it to Screen 100%
Duplicate this layer again and set it to Soft Light 60%
result:

04. Your base is finished. Now, we can try and get some color into the icon. Here comes the tricky part though.
This is something that I like to do in order to get some more color and texture variety into an icon. I duplicated the soft layer that is currently on top.
Rotate the layer. Edit > Transform > Rotate 90 CW
Go to Adjustments > Brightness/Contrast and set Brightness to +59 and Contrast to +10
Set the layer to Normal 100% and move it around a bit. Here's what I ended up with.
result:

05. Using the smudge tool I erased the part of this layer that covered Kristen's hair.
result:

06. Now set this layer to Lighten 100%
And sharpen it. Filter > Sharpen > Sharpen
Go to Edit > Fade Sharpen and set to 62%
result:

07. Go to Layer > New Fill Layer > Gradient
Load up this layer (sorry, I couldn't reproduce my settings because I have no idea what I was doing with this layer *lol*) and hit OK.
result:

08. Paste this

texture (by ??) and set the layer to Multiply 51%
result:

09. Paste this

gradient (my own) as a new layer and set it to Lighten 66%
result:

10. Paste this

gradient (my own) as a new layer and set it to Lighten 33%
result:

11. Paste this

texture (my own) as a new layer and set it to Multiply 100%
result:

12. Paste this

texture (by spookyzangel) and set the layer to Soft Light 100%
Note: I used the smudge tool on the original texture to get rid of a bit of the lilac in the bottom left corner.
result:

13. Go to Layer > New Adjustment Layer > Levels
settings:
Input Levels 0 1,10 250
Output Levels 0 255
Set this layer to Normal 61%
result:

14. Paste this

texture (by spinspiderspin) and set the layer to Multiply 44%
Erase the parts on the right that cover Kristen's face.
result:

15. Go to Layer > New Adjustment Layer > Brightness/Contrast
settings:
Brightness 0
Contrast +25
result:

16. Go to Layer > New Adjustment Layer > Brightness/Contrast
settings:
Brightness +26
Contrast +57
result:

17. Go to Layer > New Adjustment Layer > Selective Colors
settings:
Reds -1 0 0 0
Neutrals -30 -10 +16 -2
result:

18. Go to Layer > New Adjustment Layer > Levels
settings:
Input Levels 0 0,89 240
Output Levels 0 255
result:

19. Paste this

texture (my own) and set the layer to Multiply 60%
result:

20. Paste this

texture (by spinspiderspin) and set the layer to Screen 100%
Rotate the layer. Edit > Transform > Rotate 90 CW and move the layer around to the bottom of the icon.
Using the smudge tool, smooth around the edges a bit.
Merge all layers and sharpen your icon.
Filter > Sharpen > Sharpen
Go to Edit > Fade Sharpen and set to 51%
And you're done!
finale result:

DOWNLOAD PSD
from

to

requested by loveshot
Icon from this batch.
Created using Adobe Photoshop CS3
01. I took this cap and resized it to 170px height. Then hit STRG+A to select the image, STRG+C to copy and on a new 100x100 canvas hit STRG+V to paste the image as a new layer. Move the image around until you find an interesting crop.
result:

02. Using the smudge tool, I smoothed the bottom of the picture.
Once you're done with the smudge tool go to Filter > Sharpen > Sharpen
result:

03. Duplicate your this layer and set it to Screen 100%
Got to Filter > Sharpen > Sharpen
Then Edit > Fade Sharpen and set to 39%
result:

04. Next I took this cap and resized it to 250px height.
Using the lasso tool with a 5px feather, I drew around the joker card, then hit STRG+C to copy my new selection.
Then go back to your original canvas and hit STRG+V to paste your selection as a new layer. Move it around until you find the perfect placement for it.
result:

05. On this layer go to Filter > Sharpen > Sharpen and then Edit > Fade Sharpen 40%
Set the layer to Lighten 100%
Using the smudge tool, carefully remove the Joker's eyes
result:

06. Go to Layer > New Adjustment Layer > Brightness Contrast
Set Contrast to +9
result:

07. Paste this

texture (my own) and set the layer to Lighten 66%
result:

08. Paste this

texture (my own) and set the layer to Lighten 33%
result:

09. Go to Layer > New Adjustment Layer > Selective Colors
Reds +67 +10 -71 0
Neutrals -9 +9 0 +6
result:

10. Paste this

texture (my own) as a new layer and set it to Multiply 100%
result:

11. Paste this

texture (by spookyzangel) and set the layer to Soft Light 47%
Note: I used the smudge tool on the original texture to get rid of a bit of the lilac in the bottom left corner.
result:

12. Go to Layer > New Adjustment Layer > Levels
settings:
Input Levels 0 1,10 250
Output Levels 0 255
Set this layer to Normal 61%
result:

13. Paste this

texture (by spinspiderspin) and set the layer to Multiply 33%
result:

14. Next, I added the text. I used the font FolksBlack in the color #903240.
After writing the text, I went to Edit > Transform > Rotate and rotated the layer a bit.
Go to Layer > Layer Style > Stroke. I used the following settings:
Size: 1px
Position: Outside
Blend Mode: Normal
Opacity: 61%
Fill Type: Color
Color: #313131
result:

15. Go to Layer > New Adjustment Layer > Brightness/Contrast
settings:
Brightness 0
Contrast +25
result:

16. Go to Layer > New Adjustment Layer > Curves
RGB 1st Point: 45 (Input) 42 (Output), 2nd Point: 174 (Input) 189 (Output)
Red 183 (Input) 182 (Output)
Green 180 (Input) 176 (Output)
Blue 168 (Input) 178 (Output)
Merge all layers and you're done!
final result:

DOWNLOAD PSD