First icon coloring tutorial!
How to achieve this coloring

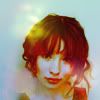
other icons made with the same coloring


I've made this coloring tutorial which was requested by babliz .
It matches well with screencaps and promo pictures.
This tutorial involves
-selective coloring,
-curves,
-color balance,
-color fill layers!
+ psd.file
-made with Adobe Photoshop 7
1. First, select your picture.
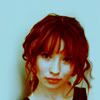
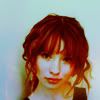
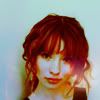
I've chosen this one from Emily Browning(from Emily-Brwoning.com).
Prepare your base, this is how mine looks like:

2. Duplicate your base.
Set it to Screen 63%

3. Duplicate your base again.
Drag it to the top and set it to Soft Light 100%

4. New Color Fill Layer 3B0714 to Exclusion 100%

5. New Color Fill Layer F2B013 to Color Burn 6%

Note: Step 4 and 5 were inspired by a tutorial from abernathi at distractiions
6. New Color Fill Layer 072C3B to Exclusion 36%

7. New Color Balance Layer
midtones: 25, 0, 15
shadows: 15, 7, -35
highlights: -3, 0, 15
Set this layer's opacity to 60%

8. New Color Fill Layer DDFAF6 to Color Burn 100%

9. Selective Color Layer
reds: -100, 0, 0, 0
yellows: 0, 0, -16, -6
whites: 9, -14, -100, 3
neutrals: 16, 2, -4, -24

10. Another Selective Color Layer
reds: -40, 5, 100, 13
yellows: -42, 0, -7, 5
whites: 0, -15, -100, 0
neutrals: 6, 2, 21, 22

11. New Color Fill Layer FEF9EF to Color Burn 100%

12. New Color Fill Layer E8F1FC to Color Burn 100%
13. New Curves Layer
RGB:
input 122
output 140
Blue:
input 121
output 135
Lower the opacity of this one to 25%

14. Another Curves Layer
RGB:
input 142
output 150

15. The last Selective Color Layer
reds: -5, 0, 0, 21
yellows: 0, 0, -6, 3
whites: 0, 6, -100, 0
neutrals: 3, 0, 19, -5

Well, now we're done with the coloring.
I added some light texture to brighten up the icon
16. Now drag this texture(I don't know who made it, please tell me if you know) to the top.
Set it to Screen 67%

17. Add this texture by cielo-gris and set it to Darken 25%

18. Another texture by matchbox_icons
Drag it to the bottom right corner of your picture and set it to Screen 100%
19. Now add this texture by worship_elle and place it again into the bottom
right corner of the icon.
Set it to Screen 55%
20. This texture was made by vol4itca
Drag it into the left upper corner of your icon.
Set it to Screen 100%

21. Last Step! Take this texture from babliz and set it to Lighten 100%

edit: I uploaded a psd.file as it was requested:
>>psd<<
And now you're finally done! Feel free to share your results with me.
Comments are great and my motivation :)
Of course the coloring looks different at every picture.
Just play around with the opacities and don't copy this tut exactly.
Add a screen layer if it's too dark and if your icon is getting too yellow just
delete the color burn layer from step 5 or raise the opacity of the exlucsion layer from step 6.
If you have problems or questions, just ask! I'll try to help you.


other icons made with the same coloring


I've made this coloring tutorial which was requested by babliz .
It matches well with screencaps and promo pictures.
This tutorial involves
-selective coloring,
-curves,
-color balance,
-color fill layers!
+ psd.file
-made with Adobe Photoshop 7
1. First, select your picture.
I've chosen this one from Emily Browning(from Emily-Brwoning.com).
Prepare your base, this is how mine looks like:

2. Duplicate your base.
Set it to Screen 63%

3. Duplicate your base again.
Drag it to the top and set it to Soft Light 100%

4. New Color Fill Layer 3B0714 to Exclusion 100%

5. New Color Fill Layer F2B013 to Color Burn 6%

Note: Step 4 and 5 were inspired by a tutorial from abernathi at distractiions
6. New Color Fill Layer 072C3B to Exclusion 36%

7. New Color Balance Layer
midtones: 25, 0, 15
shadows: 15, 7, -35
highlights: -3, 0, 15
Set this layer's opacity to 60%

8. New Color Fill Layer DDFAF6 to Color Burn 100%

9. Selective Color Layer
reds: -100, 0, 0, 0
yellows: 0, 0, -16, -6
whites: 9, -14, -100, 3
neutrals: 16, 2, -4, -24

10. Another Selective Color Layer
reds: -40, 5, 100, 13
yellows: -42, 0, -7, 5
whites: 0, -15, -100, 0
neutrals: 6, 2, 21, 22

11. New Color Fill Layer FEF9EF to Color Burn 100%

12. New Color Fill Layer E8F1FC to Color Burn 100%

13. New Curves Layer
RGB:
input 122
output 140
Blue:
input 121
output 135
Lower the opacity of this one to 25%

14. Another Curves Layer
RGB:
input 142
output 150

15. The last Selective Color Layer
reds: -5, 0, 0, 21
yellows: 0, 0, -6, 3
whites: 0, 6, -100, 0
neutrals: 3, 0, 19, -5

Well, now we're done with the coloring.
I added some light texture to brighten up the icon
16. Now drag this texture(I don't know who made it, please tell me if you know) to the top.
Set it to Screen 67%

17. Add this texture by cielo-gris and set it to Darken 25%

18. Another texture by matchbox_icons
Drag it to the bottom right corner of your picture and set it to Screen 100%

19. Now add this texture by worship_elle and place it again into the bottom
right corner of the icon.
Set it to Screen 55%

20. This texture was made by vol4itca
Drag it into the left upper corner of your icon.
Set it to Screen 100%

21. Last Step! Take this texture from babliz and set it to Lighten 100%

edit: I uploaded a psd.file as it was requested:
>>psd<<
And now you're finally done! Feel free to share your results with me.
Comments are great and my motivation :)
Of course the coloring looks different at every picture.
Just play around with the opacities and don't copy this tut exactly.
Add a screen layer if it's too dark and if your icon is getting too yellow just
delete the color burn layer from step 5 or raise the opacity of the exlucsion layer from step 6.
If you have problems or questions, just ask! I'll try to help you.