Icon Tutorials #2 - #5
All four of these tutorials use selective color. Two of them include steps from other tutorials, with credit given to those tutorials and tutorial makers.

This one includes many steps from this comment at coloring_help made by thismellark
1. Crop your base, and make a Color Fill layer (color: #fddea7) that should be set at Multiply 100%.

>>
2. Duplicate the Base layer here. Set it for screen at 100%.

>>
3. Now, add a curves layer. The settings for this layer are:
RGB:
1: 53, 43
2: 115, 126
3: 217, 211

>>
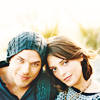
4. Duplicate your base again and set it for screen 50%.

>>
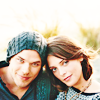
5. Now, make a Selective Color layer. It should have the following settings:
Reds:
C: 0
M: 55
Y: 0
B: 0

>>
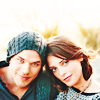
6. Make another Selective Color layer with the following settings:
Reds:
C: 0
M: 9
Y: 0
B: 0
Yellows:
C: -73
M: 2
Y: 4
B: 0
Neutrals:
C: 0
M: 2
Y: 1
B: 0

>>
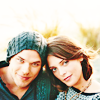
7. Now you need to make a Color Balance layer, with the following settings:
Shadows: 0,0,0
Midtones: 0, 11, -1
Highlights: 0,0,0

>>
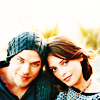
8. Duplicate your base again. Set at soft light of 100%.

>>
9. Make another Curves Layer with the following settings
RGB:
1: 52, 39
2: 229, 222

>>
10. Duplicate the base again. Set at Multiply 30%.

>>
11. Duplicate the base again. Set at Screen 20%.

>>

Bella Swan Tutorial
requested by dark_x_huntress
For the batch that this one was from, I used this tutorial from iconraven for steps 2, 3, & 4. The first step is a slightly modified step from that tutorial.
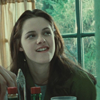
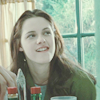
1. After you've cropped the capture, you need to add a curves layer, with the following settings:
RGB
i:74 o:105
i:188 o:155
Set that layer to screen at 100%.
>>
2. Now, add a Selective Color layer.
Reds:
C: -100
M: 0
Y: 100
B: 0
Neutrals:
C: -100
M: 0
Y: 43
B: 0

>>
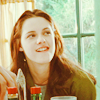
3. Next, add a Hue/Sat layer. Set the saturation to 20.

>>
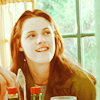
4. Next, add color balance with the following settings:
Shadows: 0,0,0
Midtones: 32, 0, -21
Highlights: 25, 35, 42

>>
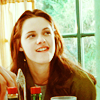
5. Now, copy the base level and paste it on top. Set it at soft light 100%.

>>
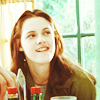
6. Paste the base level again at Screen.

>>
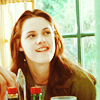
7. Since that makes Bella look too washed out, move the opacity to 40% from 100%.

>>

1. Crop your base, and duplicate it. Set the duplicate layer at Screen 32%.
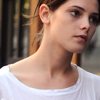
>>
2. Now, make a curves layer with the following settings:
RGB:
1: 20, 15
2: 213, 228

>>
3. Make a Selective Color layer with the following settings:
Reds:
C: 10
M: 12
Y: -20
B: 5
Yellows:
C: -29
M: 10
Y: 10
B: -1
Whites:
C: -2
M: -10
Y: 10
B: 10
Blacks:
C: -1
M: 35
Y: -1
B: 100

>>
4. Now, set that layer for Normal with an opacity of 70%.

>>
5. Duplicate the base again and set it at Soft Light 40%.

>>
6. Now, make a new Curves layer with these settings:
RGB:
1: 26, 46
2: 123, 124
3: 202, 197

>>
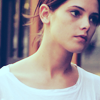
7. Make a Color Fill layer (#5c9fc5) and set it for Pin Light 50%.

>>
8. Duplicate the base and set it for Multiply 30%.

>>
9. Duplicate the base again and set it at Screen 20%.

>>
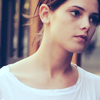
10. Make a new Curves layer with the following settings:
RGB:
1: 52, 62
2: 178, 188

>>

1. After you've cropped the base, duplicate it and set it for Screen 30%.

>>
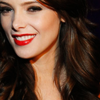
2. Now, you need to make a Curves layer with the following settings:
RGB:
1: 55, 30
2: 231, 220

>>
3. Next, you need to make a Selective Color Layer.
Reds:
C: -10
M: 100
Y: -10
B: 32
Yellows:
C: 21
M: -10
Y: 25
B: 25
Blacks:
C: 3
M: 2
Y: 1
B: 54

>>
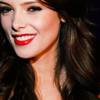
4. Duplicate the base and set it for Screen 40%.

>>
5. Make a Curves layer with the following settings:
RGB:
1: 23, 32
2: 143, 143
3: 222, 229

>>
6. Duplicate the base again and set it for Soft Light 54%.

>>
This one includes many steps from this comment at coloring_help made by thismellark
1. Crop your base, and make a Color Fill layer (color: #fddea7) that should be set at Multiply 100%.

>>

2. Duplicate the Base layer here. Set it for screen at 100%.

>>

3. Now, add a curves layer. The settings for this layer are:
RGB:
1: 53, 43
2: 115, 126
3: 217, 211

>>

4. Duplicate your base again and set it for screen 50%.

>>

5. Now, make a Selective Color layer. It should have the following settings:
Reds:
C: 0
M: 55
Y: 0
B: 0

>>

6. Make another Selective Color layer with the following settings:
Reds:
C: 0
M: 9
Y: 0
B: 0
Yellows:
C: -73
M: 2
Y: 4
B: 0
Neutrals:
C: 0
M: 2
Y: 1
B: 0

>>

7. Now you need to make a Color Balance layer, with the following settings:
Shadows: 0,0,0
Midtones: 0, 11, -1
Highlights: 0,0,0

>>

8. Duplicate your base again. Set at soft light of 100%.

>>

9. Make another Curves Layer with the following settings
RGB:
1: 52, 39
2: 229, 222

>>

10. Duplicate the base again. Set at Multiply 30%.

>>

11. Duplicate the base again. Set at Screen 20%.

>>

Bella Swan Tutorial
requested by dark_x_huntress
For the batch that this one was from, I used this tutorial from iconraven for steps 2, 3, & 4. The first step is a slightly modified step from that tutorial.
1. After you've cropped the capture, you need to add a curves layer, with the following settings:
RGB
i:74 o:105
i:188 o:155
Set that layer to screen at 100%.

>>

2. Now, add a Selective Color layer.
Reds:
C: -100
M: 0
Y: 100
B: 0
Neutrals:
C: -100
M: 0
Y: 43
B: 0

>>

3. Next, add a Hue/Sat layer. Set the saturation to 20.

>>

4. Next, add color balance with the following settings:
Shadows: 0,0,0
Midtones: 32, 0, -21
Highlights: 25, 35, 42

>>

5. Now, copy the base level and paste it on top. Set it at soft light 100%.

>>

6. Paste the base level again at Screen.

>>

7. Since that makes Bella look too washed out, move the opacity to 40% from 100%.

>>

1. Crop your base, and duplicate it. Set the duplicate layer at Screen 32%.

>>

2. Now, make a curves layer with the following settings:
RGB:
1: 20, 15
2: 213, 228

>>

3. Make a Selective Color layer with the following settings:
Reds:
C: 10
M: 12
Y: -20
B: 5
Yellows:
C: -29
M: 10
Y: 10
B: -1
Whites:
C: -2
M: -10
Y: 10
B: 10
Blacks:
C: -1
M: 35
Y: -1
B: 100

>>

4. Now, set that layer for Normal with an opacity of 70%.

>>

5. Duplicate the base again and set it at Soft Light 40%.

>>

6. Now, make a new Curves layer with these settings:
RGB:
1: 26, 46
2: 123, 124
3: 202, 197

>>

7. Make a Color Fill layer (#5c9fc5) and set it for Pin Light 50%.

>>

8. Duplicate the base and set it for Multiply 30%.

>>

9. Duplicate the base again and set it at Screen 20%.

>>

10. Make a new Curves layer with the following settings:
RGB:
1: 52, 62
2: 178, 188

>>

1. After you've cropped the base, duplicate it and set it for Screen 30%.

>>

2. Now, you need to make a Curves layer with the following settings:
RGB:
1: 55, 30
2: 231, 220

>>

3. Next, you need to make a Selective Color Layer.
Reds:
C: -10
M: 100
Y: -10
B: 32
Yellows:
C: 21
M: -10
Y: 25
B: 25
Blacks:
C: 3
M: 2
Y: 1
B: 54

>>

4. Duplicate the base and set it for Screen 40%.

>>

5. Make a Curves layer with the following settings:
RGB:
1: 23, 32
2: 143, 143
3: 222, 229

>>

6. Duplicate the base again and set it for Soft Light 54%.

>>
