(no subject)
I've made a tutorial for this icon:

- First, you must have these two images
a) sexy Sawyer (from www.lost-media.com).
b) 5th shiny picture from this post by bliccy.
now you're ready :)) ok. it's time for the real tutorial!
1. drag picture of Sawyer into your 100x100 empty image. resize Sawyer (Ctrl+T or Edit->Free Transform), sharpen him a bit (Filter-Sharpen-Sharpen) so he would look like this:

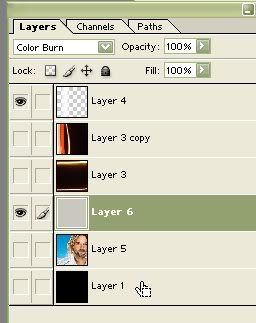
2. create a new layer and fill it with light grey color (I used #C9C7BE)

set it to "color burn". if you don't know where to change it, this screenshot might help you.
// please note, that I'm showing you how would this layers would look separately. so you can just copy them from this tutorial.
3. drag that "5th shiny picture" to the icon.
so it would look like this:

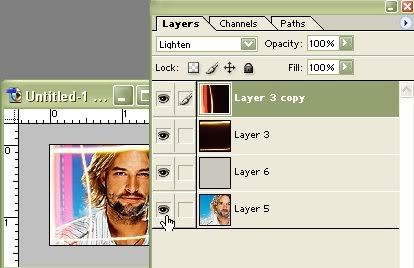
set it to "Lighten" mode.
4. drag this "5th shiny picture" once again (of copy the one that's already in your future-icon window).
transform it (Ctrl+T), so it would flip and all lines would be not horisontal, but vertical. Something like that:

it must be set to "Lighten" mode too.
//of course you can play with the placement of those shiny lines - and the more, the better :)
5. If you did it all right and placed all layers rightly (see screenshot) by this time our icon would look like this.

pretty cool, huh? :))
yet I wanna show you another trick so that your icon would shine even more!!! :)
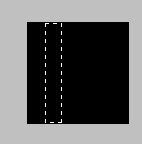
6. create a new layer, choose rectangular marquee tool and select thin rectangle
(I made it on the black background so you would see it, but you should make it on a transparent one)
7. Fill it with white color (Edit->Fill, white color, 100%). But it would look kinda dumb just like that. So please go to Filters->Blur->Motion blur (angle "-4", distance "11"). And you'll get that pretty thingy:
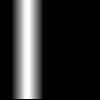
Set it to "Screen" mode.
//just reminding that this white thingy will be on a transparent, not black background :)
and you'll get that:
yay!!!
the end of tutorial! :))
please, let me know if you found it useful!!!!! :)))
- First, you must have these two images
a) sexy Sawyer (from www.lost-media.com).
b) 5th shiny picture from this post by bliccy.
now you're ready :)) ok. it's time for the real tutorial!
1. drag picture of Sawyer into your 100x100 empty image. resize Sawyer (Ctrl+T or Edit->Free Transform), sharpen him a bit (Filter-Sharpen-Sharpen) so he would look like this:
2. create a new layer and fill it with light grey color (I used #C9C7BE)
set it to "color burn". if you don't know where to change it, this screenshot might help you.
// please note, that I'm showing you how would this layers would look separately. so you can just copy them from this tutorial.
3. drag that "5th shiny picture" to the icon.
so it would look like this:
set it to "Lighten" mode.
4. drag this "5th shiny picture" once again (of copy the one that's already in your future-icon window).
transform it (Ctrl+T), so it would flip and all lines would be not horisontal, but vertical. Something like that:
it must be set to "Lighten" mode too.
//of course you can play with the placement of those shiny lines - and the more, the better :)
5. If you did it all right and placed all layers rightly (see screenshot) by this time our icon would look like this.
pretty cool, huh? :))
yet I wanna show you another trick so that your icon would shine even more!!! :)
6. create a new layer, choose rectangular marquee tool and select thin rectangle
(I made it on the black background so you would see it, but you should make it on a transparent one)
7. Fill it with white color (Edit->Fill, white color, 100%). But it would look kinda dumb just like that. So please go to Filters->Blur->Motion blur (angle "-4", distance "11"). And you'll get that pretty thingy:
Set it to "Screen" mode.
//just reminding that this white thingy will be on a transparent, not black background :)
and you'll get that:
yay!!!
the end of tutorial! :))
please, let me know if you found it useful!!!!! :)))