GREEN Colors in our meal
Совсем недавно в рамках школьного проекта, для полноты картины нужно было составить зеленое меню. Не в смысле здоровости ингридинтов, а в смысле цвета. Хотя одно другого не исключает. Про сам проект можно почитать тут. Он длился всего неделю. Т.е. на исследование, концепции, планы, визуализацию - на все все давалась всего неделя. Мы работали в командах от 3 до 5 человек. познакомились в понедельник, в пятницу защитились на выставке. Очень интересный и главное полезный опыт получился.
Вообще мое нынешнее житие-бытие больше напоминает курс выживания молодого бойца. Еще началась довольно активная работа по J-FEST и ряд других проектов по работе и не только. Весело ^__^
А показать я хотела рецепты зеленой еды, которые нашла пока делала меню. Картинки большие, поэтому часть спрятались. Прошу прощения, что все на английском. Надеюсь переводчик справится с ингредиентами))
Ana's Weeknight Broccoli Soup

I only recently decided that I actually like broccoli.
For years, I despised it, avoiding it on veggie trays, picking it out of soups, and steering clear of casseroles and pastas with those pesky green crowns. My boyfriend even used to make jokes about it - when we would go out to eat and I would order something that might have broccoli, he would smile and say, "I'll be sure to tell them you want extra broccoli." I would usually roll my eyes, smile back, and reply with, "Ha, ha. I know you think you're very funny." (Incidentally, he is usually quite hilarious.)
My aversion to broccoli was pretty strange, considering I am really not a picky eater, and I do enjoy most vegetables. Plus, I am a big girl. I know vegetables are good for me so I don't need to be coerced into eating them. But still... Broccoli was always a sticking point for me.

Broccoli cut up and prepped the day before to make this soup even easier.
But now I would say I like broccoli.
I honestly don't know if my tastebuds suddenly took a liking to this veggie, or if it was just the fickle winds of change, but there was a definite turning point. One day I hated broccoli, the next day I liked it.
I can't say I love it yet, but I like it. Sort of like with any new relationship, I am still trying to decide exactly how I feel about it, but broccoli is growing on me day by day. We haven't had our first fight yet, so we are still in the honeymoon phase, but so far things are looking good.

So in the spirit of celebrating my new found feelings for broccoli, I thought I would share an easy, satisfying way to enjoy this lovely veggie. This recipe is from my good friend and super-mom, Ana. She makes this recipe on busy weeknights, and believe it or not, her 2 1/2-year old daughter actually requests this soup all the time! She looooooves her broccoli soup.
I got to try Ana's Weeknight Broccoli Soup right after her second child was born - I was over at her place one evening, and she was chatting, entertaining her daughter, making this soup, and cleaning up the kitchen while balancing her newborn on her hip. Yes, I did say she was super-mom. But basically, the fact that Ana can multi-task and make this soup at the same time is just a testament to how easy it is - and that is something that any busy guy or gal can appreciate.

Basically this soup is so easy because you just simmer all the ingredients with some quality broth, blend it until smooth, and serve topped with some cheese or crusty bread. I like to make it even easier by chopping up some of the ingredients the night before (see my broccoli cut and separated into crowns and stems in the photo above) and keeping them in the fridge so they are ready to go. In addition to the broccoli, this soup gets some sweet depth of flavor from spring leeks and garlic, and it is thickened with potatoes rather than cream, which makes this soup really healthy too.

Leeks can be chopped the day before and kept in the fridge overnight.

I can get fresh bay leaves from my farmer's market and I love using them in soups and other dishes.

The dark buds from the broccoli crowns look beautiful in the smooth, jade-colored soup.
I think I was smitten by Ana's soup not only because of the simple, satisfying taste, but also because I found it to be really beautiful - when you blend the soup until smooth, most of the buds from the broccoli crowns don't get completely pureed and so the soup itself is a lovely jade color that is studded with dark green flecks. I was entranced.

A small square of authentic Parmigiano Reggiano from Venissimo is the perfect topping.

I know I have said it a few times already, but at the heart of it, I really like this soup because it is simple, healthy, and perfect for families. Even if I am only a family of one right now, it is good to know I have this recipe in my arsenal for the future, and that it will feed me leftovers in the present. And if you are like me and only in 'like' with broccoli and not in 'love' with it, I can assure you this soup is not a broccoli assault - there is the same amount of potatoes as broccoli in this soup, so it has a medley of flavors to please even the pickiest of palates. And an added bonus? It is extremely inexpensive to make. Basically this recipe is a win-win on all fronts, but is that really any surprise since it comes from a super savvy mom?

You might also like: Cauliflower Soup with Seared Scallops, Spiced Lemon and Cilantro Chicken Soup
One year ago: Gratin Dauphinois (wow, my photography skills have really come a long way...)
__________________________________
Ana's Weeknight Broccoli Soup
The measurements for the ingredients below are exactly what I used, but don't sweat it if your head of broccoli or your diced potato amounts aren't precise. Just throw it all in the pot and go about your busy day.
4 cups broccoli florets and diced stems, (about 12-14 ounces, or 1 large head)
2 cups washed, peeled diced potatoes (about 12 ounces)
2 cups washed, roughly sliced leeks (about 1 leek, white part only)
1 celery rib, sliced
2 cloves garlic, smashed
1 bay leaf
4 cups chicken broth (OR 2 cans chicken broth, 14 ounces each + 1 cup water)
1-2 tsp kosher salt (or to taste)
pepper to taste
For serving (optional):
Grated parmesan cheese
Heavy cream
Crusty french bread
In a large stockpot, combine diced broccoli stems (reserve florets), and all remaining ingredients. Bring to a boil over high heat, then reduce heat to low, cover pot, and simmer for 15 minutes. Add broccoli florets and stir in so they are covered, then continue to simmer for an additional 5-7 minutes or until florets are tender.
Remove bay leaf, then use a regular or immersion blender to puree the soup. (If you use a regular blender, you will need to puree it in batches.) Serve immediately, and if you prefer, top it with grated parmesan cheese or a dash of heavy cream, or serve with crusty bread. Refrigerated, will keep for several days.
Matcha and Chocolate Marble Cake & Lashgasim Mascara

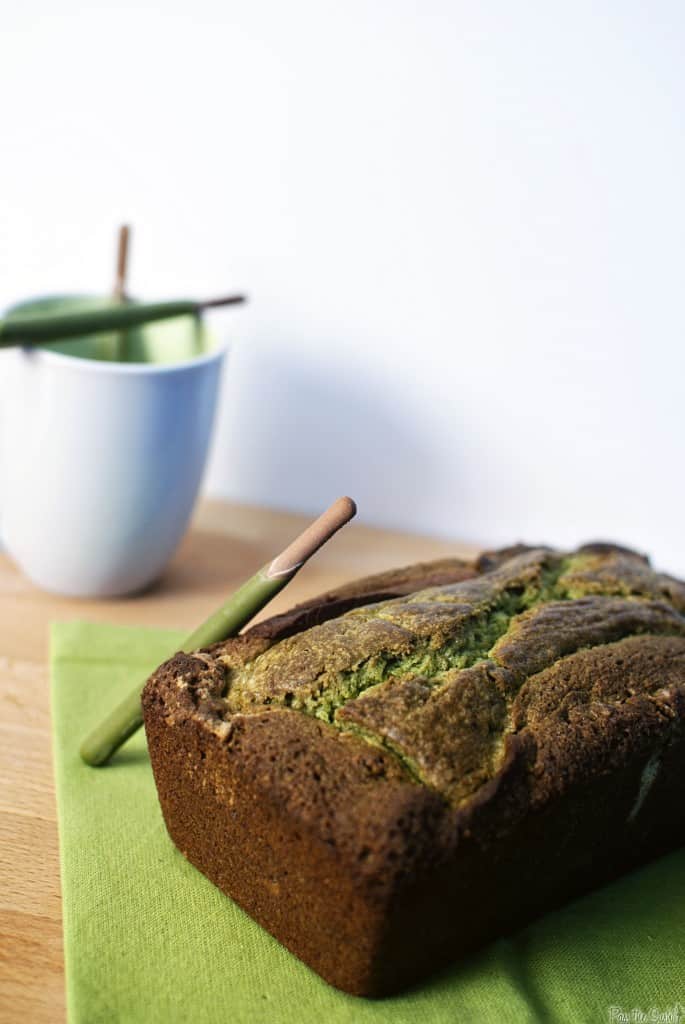
I’ve been itching to play with matcha since those cupcakes I made last year. This cake came out wonderfully except for my lack of marbling skills. I found the flavors to be wonderful and not overly sweet. Perfect sliced for breakfast or as a snack without being overly sweet.

Discovered on Life’s a Feast, adapted from Chef Marcy Goldman, Food & Wine.
Ingredients:
Preheat the oven to 350 degrees F and grease an 8×4 loaf pan.
In a medium bowl, whisk together the flour, baking powder and salt; set aside.
In the bowl of a mixer, beat the 12 tbs butter and sugar until fluffy. Beat in the eggs, one at a time, scraping down the sides as needed. Mix in the vanilla.
Slowly mix in the dry ingredients, alternating with the milk until blended.
In another small bowl, whisk the melted butter into the cocoa powder in a small bowl until completely blended and smooth. Remove one cup of the batter from the mixing bowl and stir into the chocolate mixture until well blended.
Stir the Matcha tea powder into the remaining batter in the mixing bowl. When mixed, spoon half of the matcha batter into the prepared loaf pan, making sure to smooth out to all corners and tap down any lumps. With a spoon or spatula, plop the chocolate batter onto the matcha batter ( I did not need to use all of my chocolate batter). Then cover the chocolate layer with the remaining matcha batter, using the back of a spoon, or spatula to smooth out while trying to mix the chocolate layer. With a butter knife, create a few swirls in the batter.
Bake for 25 minutes then reduce the oven temperature to 325 degrees F and bake for an additional 25 minutes. Ten with aluminum foil to prevent any further browning and bake for 10 to 15 minutes more or until just set in the center and a toothpick comes out clean with a few moist crumbs.
Cute Matcha Cupcakes

Preparation:
Bring cheese and butter to room temperature. Beat butter and cheese at medium speed until creamy and smooth. Add half of the powdered sugar, 1 tablespoon of green tea powder, and the vanilla. Beat until combined. Gradually add remaining sugar (more if you have to) until you get to the consistency and sweetness you like. Add more green tea powder if you’d like a stronger matcha taste.
I used a basic chocolate cupcake from Martha Stewart’s Cupcakes because I really didn’t know what would go with matcha.
I refrigerated my icing for about an hour to get a better flow when I was decorating the cupcakes. I used the Giant Star Pastry tip from Bake it Pretty.
Not Your Same Old Green Bean Casserole

Preparation:
Prep your green beans by trimming the ends off. Cut green beans in half if you like pieces to be a little smaller.
Blanch the green beans: drop them into lightly salted boiling water and allow green beans to cook for about 3 to 4 minutes. Remove them from the boiling water with a slotted spoon and immediately plunge them into a bowl of ice cold water to stop the cooking process. Drain beans once they’re cool and set aside.
Add bacon pieces to a skillet over medium heat. Cook bacon for two minutes, then add diced onion and garlic and continue cooking for 3 to 5 minutes, or until bacon is done (but not crisp) and onions are golden brown. Remove from heat and set aside.
In a separate skillet or saucepan, melt butter over medium heat. Sprinkle flour into the pan and whisk immediately to evenly mix it into the butter. Cook for a minute or two, then pour in milk and half and half. Continue cooking, whisking constantly, while sauce thickens, about 2 minutes. Add salt, pepper, and cayenne then add the grated cheddar. Stir while cheese melts. Turn off heat.
Add pimentos to pan, then add bacon/onion mixture. Stir to combine. Pour over green beans and stir gently to combine. Pour into a baking dish and top with panko crumbs.
Bake at 350 degrees for 30 minutes or until sauce is bubbly and panko crumbs are golden.Fresh crunchy green beans in a cream sauce? Heaven. Seriously, I may be in love with the Pioneer Woman (yeah, that doesn’t make me sound creepy at all).
Steak and Udon Stir-fry

The beautiful thing about stir frys is (everything) they come together quickly, they are a great way to pack in those veggies and they are a knockout for the taste-buds. Why I don’t make stir-frys as a weekly regular in this house, I’ll never know because they are a dinner even the most novice chef can succeed at. Not to mention, Handsome’s eyes light up the moment the big heavy iron wok appears and I know he is going to eat more colorful vegetables then he can possible pick around.
Personally,the prep work is the best part of a stir-fry. Chopping vegetables into thin strips is a great stress reliever after a long day of work (Pass the Sushi would like to insert a disclaimer here stating that we don’t recommend operating sharp objects after one of those days at work without first sipping a martini). It’s not the fastest prep work you’ll do in the kitchen, but it is one of those tasks that offers its simple rewards when everything is all said and done.
Steak and Udon Stir-fry
built out of the need to use those awesome looking udon noodles.
Ingredients:
Preparation:
Prepare udon noodles according to package.
Meanwhile, in a preheated wok or skillet over medium-high, saute steak, about 2 minutes (or done to your liking). Remove steak from wok and add olive oil and garlic; saute 15 seconds. Add carrots, bell pepper, broccoli, onion and cabbage. Saute until crisp (about 2 minutes). Add snow peas, scallions and teriyaki sauce and saute for 2 minutes more. Return steak to wok, and toss everything together. Remove from heat and serve over prepared udon noodles.
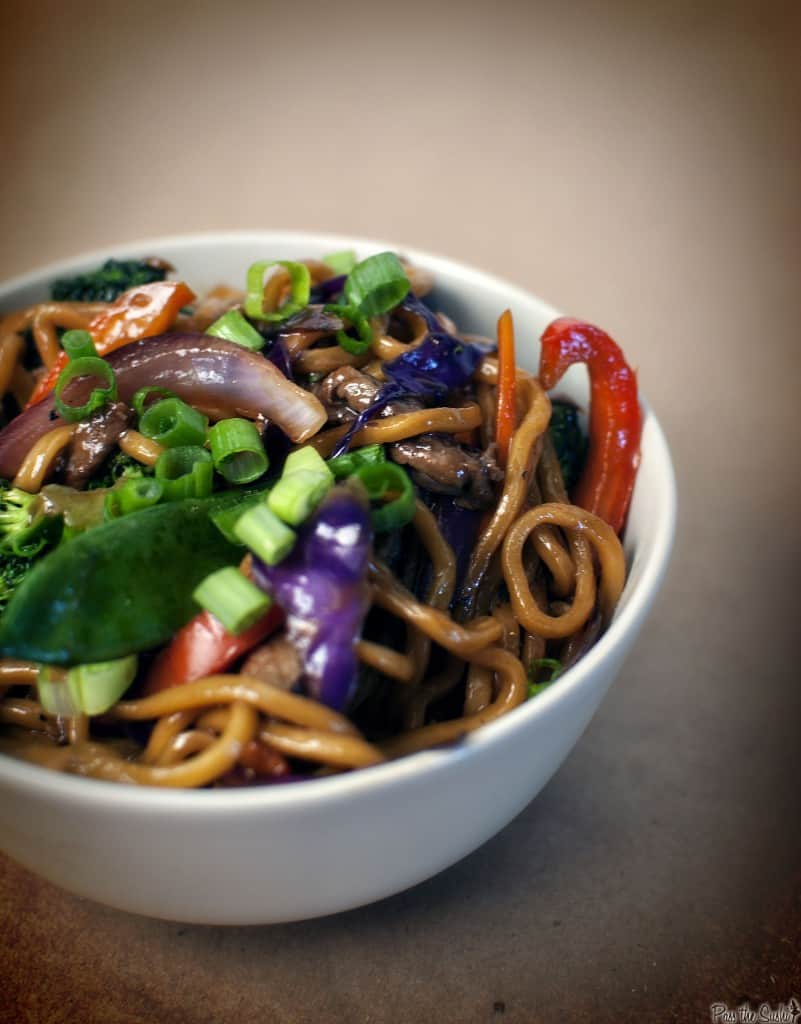
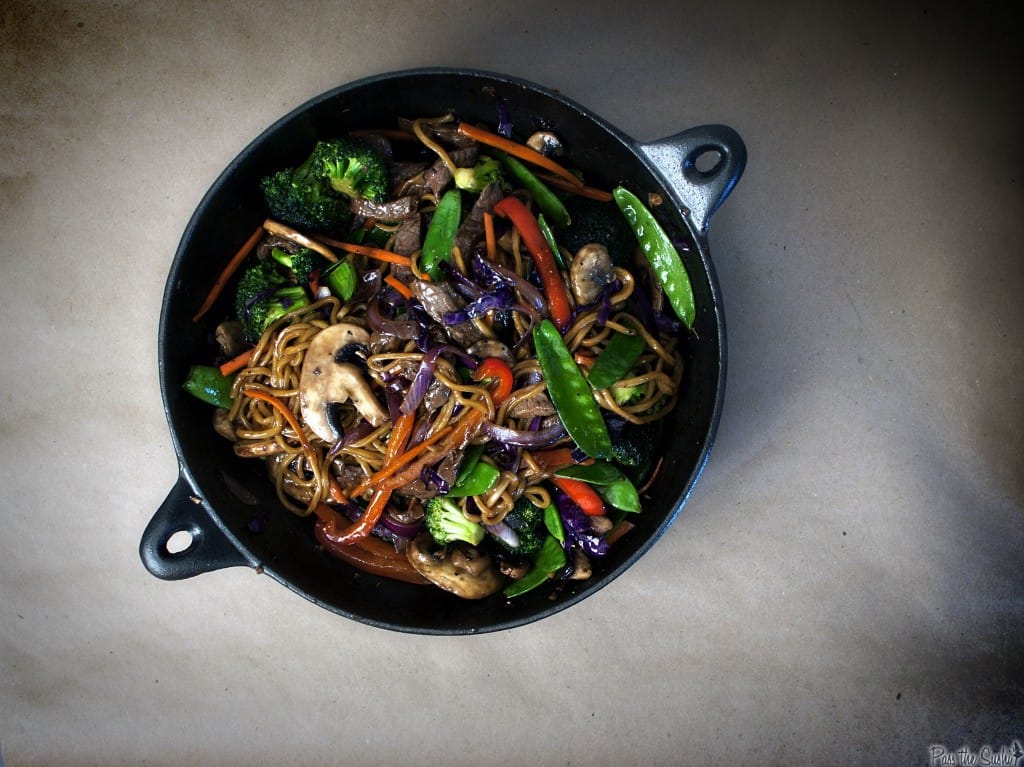
This was one of those meals inspired by genuinely wanting to use an ingredient purchased at the market a few days before, udon noodles The noodles were the inspiration behind this ‘throw everything we have in the pot’ supper. This meal was flavorful with hardly any remnants worth saving. The udon noodles were very long and I left them that way when I served dinner because they brought out the kid in me, taking my time to wrap large clumps round my chopsticks (bad table etiquette I know, but fun nonetheless)
Alkaline Green Smoothie & New York City!
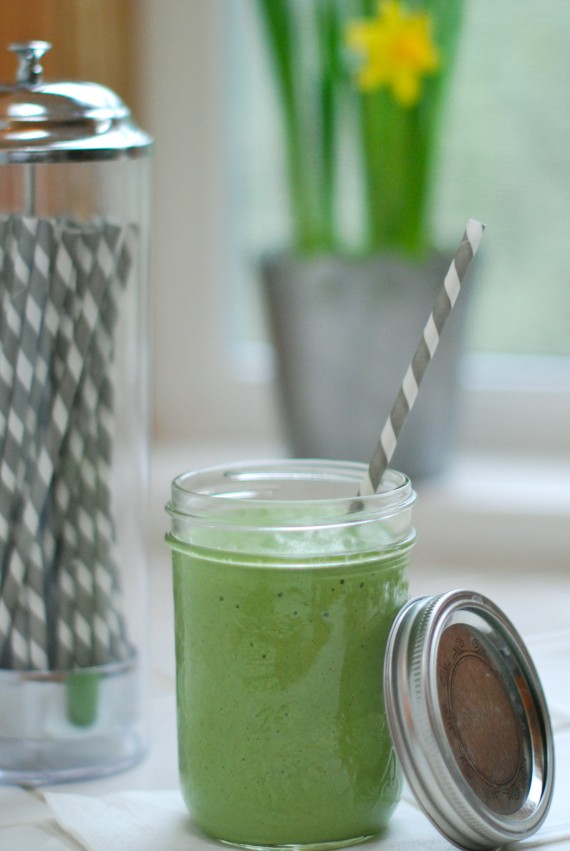
You might ask, “What’s healthier than a green smoothie?” Well… there’s green smoothies and then there’s Alkaline green smoothies! Green is all the rage but you can get caught up in the hype of green and still not be doing yourself a very big favour. Many of the green smoothie recipes are jammed with super sweet fruit and just because they are green, people are thinking they are optimally healthy. They taste divine and it helps to mask the green business but is it a good idea? I say ‘No’ because I believe in minimizing your sugar intake, even fruit sugars especially the high sugar fruits like pineapple, bananas, mangoes and oranges, as they are acid forming and they elevate blood sugar just like any other sugar. The alkaline food chart is here if you want to take a peek at the alkalinity of various fruits. I have other ways to make the green taste yummy and actually the green itself doesn’t taste bad in the first place. You might say, “Well, fruit is healthy”- and yes it can be but moderation is key. Many people don’t do moderation and who knows how many of these so called healthy green smoothies they have in a day or every morning. I say mix it up and have the odd tropical fruit sweetened green smooth, but adapt the knowledge and the understanding of how healthy an alkalizing green smoothie is and then alternate or eventually switch to the better choice.
Even if you take a look at the franchises that offer smoothies and fresh juices you’d be surprised at the sugar content in those so called healthy smoothies and juices that people are replacing meals with. If you have diabetic tendencies, any inflammation in your body, or perhaps yeast over growth or candida symptoms (check here to see if you have any) you will want to steer clear of high sugar at as this just exasperates the problems.
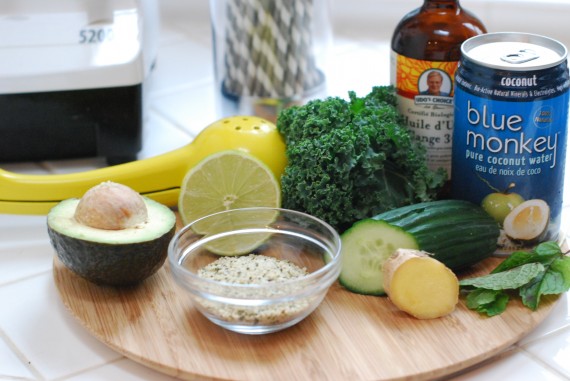
Getting your daily greens at every meal is the best way to be optimally healthy. Green plants are the building blocks of red blood cells and are naturally rich in alkaline minerals, vitamins, amino acids, proteins, and most of the essential resources your body needs. Jason of Vital Living explains further how important green plants are for us- take a peek at his recent post here.
Adding an alkaline green smoothie to your daily routine is a fantastic way to further alkalize and an easy way for your body to assimilate the nutrients and the fiber as the blender breaks it down making it easier on your digestive track to absorb. I am passionate about making sure I get my greens in as many ways possible as I crave the healthy feeling I get but sometimes I’m not in the mood to chomp a salad so I just blend my greens up.
Alkaline Green Smoothie
yield- 1 smoothie approx 12-16oz
6″ piece of cucumber
3 medium Kale leaves, torn
5 stems fresh mint
3 stems fresh parsley
1″ piece fresh ginger
1 avocado
1 cup coconut water
fresh juice of one lime
1-2 tsp udo’s oil
1-2 tbsp hemp seeds
2-3 drops stevia or a tsp of agave
Method
Place all ingredients into high speed blender and mix until smooth, adding a little filtered water if needed for consistency. Enjoy!
Optionally, I sometimes add 1/2 cup frozen berries-blueberries, raspberries or strawberries as they are low sugar fruit that is healthier to add than the super sweet fruits. However, you may find that you like the smoothie as is above. The lime, the ginger and the mint are really nice together. I have discovered that the coconut water is quite hydrating and I like the flavour it brings to the smoothie but it does contain a little natural sugar. You might like to use almond milk in place if you want to avoid the sugar all together as it will still taste nice. If I can actually find a young coconut in the market to open up so I can extract the juice and the meat, it’s a good day! I love how fresh it is and the meat makes the smoothie just divine. The bottled coconut water is okay but because it has been pasteurized the nutrient levels are considerably less, but still beneficial. Just be sure to buy the unsweetened, unflavoured version.
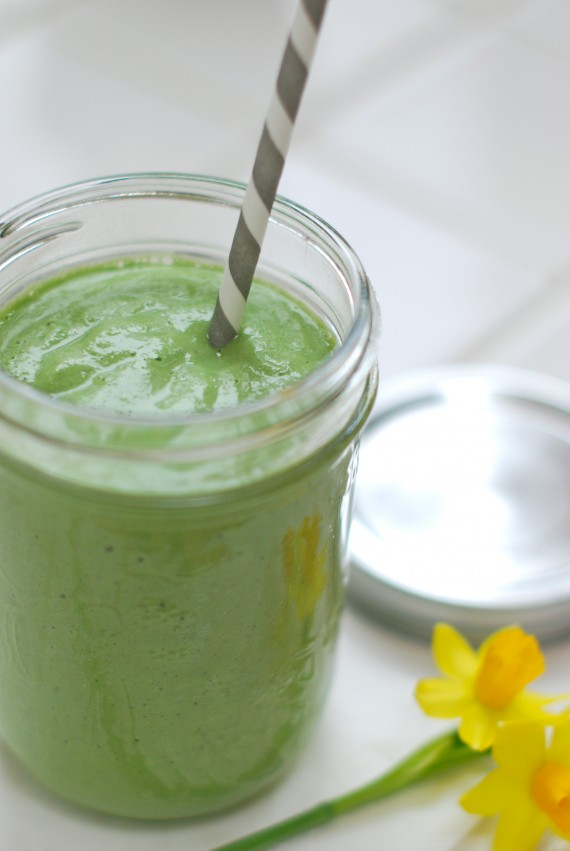
I hope this smoothie becomes your “go to” recipe that you can play with for a variety of flavours. I am actually wishing I could make one right now since I am tucked away in my New York City hotel room as the snow storm over takes the city but I didn’t pack the blender-dang! But the good thing is that I am only blocks away from a few fabulous establishments that are raw and offer incredible smoothies, juices and delicious meals if I choose to brave the cold snow and winds. I flew in for a special seminar with Seth Godin and have another 48 hours here but oh my, word the snow!
As a little surprise for you I have planned to share about a couple of these healthy food entrepreneurs of New York in my upcoming posts with an interview or two so do stay tuned-that is if I get out of this town with the near state of emergency snow storm that is happening out there RIGHT now!
Hope you have a great week. Wish me luck with this storm!
Julie
ps. I should mention that a good rule of thumb is to be sure your smoothie’s “green content” is more than 50% so that if you do choose to add sweeter fruits you will still end up with a good balance of alkaline benefits.
Tasty Green Juice
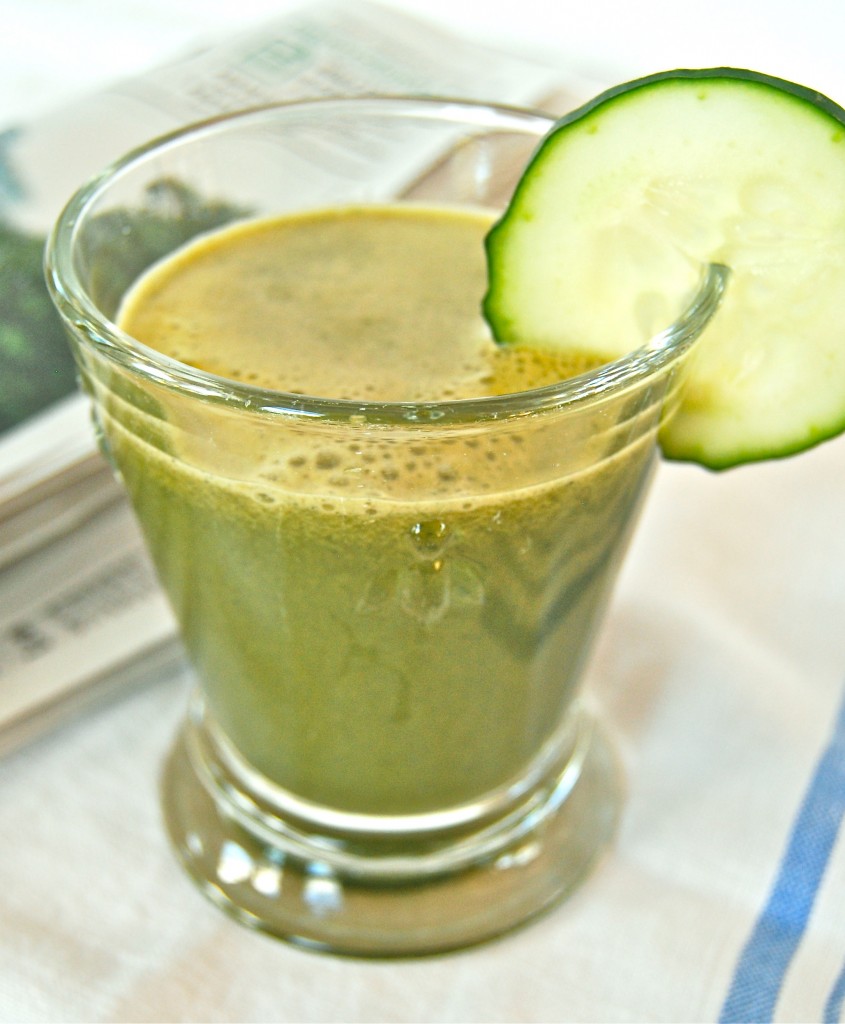
Yuummmm!
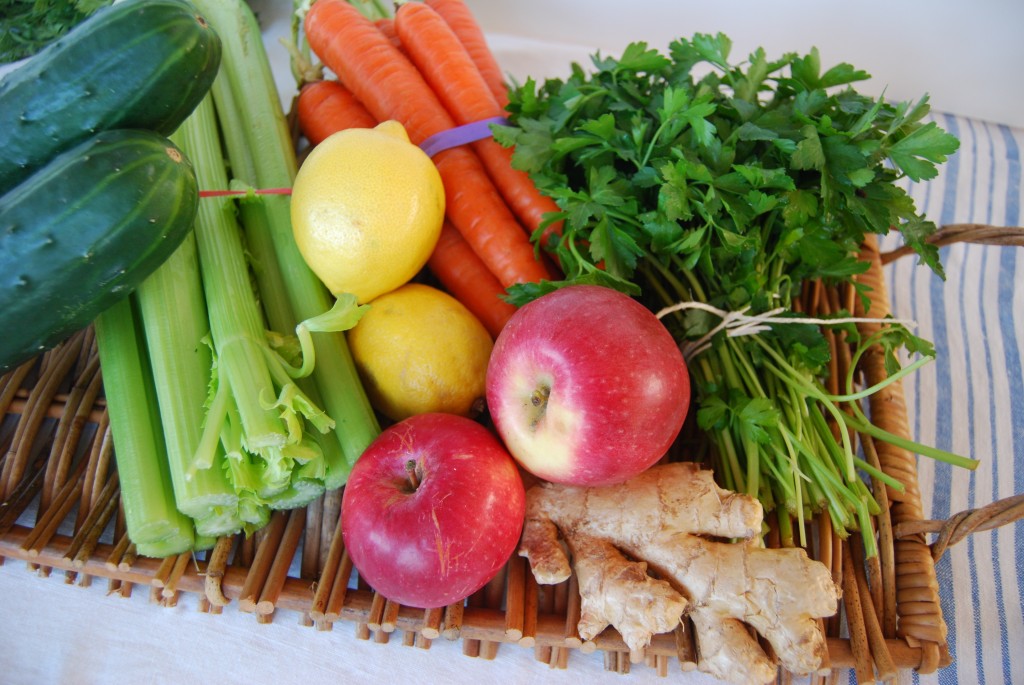
Is your morning ritual healthy? Does it include alkalizing foods that will nourish your cells providing terrific energy to start your day? If you’re not quite sure, let me show you what is incredibly delicious that will do exactly that! First off though, this is a recipe that requires that you make a commitment to your health goals, bite the bullet and get yourself a juicer- and get a decent one cuz believe me it will become one of the top used appliances in your kitchen once you taste this addictive recipe and feel the benefits of juicing. See our juicer info here. I can’t take full credit for this recipe because it was originally created by Matthew Kenney who wrote Everyday Raw. I adapted this by using less apple or no apple to reduce the sweetness. If I want to be a purist and keep the fruit separate but I want a little sweet I add a little stevia to the juice and voila pure veggies, some lemon and some sweetness. Still just divine!
I must admit that hardly a day passes that I don’t begin my day without this yummy juice, which must mean that I am addicted to this drink. And I know that there are many other delicious recipes, and have tried many others but there is something about this combination that everyone in the family also absolutely loves. When we are out of any one ingredient we kinda panic- we run to the grocery store in the morning to get what we need- crazy huh?
Morning Green Juice
1 apple ( may leave out if you wish for no sweetness)
1 lemon peeled
2 celery stalks
2 large carrots
1 large english cucumber or 2 field cukes
1/2″ piece of fresh ginger
6-10 stems parsley (any kind)
6 stems fresh mint
Method
Begin juicing all items above making sure NOT to juice the herbs & ginger last as they need a solid veggie to force their goodness residue thru the mesh of the machine.
Stir and pour into glass. I have this thing for straws so I always enjoy mine with a straw- my morning cocktail! Yum!!
Yield: Approx 20-25 fl oz. Depending on the size of each of your veggies it will vary. Add more cucumber to increase volume if you wish. I have even juiced a small zuchini in a pinch. I am often double this recipe for a family of 5 every morning.
Tip 1 : Get yourself a compost if you don’t already have one and you’ll be producing the most amazing soil!
Tip 2: 20-30 mins after drinking this follow with my spelt porridge recipe and you will be good to go for about 3 hours or more. It’s good to snack on raw healthy nuts in between meals if you feel the growlies so grab a handful to take with you as you head out the door.
Вообще мое нынешнее житие-бытие больше напоминает курс выживания молодого бойца. Еще началась довольно активная работа по J-FEST и ряд других проектов по работе и не только. Весело ^__^
А показать я хотела рецепты зеленой еды, которые нашла пока делала меню. Картинки большие, поэтому часть спрятались. Прошу прощения, что все на английском. Надеюсь переводчик справится с ингредиентами))
Ana's Weeknight Broccoli Soup

I only recently decided that I actually like broccoli.
For years, I despised it, avoiding it on veggie trays, picking it out of soups, and steering clear of casseroles and pastas with those pesky green crowns. My boyfriend even used to make jokes about it - when we would go out to eat and I would order something that might have broccoli, he would smile and say, "I'll be sure to tell them you want extra broccoli." I would usually roll my eyes, smile back, and reply with, "Ha, ha. I know you think you're very funny." (Incidentally, he is usually quite hilarious.)
My aversion to broccoli was pretty strange, considering I am really not a picky eater, and I do enjoy most vegetables. Plus, I am a big girl. I know vegetables are good for me so I don't need to be coerced into eating them. But still... Broccoli was always a sticking point for me.

Broccoli cut up and prepped the day before to make this soup even easier.
But now I would say I like broccoli.
I honestly don't know if my tastebuds suddenly took a liking to this veggie, or if it was just the fickle winds of change, but there was a definite turning point. One day I hated broccoli, the next day I liked it.
I can't say I love it yet, but I like it. Sort of like with any new relationship, I am still trying to decide exactly how I feel about it, but broccoli is growing on me day by day. We haven't had our first fight yet, so we are still in the honeymoon phase, but so far things are looking good.

So in the spirit of celebrating my new found feelings for broccoli, I thought I would share an easy, satisfying way to enjoy this lovely veggie. This recipe is from my good friend and super-mom, Ana. She makes this recipe on busy weeknights, and believe it or not, her 2 1/2-year old daughter actually requests this soup all the time! She looooooves her broccoli soup.
I got to try Ana's Weeknight Broccoli Soup right after her second child was born - I was over at her place one evening, and she was chatting, entertaining her daughter, making this soup, and cleaning up the kitchen while balancing her newborn on her hip. Yes, I did say she was super-mom. But basically, the fact that Ana can multi-task and make this soup at the same time is just a testament to how easy it is - and that is something that any busy guy or gal can appreciate.

Basically this soup is so easy because you just simmer all the ingredients with some quality broth, blend it until smooth, and serve topped with some cheese or crusty bread. I like to make it even easier by chopping up some of the ingredients the night before (see my broccoli cut and separated into crowns and stems in the photo above) and keeping them in the fridge so they are ready to go. In addition to the broccoli, this soup gets some sweet depth of flavor from spring leeks and garlic, and it is thickened with potatoes rather than cream, which makes this soup really healthy too.

Leeks can be chopped the day before and kept in the fridge overnight.

I can get fresh bay leaves from my farmer's market and I love using them in soups and other dishes.

The dark buds from the broccoli crowns look beautiful in the smooth, jade-colored soup.
I think I was smitten by Ana's soup not only because of the simple, satisfying taste, but also because I found it to be really beautiful - when you blend the soup until smooth, most of the buds from the broccoli crowns don't get completely pureed and so the soup itself is a lovely jade color that is studded with dark green flecks. I was entranced.

A small square of authentic Parmigiano Reggiano from Venissimo is the perfect topping.

I know I have said it a few times already, but at the heart of it, I really like this soup because it is simple, healthy, and perfect for families. Even if I am only a family of one right now, it is good to know I have this recipe in my arsenal for the future, and that it will feed me leftovers in the present. And if you are like me and only in 'like' with broccoli and not in 'love' with it, I can assure you this soup is not a broccoli assault - there is the same amount of potatoes as broccoli in this soup, so it has a medley of flavors to please even the pickiest of palates. And an added bonus? It is extremely inexpensive to make. Basically this recipe is a win-win on all fronts, but is that really any surprise since it comes from a super savvy mom?

You might also like: Cauliflower Soup with Seared Scallops, Spiced Lemon and Cilantro Chicken Soup
One year ago: Gratin Dauphinois (wow, my photography skills have really come a long way...)
__________________________________
Ana's Weeknight Broccoli Soup
The measurements for the ingredients below are exactly what I used, but don't sweat it if your head of broccoli or your diced potato amounts aren't precise. Just throw it all in the pot and go about your busy day.
4 cups broccoli florets and diced stems, (about 12-14 ounces, or 1 large head)
2 cups washed, peeled diced potatoes (about 12 ounces)
2 cups washed, roughly sliced leeks (about 1 leek, white part only)
1 celery rib, sliced
2 cloves garlic, smashed
1 bay leaf
4 cups chicken broth (OR 2 cans chicken broth, 14 ounces each + 1 cup water)
1-2 tsp kosher salt (or to taste)
pepper to taste
For serving (optional):
Grated parmesan cheese
Heavy cream
Crusty french bread
In a large stockpot, combine diced broccoli stems (reserve florets), and all remaining ingredients. Bring to a boil over high heat, then reduce heat to low, cover pot, and simmer for 15 minutes. Add broccoli florets and stir in so they are covered, then continue to simmer for an additional 5-7 minutes or until florets are tender.
Remove bay leaf, then use a regular or immersion blender to puree the soup. (If you use a regular blender, you will need to puree it in batches.) Serve immediately, and if you prefer, top it with grated parmesan cheese or a dash of heavy cream, or serve with crusty bread. Refrigerated, will keep for several days.
Matcha and Chocolate Marble Cake & Lashgasim Mascara

I’ve been itching to play with matcha since those cupcakes I made last year. This cake came out wonderfully except for my lack of marbling skills. I found the flavors to be wonderful and not overly sweet. Perfect sliced for breakfast or as a snack without being overly sweet.

Discovered on Life’s a Feast, adapted from Chef Marcy Goldman, Food & Wine.
Ingredients:
- 2 cups AP flour
- 2 teas baking powder
- 1/4 teas salt
- 12 tbs unsalted butter, softened to room temperature + 3 tbs unsalted butter, melted
- 1 1/3 cups sugar
- 2 large eggs
- 1 teas vanilla
- 1/2 cup whole milk
- 2 tbs unsweetened cocoa powder
- 1 1/2 teas Matcha tea powder
Preheat the oven to 350 degrees F and grease an 8×4 loaf pan.
In a medium bowl, whisk together the flour, baking powder and salt; set aside.
In the bowl of a mixer, beat the 12 tbs butter and sugar until fluffy. Beat in the eggs, one at a time, scraping down the sides as needed. Mix in the vanilla.
Slowly mix in the dry ingredients, alternating with the milk until blended.
In another small bowl, whisk the melted butter into the cocoa powder in a small bowl until completely blended and smooth. Remove one cup of the batter from the mixing bowl and stir into the chocolate mixture until well blended.
Stir the Matcha tea powder into the remaining batter in the mixing bowl. When mixed, spoon half of the matcha batter into the prepared loaf pan, making sure to smooth out to all corners and tap down any lumps. With a spoon or spatula, plop the chocolate batter onto the matcha batter ( I did not need to use all of my chocolate batter). Then cover the chocolate layer with the remaining matcha batter, using the back of a spoon, or spatula to smooth out while trying to mix the chocolate layer. With a butter knife, create a few swirls in the batter.
Bake for 25 minutes then reduce the oven temperature to 325 degrees F and bake for an additional 25 minutes. Ten with aluminum foil to prevent any further browning and bake for 10 to 15 minutes more or until just set in the center and a toothpick comes out clean with a few moist crumbs.

Cute Matcha Cupcakes

- 1 Eight oz package cream cheese
- 1/2 stick butter
- 3 cups sifted powdered sugar
- 2 tablespoons matcha green tea powder
- 3/4 teaspoon vanilla extract
Preparation:
Bring cheese and butter to room temperature. Beat butter and cheese at medium speed until creamy and smooth. Add half of the powdered sugar, 1 tablespoon of green tea powder, and the vanilla. Beat until combined. Gradually add remaining sugar (more if you have to) until you get to the consistency and sweetness you like. Add more green tea powder if you’d like a stronger matcha taste.
I used a basic chocolate cupcake from Martha Stewart’s Cupcakes because I really didn’t know what would go with matcha.
I refrigerated my icing for about an hour to get a better flow when I was decorating the cupcakes. I used the Giant Star Pastry tip from Bake it Pretty.
Not Your Same Old Green Bean Casserole

- 2 pounds Fresh Green Beans, Ends Cut Off
- 4 slices Bacon, Cut Into 1/4 Inch Pieces
- 3 cloves Garlic, Minced
- ½ whole Large Onion, Chopped
- 4 Tablespoons Butter
- 4 Tablespoons All-purpose Flour
- 2-½ cups Whole Milk
- ½ cups Half-and-half
- 1-½ teaspoon Salt, More To Taste
- Freshly Ground Black Pepper, To Taste
- ⅛ teaspoons Cayenne Pepper
- 1 cup Grated Sharp Cheddar Cheese
- 1 jar (4 Ounce) Sliced Pimentoes, Drained
- Extra Milk For Thinning If Necessary
- 1 cup Panko Bread Crumbs
Preparation:
Prep your green beans by trimming the ends off. Cut green beans in half if you like pieces to be a little smaller.
Blanch the green beans: drop them into lightly salted boiling water and allow green beans to cook for about 3 to 4 minutes. Remove them from the boiling water with a slotted spoon and immediately plunge them into a bowl of ice cold water to stop the cooking process. Drain beans once they’re cool and set aside.
Add bacon pieces to a skillet over medium heat. Cook bacon for two minutes, then add diced onion and garlic and continue cooking for 3 to 5 minutes, or until bacon is done (but not crisp) and onions are golden brown. Remove from heat and set aside.
In a separate skillet or saucepan, melt butter over medium heat. Sprinkle flour into the pan and whisk immediately to evenly mix it into the butter. Cook for a minute or two, then pour in milk and half and half. Continue cooking, whisking constantly, while sauce thickens, about 2 minutes. Add salt, pepper, and cayenne then add the grated cheddar. Stir while cheese melts. Turn off heat.
Add pimentos to pan, then add bacon/onion mixture. Stir to combine. Pour over green beans and stir gently to combine. Pour into a baking dish and top with panko crumbs.
Bake at 350 degrees for 30 minutes or until sauce is bubbly and panko crumbs are golden.Fresh crunchy green beans in a cream sauce? Heaven. Seriously, I may be in love with the Pioneer Woman (yeah, that doesn’t make me sound creepy at all).
Steak and Udon Stir-fry

The beautiful thing about stir frys is (everything) they come together quickly, they are a great way to pack in those veggies and they are a knockout for the taste-buds. Why I don’t make stir-frys as a weekly regular in this house, I’ll never know because they are a dinner even the most novice chef can succeed at. Not to mention, Handsome’s eyes light up the moment the big heavy iron wok appears and I know he is going to eat more colorful vegetables then he can possible pick around.
Personally,the prep work is the best part of a stir-fry. Chopping vegetables into thin strips is a great stress reliever after a long day of work (Pass the Sushi would like to insert a disclaimer here stating that we don’t recommend operating sharp objects after one of those days at work without first sipping a martini). It’s not the fastest prep work you’ll do in the kitchen, but it is one of those tasks that offers its simple rewards when everything is all said and done.

Steak and Udon Stir-fry
built out of the need to use those awesome looking udon noodles.
Ingredients:

1 package Udon noodles (replace with spaghetti)- 2 tbs olive oil
- 1 lb flank steak, sliced against the grain 1/4 inch thick at most
- 2 cloves garlic minced
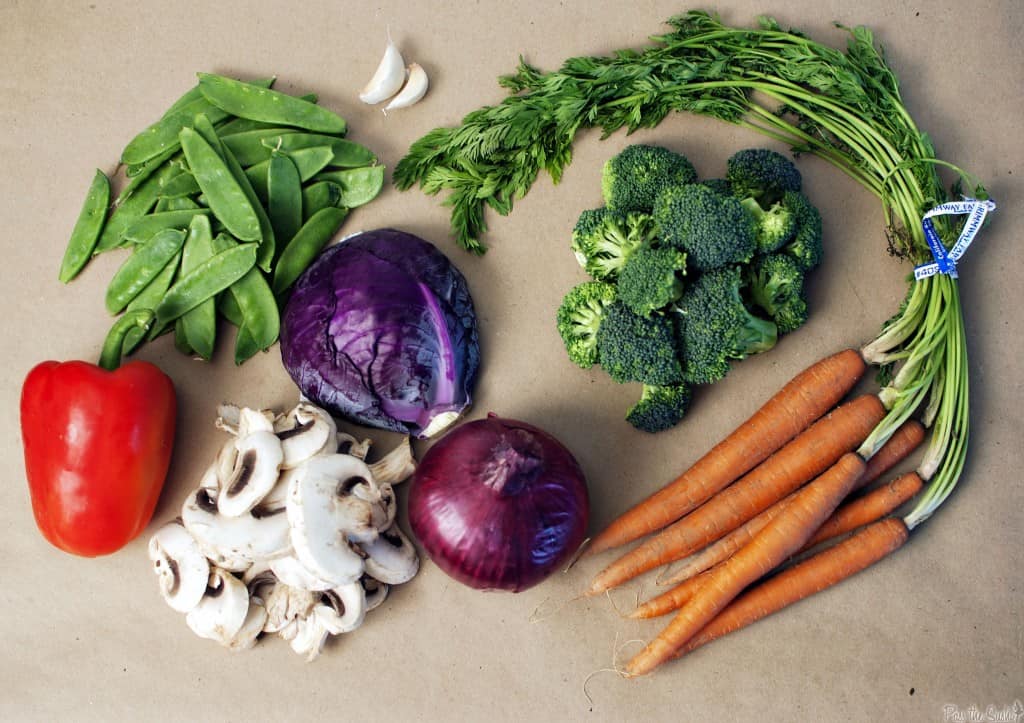
- 1 bell pepper sliced
- 2 carrots, julliened
- 1 cup mushrooms, sliced
- 1 1/2 cups fresh broccoli
- 1/2 red onion, sliced
- 1 cup red cabbage, sliced
- 1 cup snow peas
- 2 scallions, diced
- 1/2 cup teriyaki sauce (I used a bottled teriyaki marinade)
Preparation:
Prepare udon noodles according to package.
Meanwhile, in a preheated wok or skillet over medium-high, saute steak, about 2 minutes (or done to your liking). Remove steak from wok and add olive oil and garlic; saute 15 seconds. Add carrots, bell pepper, broccoli, onion and cabbage. Saute until crisp (about 2 minutes). Add snow peas, scallions and teriyaki sauce and saute for 2 minutes more. Return steak to wok, and toss everything together. Remove from heat and serve over prepared udon noodles.

This was one of those meals inspired by genuinely wanting to use an ingredient purchased at the market a few days before, udon noodles The noodles were the inspiration behind this ‘throw everything we have in the pot’ supper. This meal was flavorful with hardly any remnants worth saving. The udon noodles were very long and I left them that way when I served dinner because they brought out the kid in me, taking my time to wrap large clumps round my chopsticks (bad table etiquette I know, but fun nonetheless)

Alkaline Green Smoothie & New York City!

You might ask, “What’s healthier than a green smoothie?” Well… there’s green smoothies and then there’s Alkaline green smoothies! Green is all the rage but you can get caught up in the hype of green and still not be doing yourself a very big favour. Many of the green smoothie recipes are jammed with super sweet fruit and just because they are green, people are thinking they are optimally healthy. They taste divine and it helps to mask the green business but is it a good idea? I say ‘No’ because I believe in minimizing your sugar intake, even fruit sugars especially the high sugar fruits like pineapple, bananas, mangoes and oranges, as they are acid forming and they elevate blood sugar just like any other sugar. The alkaline food chart is here if you want to take a peek at the alkalinity of various fruits. I have other ways to make the green taste yummy and actually the green itself doesn’t taste bad in the first place. You might say, “Well, fruit is healthy”- and yes it can be but moderation is key. Many people don’t do moderation and who knows how many of these so called healthy green smoothies they have in a day or every morning. I say mix it up and have the odd tropical fruit sweetened green smooth, but adapt the knowledge and the understanding of how healthy an alkalizing green smoothie is and then alternate or eventually switch to the better choice.
Even if you take a look at the franchises that offer smoothies and fresh juices you’d be surprised at the sugar content in those so called healthy smoothies and juices that people are replacing meals with. If you have diabetic tendencies, any inflammation in your body, or perhaps yeast over growth or candida symptoms (check here to see if you have any) you will want to steer clear of high sugar at as this just exasperates the problems.

Getting your daily greens at every meal is the best way to be optimally healthy. Green plants are the building blocks of red blood cells and are naturally rich in alkaline minerals, vitamins, amino acids, proteins, and most of the essential resources your body needs. Jason of Vital Living explains further how important green plants are for us- take a peek at his recent post here.
Adding an alkaline green smoothie to your daily routine is a fantastic way to further alkalize and an easy way for your body to assimilate the nutrients and the fiber as the blender breaks it down making it easier on your digestive track to absorb. I am passionate about making sure I get my greens in as many ways possible as I crave the healthy feeling I get but sometimes I’m not in the mood to chomp a salad so I just blend my greens up.
Alkaline Green Smoothie
yield- 1 smoothie approx 12-16oz
6″ piece of cucumber
3 medium Kale leaves, torn
5 stems fresh mint
3 stems fresh parsley
1″ piece fresh ginger
1 avocado
1 cup coconut water
fresh juice of one lime
1-2 tsp udo’s oil
1-2 tbsp hemp seeds
2-3 drops stevia or a tsp of agave
Method
Place all ingredients into high speed blender and mix until smooth, adding a little filtered water if needed for consistency. Enjoy!
Optionally, I sometimes add 1/2 cup frozen berries-blueberries, raspberries or strawberries as they are low sugar fruit that is healthier to add than the super sweet fruits. However, you may find that you like the smoothie as is above. The lime, the ginger and the mint are really nice together. I have discovered that the coconut water is quite hydrating and I like the flavour it brings to the smoothie but it does contain a little natural sugar. You might like to use almond milk in place if you want to avoid the sugar all together as it will still taste nice. If I can actually find a young coconut in the market to open up so I can extract the juice and the meat, it’s a good day! I love how fresh it is and the meat makes the smoothie just divine. The bottled coconut water is okay but because it has been pasteurized the nutrient levels are considerably less, but still beneficial. Just be sure to buy the unsweetened, unflavoured version.

I hope this smoothie becomes your “go to” recipe that you can play with for a variety of flavours. I am actually wishing I could make one right now since I am tucked away in my New York City hotel room as the snow storm over takes the city but I didn’t pack the blender-dang! But the good thing is that I am only blocks away from a few fabulous establishments that are raw and offer incredible smoothies, juices and delicious meals if I choose to brave the cold snow and winds. I flew in for a special seminar with Seth Godin and have another 48 hours here but oh my, word the snow!
As a little surprise for you I have planned to share about a couple of these healthy food entrepreneurs of New York in my upcoming posts with an interview or two so do stay tuned-that is if I get out of this town with the near state of emergency snow storm that is happening out there RIGHT now!
Hope you have a great week. Wish me luck with this storm!
Julie
ps. I should mention that a good rule of thumb is to be sure your smoothie’s “green content” is more than 50% so that if you do choose to add sweeter fruits you will still end up with a good balance of alkaline benefits.
Tasty Green Juice

Yuummmm!
Is your morning ritual healthy? Does it include alkalizing foods that will nourish your cells providing terrific energy to start your day? If you’re not quite sure, let me show you what is incredibly delicious that will do exactly that! First off though, this is a recipe that requires that you make a commitment to your health goals, bite the bullet and get yourself a juicer- and get a decent one cuz believe me it will become one of the top used appliances in your kitchen once you taste this addictive recipe and feel the benefits of juicing. See our juicer info here. I can’t take full credit for this recipe because it was originally created by Matthew Kenney who wrote Everyday Raw. I adapted this by using less apple or no apple to reduce the sweetness. If I want to be a purist and keep the fruit separate but I want a little sweet I add a little stevia to the juice and voila pure veggies, some lemon and some sweetness. Still just divine!
I must admit that hardly a day passes that I don’t begin my day without this yummy juice, which must mean that I am addicted to this drink. And I know that there are many other delicious recipes, and have tried many others but there is something about this combination that everyone in the family also absolutely loves. When we are out of any one ingredient we kinda panic- we run to the grocery store in the morning to get what we need- crazy huh?

Morning Green Juice
1 apple ( may leave out if you wish for no sweetness)
1 lemon peeled
2 celery stalks
2 large carrots
1 large english cucumber or 2 field cukes
1/2″ piece of fresh ginger
6-10 stems parsley (any kind)
6 stems fresh mint
Method
Begin juicing all items above making sure NOT to juice the herbs & ginger last as they need a solid veggie to force their goodness residue thru the mesh of the machine.
Stir and pour into glass. I have this thing for straws so I always enjoy mine with a straw- my morning cocktail! Yum!!
Yield: Approx 20-25 fl oz. Depending on the size of each of your veggies it will vary. Add more cucumber to increase volume if you wish. I have even juiced a small zuchini in a pinch. I am often double this recipe for a family of 5 every morning.
Tip 1 : Get yourself a compost if you don’t already have one and you’ll be producing the most amazing soil!
Tip 2: 20-30 mins after drinking this follow with my spelt porridge recipe and you will be good to go for about 3 hours or more. It’s good to snack on raw healthy nuts in between meals if you feel the growlies so grab a handful to take with you as you head out the door.