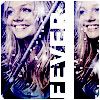
Icon Tutorial: Emma Bunton
Learn How To Make This Icon In Photoshop

This is my first tutorial. It was made for Photoshop users assuming you have basic knowledge of the tools and effects. If you have questions feel free to ask.
First I'm going to start off with this image which I've resized:

Duplicate the layer once and set it to softlight then go to filter>sharper>sharpen

Next add a new layer between the two layers you currently have and set it to exclusion and fill it with #0D004C

Make a new layer between your bottom layer and the exclusion layer and fill it with #A186BE and set it to color

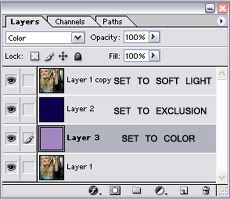
Here's what your layer palette should look like now:
Add the gradient below and set it to screen at 79%

Now flatten the image (edit>flatten image) and then duplicate the layer and drag it to where you want it. Then use the shape tool to make a line between the two images and make sure it's color is set to #FFFFFF (also known as white).

Flatten the image again and duplicate the layer and go to filter>blur>motion blur and set it to about 24 then set the layer to color burn.

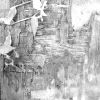
Finish it off with a texture by teh_indy set to overlay
And then some text size 24, Arial Black, in all caps. To rotate it go to edit>transform>rotate 90 degrees CCW

Now you can do whatever you want but I decided to add some sparkle and a border from hybrid-genesis.com. The border gave me the rounded edges in case you were wondering. You can use any type of border you want but it looks best if the color is set to white

Then I flattened the image once again duplicated the layer and set it to color burn and then sharpened it. Here is my finished product:


This is my first tutorial. It was made for Photoshop users assuming you have basic knowledge of the tools and effects. If you have questions feel free to ask.
First I'm going to start off with this image which I've resized:

Duplicate the layer once and set it to softlight then go to filter>sharper>sharpen

Next add a new layer between the two layers you currently have and set it to exclusion and fill it with #0D004C

Make a new layer between your bottom layer and the exclusion layer and fill it with #A186BE and set it to color

Here's what your layer palette should look like now:

Add the gradient below and set it to screen at 79%

Now flatten the image (edit>flatten image) and then duplicate the layer and drag it to where you want it. Then use the shape tool to make a line between the two images and make sure it's color is set to #FFFFFF (also known as white).

Flatten the image again and duplicate the layer and go to filter>blur>motion blur and set it to about 24 then set the layer to color burn.

Finish it off with a texture by teh_indy set to overlay

And then some text size 24, Arial Black, in all caps. To rotate it go to edit>transform>rotate 90 degrees CCW

Now you can do whatever you want but I decided to add some sparkle and a border from hybrid-genesis.com. The border gave me the rounded edges in case you were wondering. You can use any type of border you want but it looks best if the color is set to white

Then I flattened the image once again duplicated the layer and set it to color burn and then sharpened it. Here is my finished product:
