Pony KAL #3: Chest/Pelvis, Legs, and Details
Time for part 3! Just a little more knitting, guys. Pics/directions under the cut, click to embiggen.
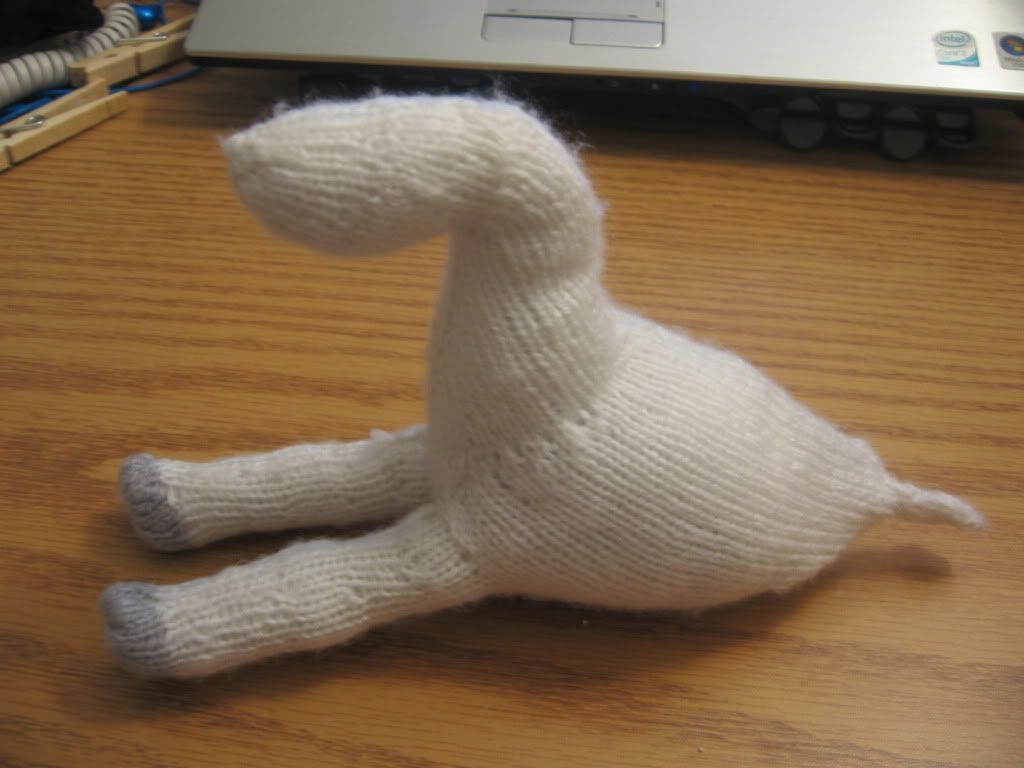
When last we stopped, we had the whole body knit up, with large openings for the legs. We're going to start this round by filling in those holes.
WIRING THE FRONT LEGS
Cut a 15-inch piece of wire. Bend the ends into large circles (~.75" in diameter), then bend the entire thing into a symmetrical U-shape.
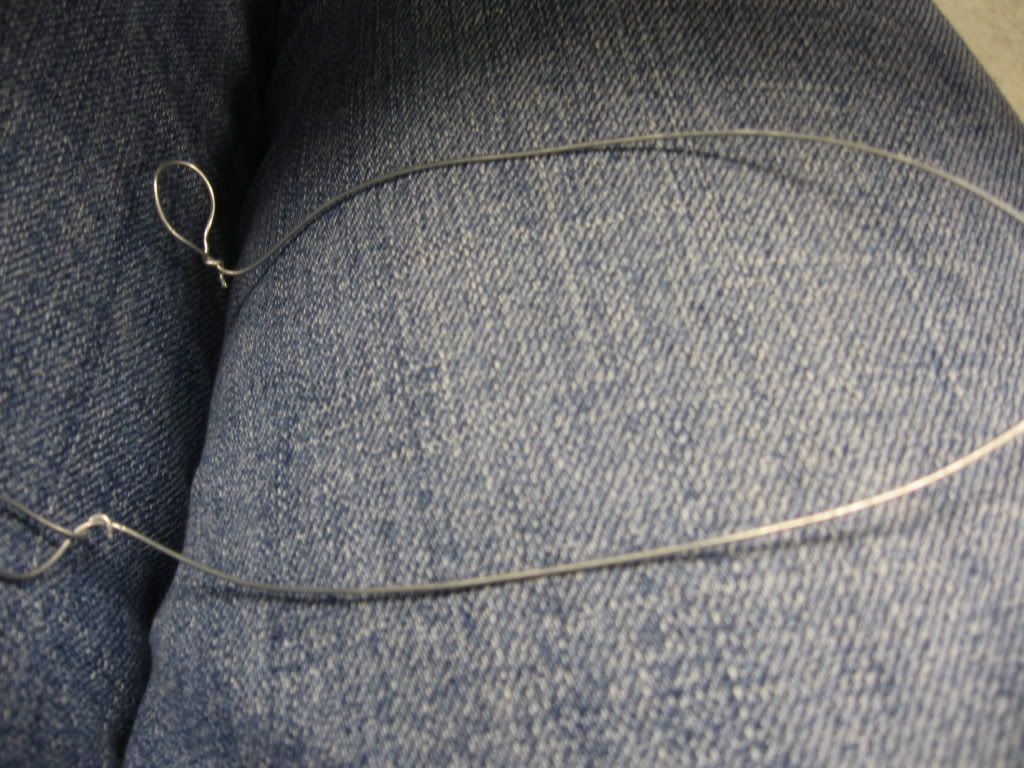
Rotate it so the ends point down and the apex of the U is at the center back of where the neck and body join. Attach this center point.
Gently bend the wire so it runs down the shoulders of the horse, parallel to the vertical edges of the shoulder. Attach the wire at one or two more points inside the body shell to be secure.

Okay, NOW we can knit.
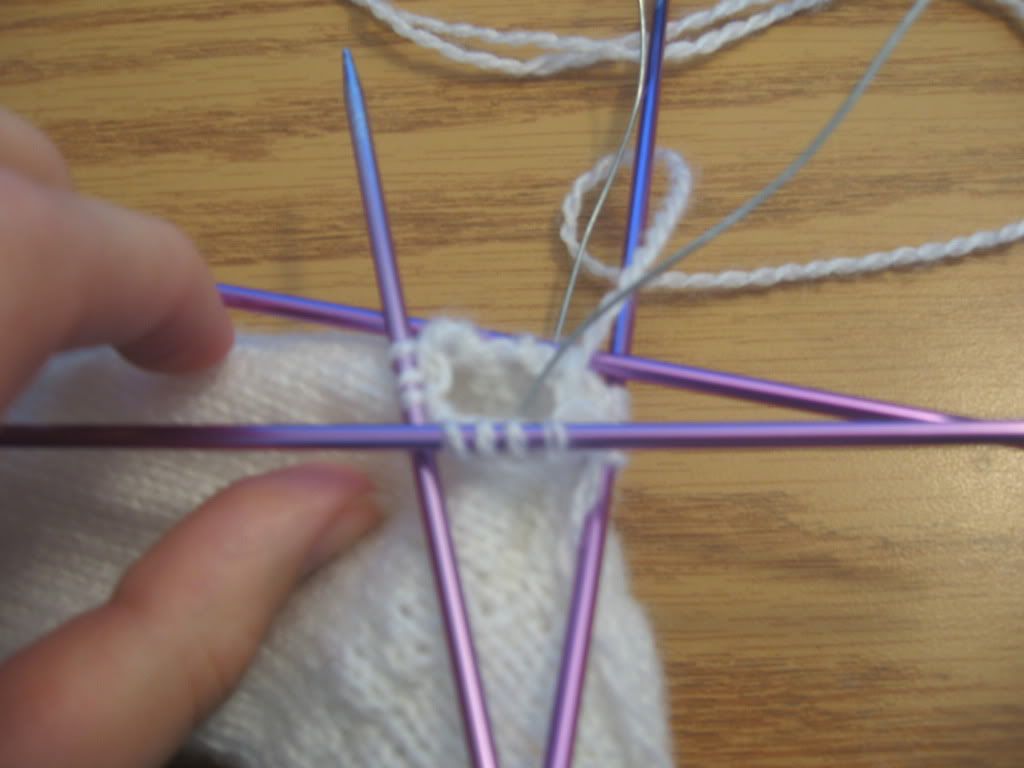
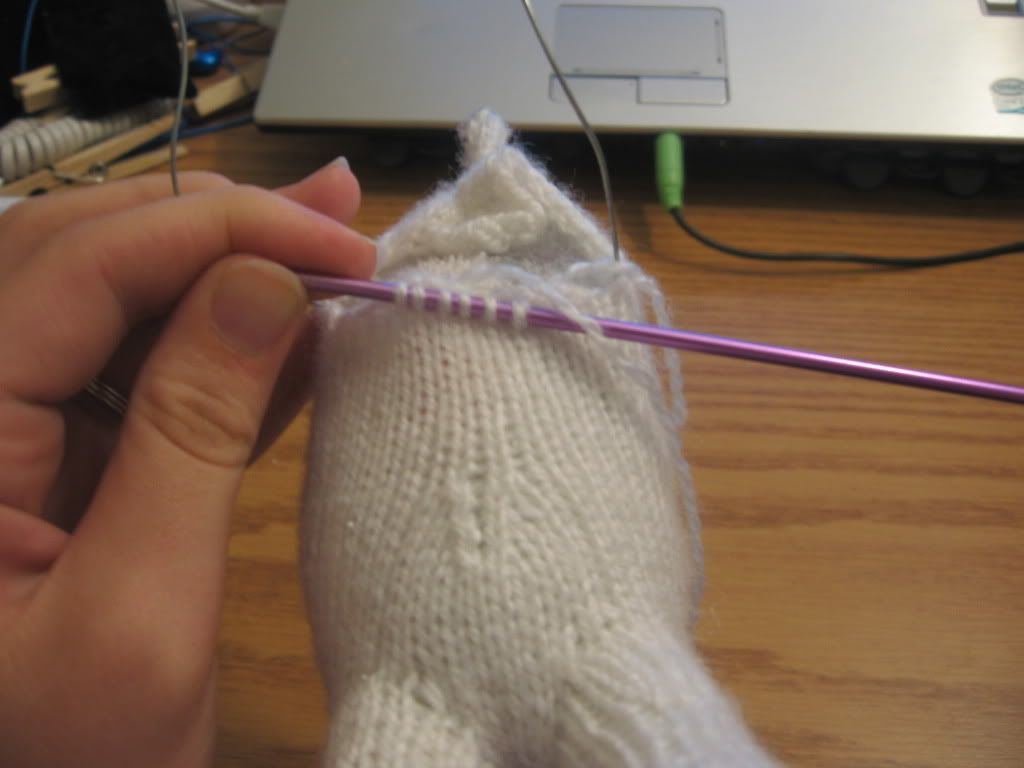
STERNUM
Knit up 10 sts along front of chest.
Purl one row, knit one row, purl one row.
Next row: Ssk, k to last 2 sts, k2tog.
Next row: Purl.
Repeat these two rows until 6 sts remain, ending with a purl row.
Work 6 rows plain. You should have a little tab of stockinette stitch.
Graft 6 sts to belly.
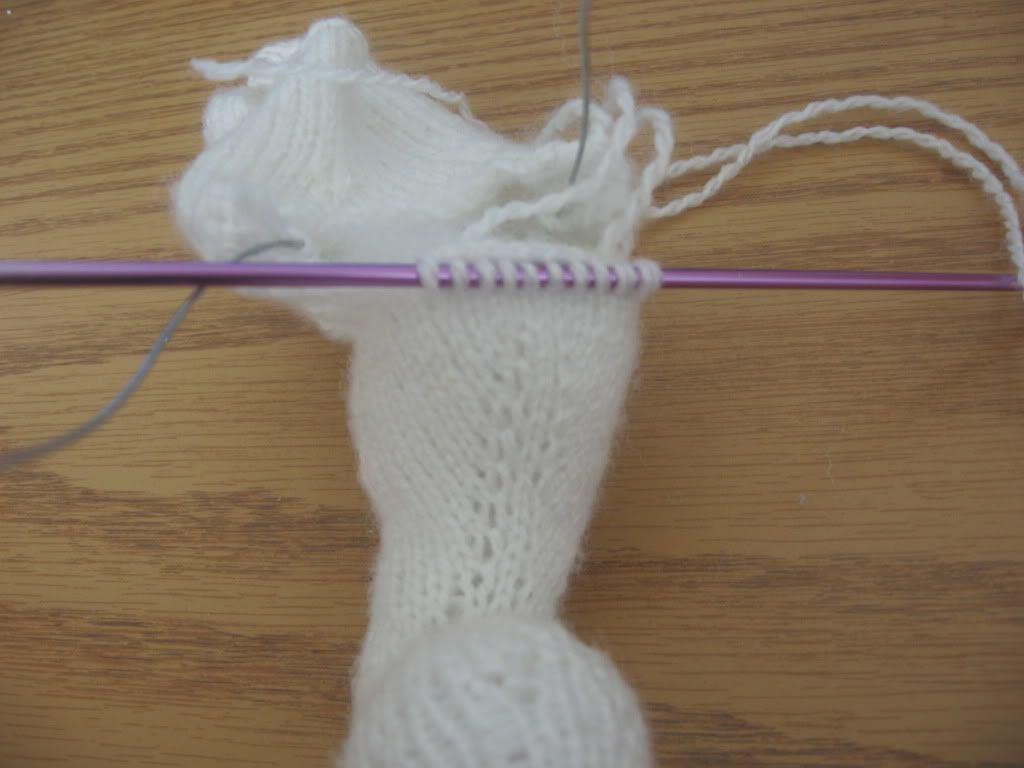
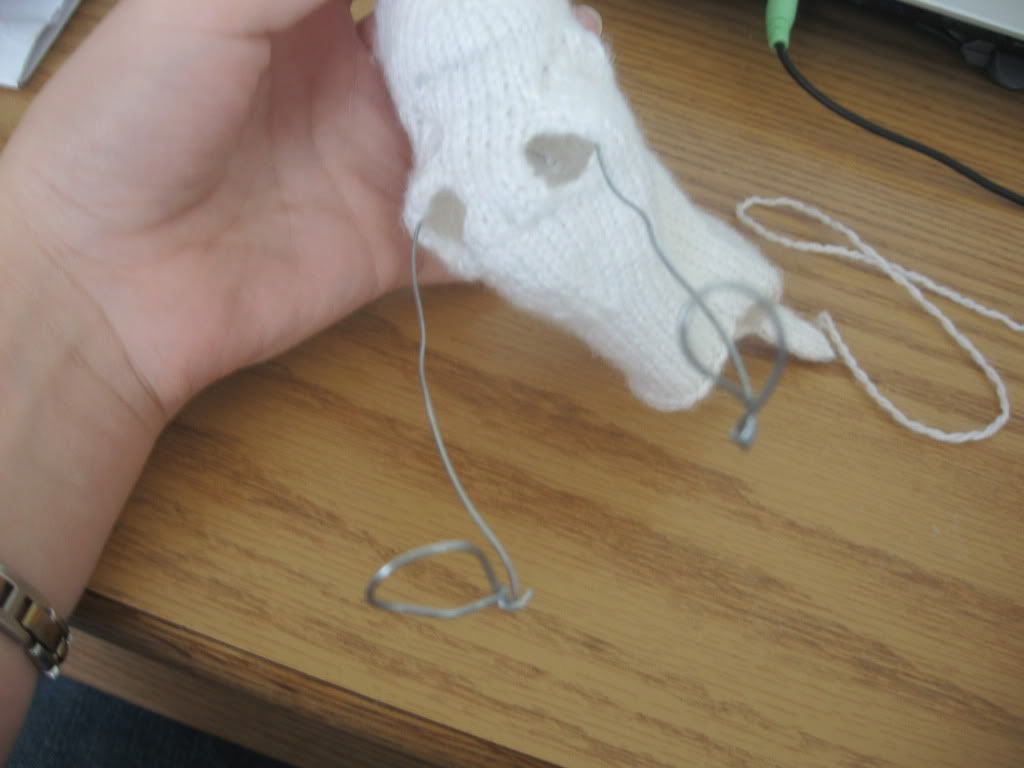
Sew cast-on edges of shoulder seams to sternum. MAKE SURE that the leg wires poke out through the holes formed by the sternum and body!
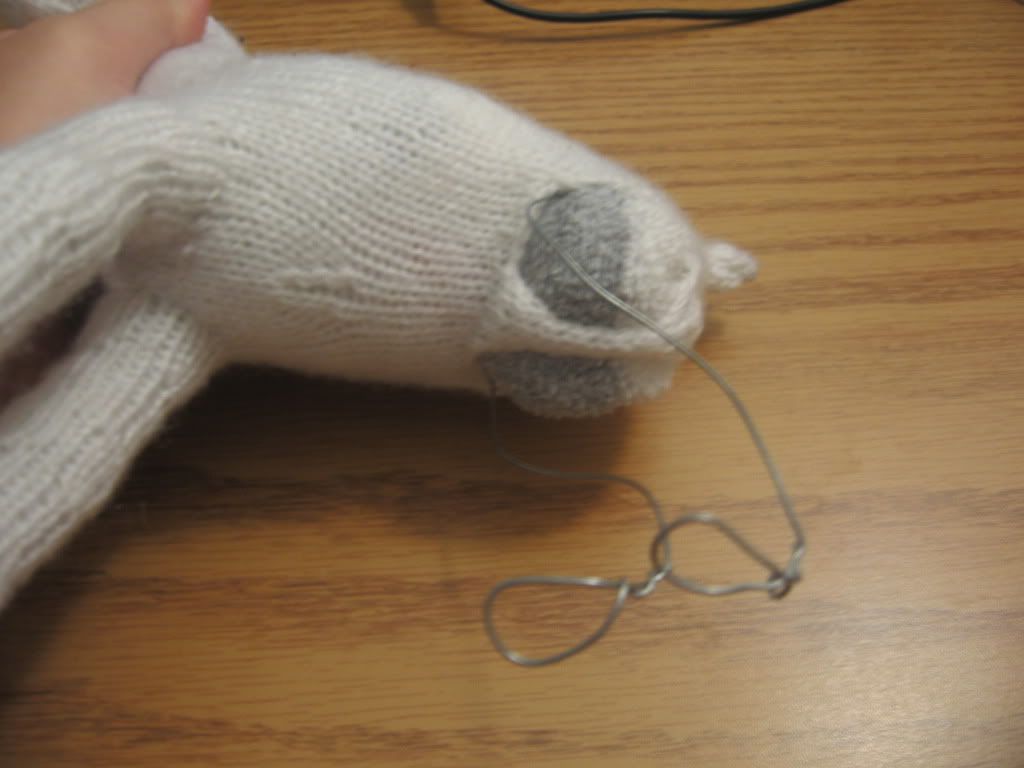
FRONT LEG
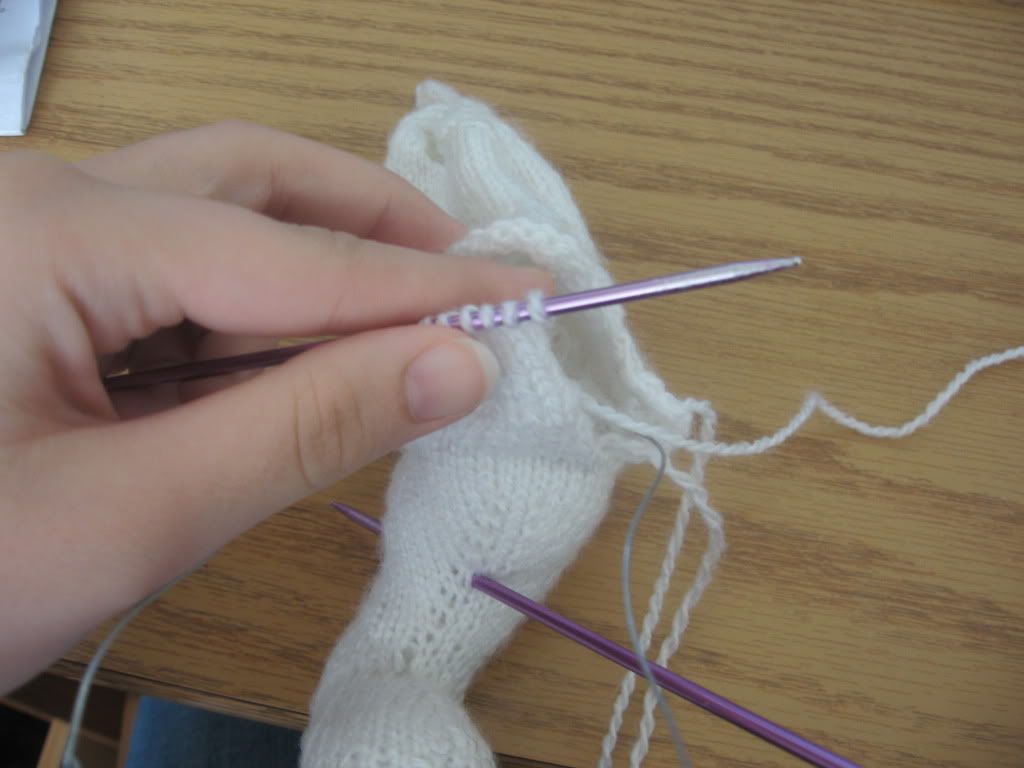
As you are knitting this, be sure to secure the leg wires along the front edge of the leg and stuff as you go.
Knit up 16 sts around leg hole starting at front center of leg.
Work 5 rnds plain.
Next rnd: [K2, k2tog] 4x.
Work 7 rnds plain.
Next rnd: [K3, M1R] 4x.
Work 5 rnds plain.
Next rnd: [k2, k2tog] 4x.
Work 8 rnds plain.
K5, M1R, k2, M1L, k5.
Work 2 rnds plain.
K5, ssk, k2tog, k5.
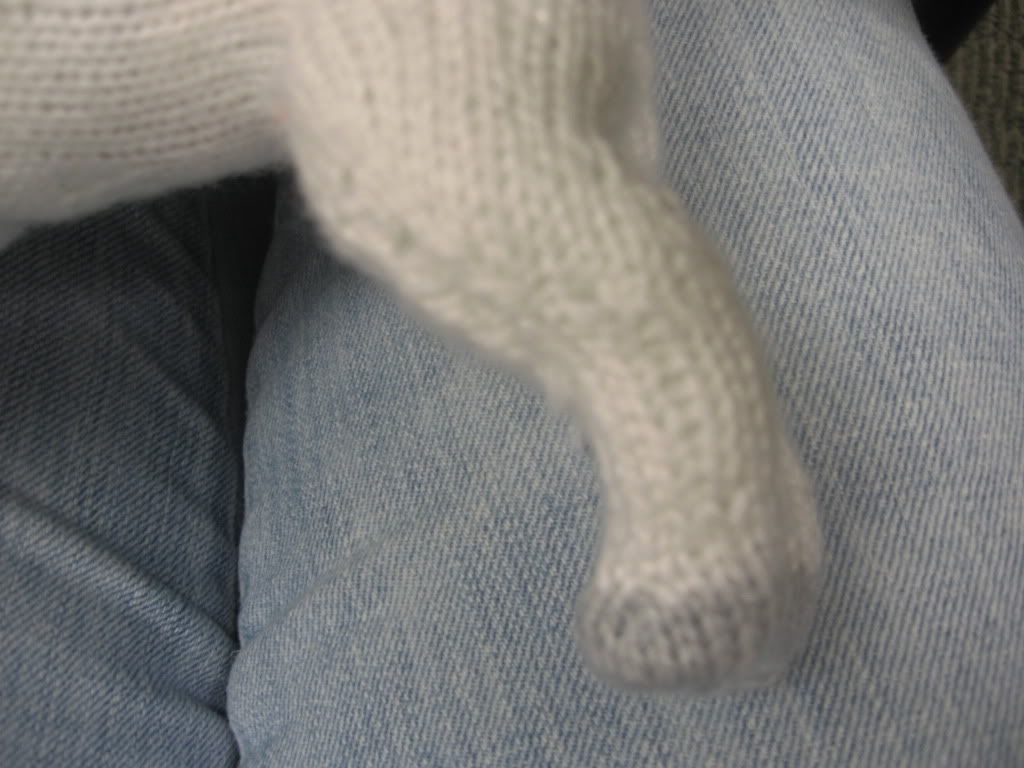
Switch to hoof color; k 1 rnd plain.
Next rnd: K1, M1L, k to last st, M1R, k1.
Repeat last rnd 2x more.
K 2 rnds plain.
K2tog around to last st. Pull sts up in a loop and sew to bottom of hoof wire.
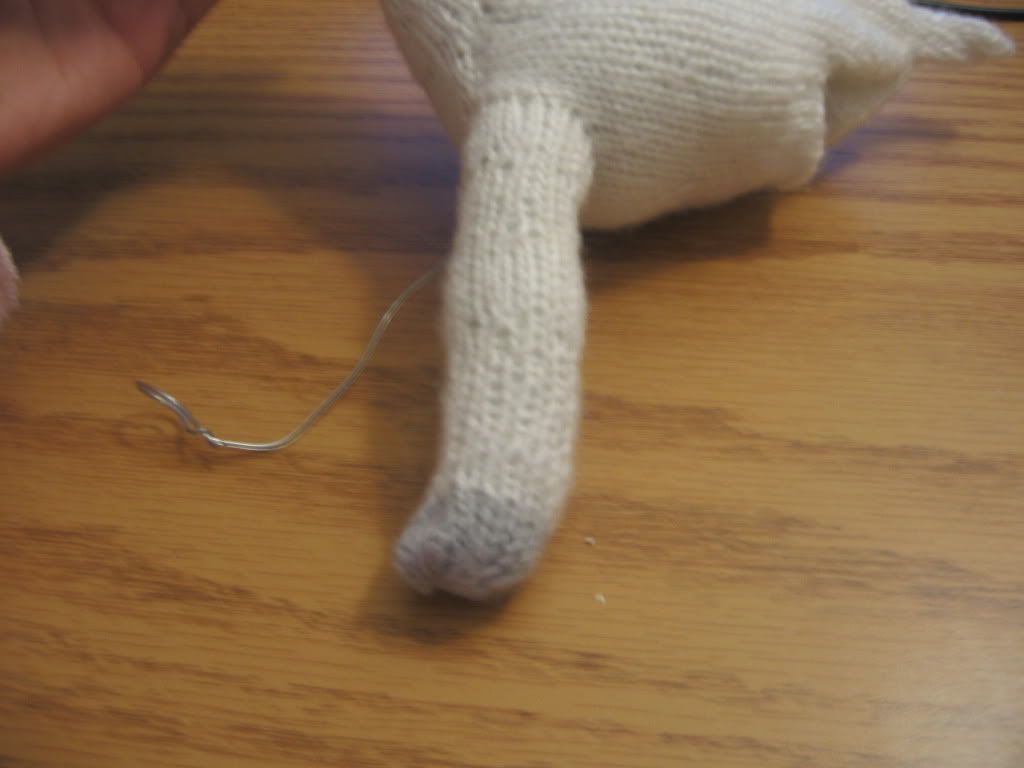
Repeat for other leg.
WIRING THE BACK LEGS
Cut a 15-inch piece of wire. Bend the ends into loops like the front legs, then bend the entire thing into a symmetrical U-shape.
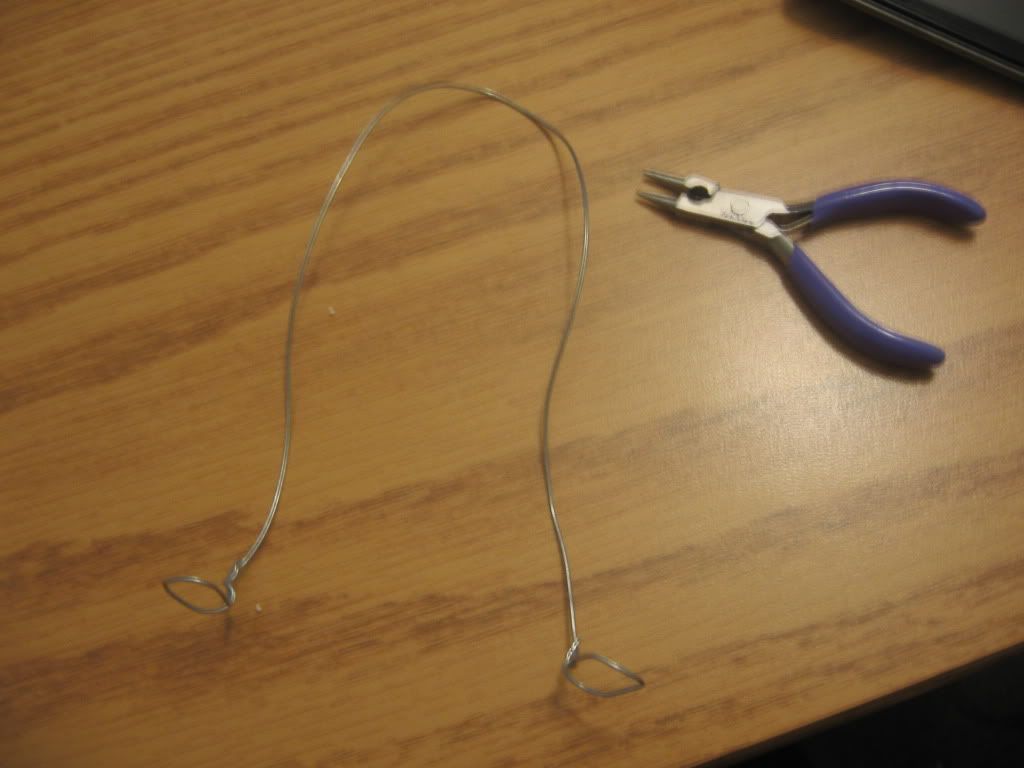
Rotate it so the ends point down and the apex of the U is at the center back of the body, parallel to the front of the rear leg opening. Attach this center point.
Gently bend the wire so it runs down the sides of the horse, parallel to the vertical edges of the leg opening. Attach the wire at one or two more points, and gently bend it so it forms the general shape of horse back legs.

Pause for a moment and stuff the belly as full as you can. I used two small pouches of polystyrene pellets and filled in the gaps with fiberfill.
PELVIC STRIP
Knit up 6 sts from underbelly.
Work 3 rows plain.
Next row: ssk, k2, k2tog: 4 sts.
Work 9 rows plain.
Graft remaining stitches to...butt. (Seriously, there's no good way to describe that area.) Again, the leg wires should come out these two holes.
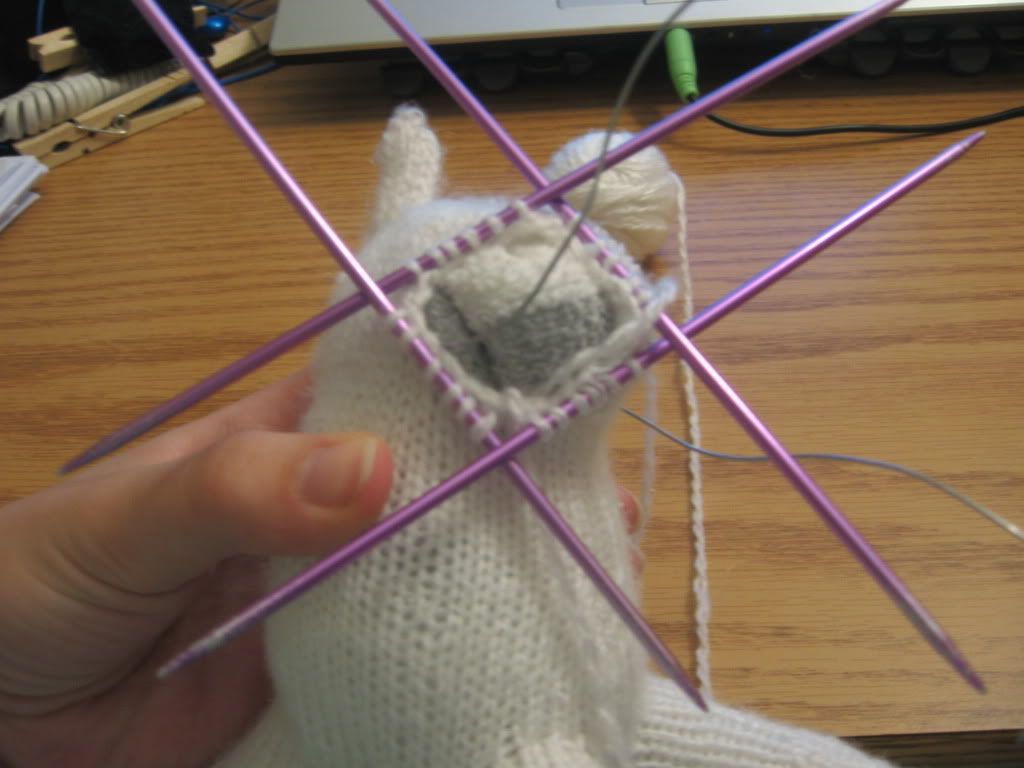
BACK LEG
As you knit, don't forget to attach the wire down the front of the leg and stuff it as you go.
Knit up 24 sts from leg hole, again starting at center front.
Work 5 rnds plain.
K10, k2tog, ssk, k10: 22 sts. Work 1 rnd plain.
K9, k2tog, ssk, k9: 20 sts. Work 1 rnd plain.
Ssk, k to last 2 sts, k2tog. Work 1 rnd plain.
Repeat last 2 rnds once more: 16 sts.
Ssk, k 5, M1R, k2, M1L, k5, k2tog. K 1 rnd plain.
Repeat last 2 rnds 2x more: 16 sts.
[K2, k2tog] 4x around: 12 sts.
K 12 rnds plain.
Switch to hoof color; k 1 rnd plain.
Next rnd: K1, M1L, k to last st, M1R, k1.
Repeat last rnd 2x more.
K 2 rnds plain.
K2tog around to last st. Pull sts up in a loop and sew to bottom of hoof wire.
Repeat for other leg.
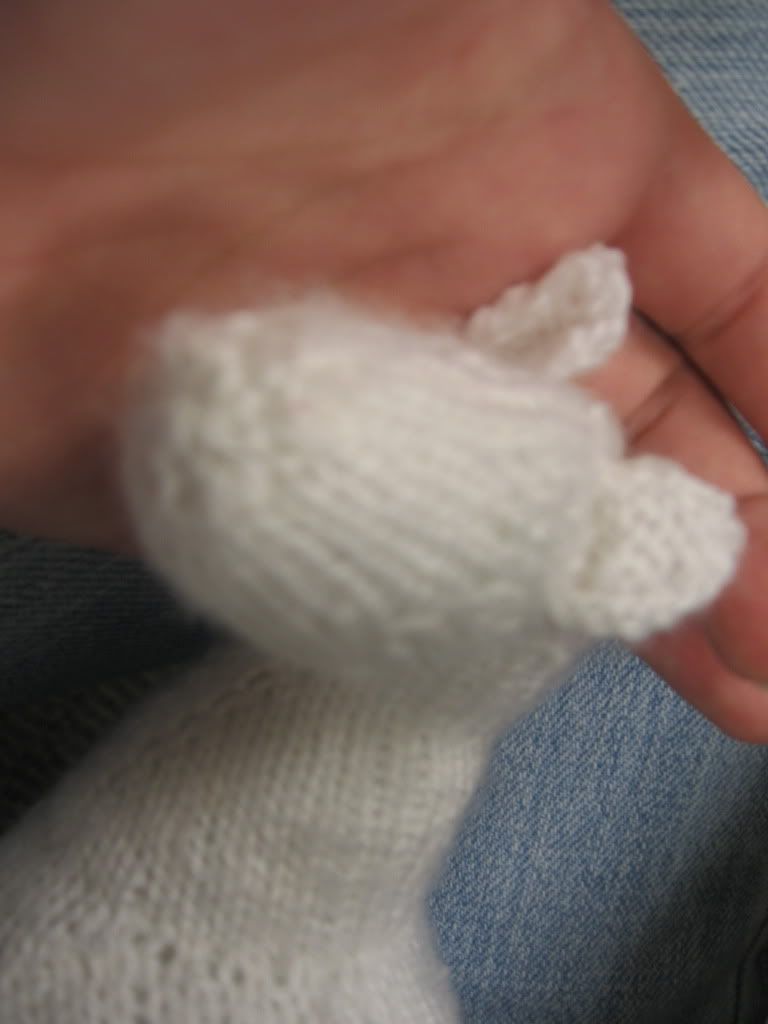
EARS (can't forget those!) - make 2
Cast on 5 sts, purl back.
Knit 1 row, purl 1 row.
SSK, k to last 2, k2tog.
Purl back.
Repeat last 2 rows once more: 3 sts remain.
Slip 1, k2tog, pass sl st over: 1 st.
Fasten off.
Sew in the appropriate places on your horse's head.
If you want your horse to be a unicorn, make another wee triangle and seam it up into a cone, then sew it to your horse's forehead. I used some crochet cotton that had a glitzy gold strand in it and started with seven stitches instead of five. Alternatively, use a spiral cowrie shell (or make one from sculpey, or get a charm/bead) and sew that in place.
Check it out, guys! We're done with all the knitting for this project! All that's left is adding all that glorious fluffy hair. Check back for that in a little while!
LINKS TO OTHER KAL SECTIONS
1. Intro and Materials
2. Head, neck and body
3. Chest/pelvis, legs, and details - you are here!
4. Mane and tail
Index of all Pony KAL posts
When last we stopped, we had the whole body knit up, with large openings for the legs. We're going to start this round by filling in those holes.
WIRING THE FRONT LEGS
Cut a 15-inch piece of wire. Bend the ends into large circles (~.75" in diameter), then bend the entire thing into a symmetrical U-shape.

Rotate it so the ends point down and the apex of the U is at the center back of where the neck and body join. Attach this center point.
Gently bend the wire so it runs down the shoulders of the horse, parallel to the vertical edges of the shoulder. Attach the wire at one or two more points inside the body shell to be secure.

Okay, NOW we can knit.
STERNUM
Knit up 10 sts along front of chest.

Purl one row, knit one row, purl one row.
Next row: Ssk, k to last 2 sts, k2tog.
Next row: Purl.
Repeat these two rows until 6 sts remain, ending with a purl row.
Work 6 rows plain. You should have a little tab of stockinette stitch.

Graft 6 sts to belly.
Sew cast-on edges of shoulder seams to sternum. MAKE SURE that the leg wires poke out through the holes formed by the sternum and body!

FRONT LEG
As you are knitting this, be sure to secure the leg wires along the front edge of the leg and stuff as you go.
Knit up 16 sts around leg hole starting at front center of leg.

Work 5 rnds plain.
Next rnd: [K2, k2tog] 4x.
Work 7 rnds plain.
Next rnd: [K3, M1R] 4x.
Work 5 rnds plain.
Next rnd: [k2, k2tog] 4x.
Work 8 rnds plain.
K5, M1R, k2, M1L, k5.
Work 2 rnds plain.
K5, ssk, k2tog, k5.
Switch to hoof color; k 1 rnd plain.
Next rnd: K1, M1L, k to last st, M1R, k1.
Repeat last rnd 2x more.
K 2 rnds plain.
K2tog around to last st. Pull sts up in a loop and sew to bottom of hoof wire.

Repeat for other leg.

WIRING THE BACK LEGS
Cut a 15-inch piece of wire. Bend the ends into loops like the front legs, then bend the entire thing into a symmetrical U-shape.

Rotate it so the ends point down and the apex of the U is at the center back of the body, parallel to the front of the rear leg opening. Attach this center point.
Gently bend the wire so it runs down the sides of the horse, parallel to the vertical edges of the leg opening. Attach the wire at one or two more points, and gently bend it so it forms the general shape of horse back legs.

Pause for a moment and stuff the belly as full as you can. I used two small pouches of polystyrene pellets and filled in the gaps with fiberfill.
PELVIC STRIP
Knit up 6 sts from underbelly.

Work 3 rows plain.
Next row: ssk, k2, k2tog: 4 sts.
Work 9 rows plain.
Graft remaining stitches to...butt. (Seriously, there's no good way to describe that area.) Again, the leg wires should come out these two holes.

BACK LEG
As you knit, don't forget to attach the wire down the front of the leg and stuff it as you go.
Knit up 24 sts from leg hole, again starting at center front.

Work 5 rnds plain.
K10, k2tog, ssk, k10: 22 sts. Work 1 rnd plain.
K9, k2tog, ssk, k9: 20 sts. Work 1 rnd plain.
Ssk, k to last 2 sts, k2tog. Work 1 rnd plain.
Repeat last 2 rnds once more: 16 sts.
Ssk, k 5, M1R, k2, M1L, k5, k2tog. K 1 rnd plain.
Repeat last 2 rnds 2x more: 16 sts.
[K2, k2tog] 4x around: 12 sts.
K 12 rnds plain.
Switch to hoof color; k 1 rnd plain.
Next rnd: K1, M1L, k to last st, M1R, k1.
Repeat last rnd 2x more.
K 2 rnds plain.
K2tog around to last st. Pull sts up in a loop and sew to bottom of hoof wire.

Repeat for other leg.
EARS (can't forget those!) - make 2
Cast on 5 sts, purl back.
Knit 1 row, purl 1 row.
SSK, k to last 2, k2tog.
Purl back.
Repeat last 2 rows once more: 3 sts remain.
Slip 1, k2tog, pass sl st over: 1 st.
Fasten off.
Sew in the appropriate places on your horse's head.

If you want your horse to be a unicorn, make another wee triangle and seam it up into a cone, then sew it to your horse's forehead. I used some crochet cotton that had a glitzy gold strand in it and started with seven stitches instead of five. Alternatively, use a spiral cowrie shell (or make one from sculpey, or get a charm/bead) and sew that in place.
Check it out, guys! We're done with all the knitting for this project! All that's left is adding all that glorious fluffy hair. Check back for that in a little while!
LINKS TO OTHER KAL SECTIONS
1. Intro and Materials
2. Head, neck and body
3. Chest/pelvis, legs, and details - you are here!
4. Mane and tail
Index of all Pony KAL posts