Project: Shoe modification!
Our unit in shoe class right now is on modifying shoes on some basic structural level to achieve a new silhouette or shape. As i've mentioned before, i do the projects a step ahead of or along with my students, so that they can observe my process as well as one another's. So, here is one of my pairs of shoes that i've completely remade:
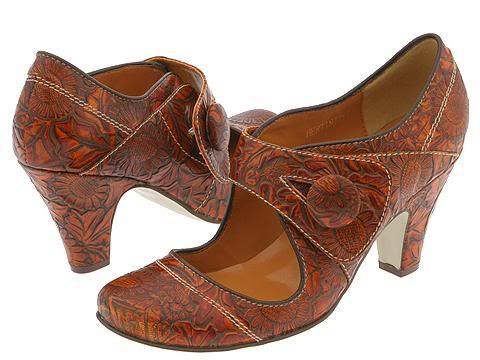
Here is my research photo. This is the shape/look i was shooting for.
Photo is of a pair sold on Zappos.com for $165.
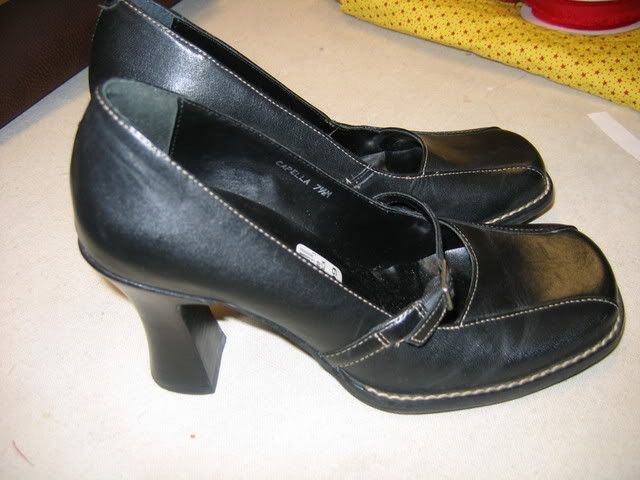
Here are my base shoes.
These have sat in my closet for 3 years, entirely unworn but for once when i played an angry office-worker in a music video. (Don't ask.) I decided that, within the context of the project, i'd allow myself to expand the color range of the shoes, largely because there's no good way of turning black leather to brown leather. I could spray them with shoe spray, but i actually wanted to turn these shoes into ones i'd wear, and i feel that shoe-spray, while often fine for stagewear, is not something i care to have for streetwear shoes. I decided what was most important was to change the actual shape of the shoe into the maryjane-strap/button style, and incorporate the elements of textural leather and more decorative topstitching. I removed that little tiny buckle-strap and set to work.
I decided to add a sort of "saddle shoe" shape that would extend under the arch, and on top of which a strap would be added to create those big rounded strap-flanges, like this:
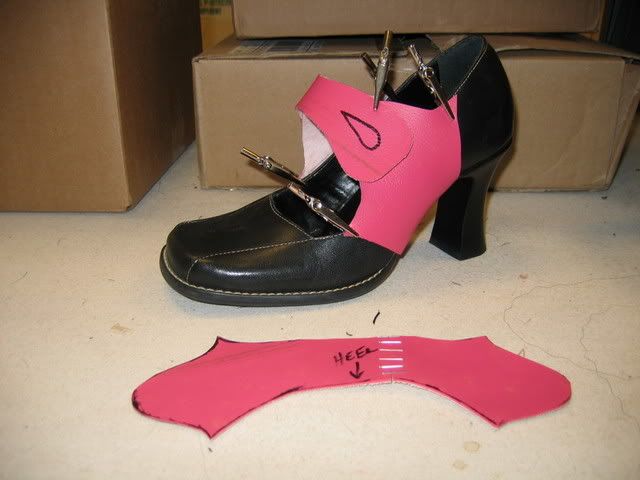
Note skanky pink vinyl couch cushion cannibalized for mock-up/pattern material. Whee!
I tried the shoe on at this point to make sure the shapes were good for my foot.
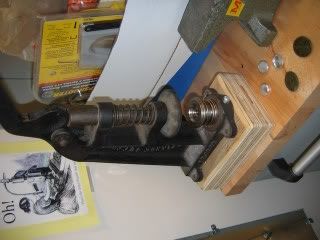
I used our industrial button press to create 1" leather-covered buttons.
The next thing i did was to trace the pattern pieces out onto some scraps of green upholstery leather that i found in storage, one plain-grain and one with a pressed faux-crocodile pattern. I then adhered my pieces to some thin pigskin as lining, and stitched them close to the marked edge.
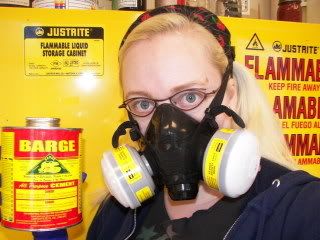
Use proper respiratory protection when working with Barge adhesive!
It is a proven cancer-causing agent and who wants cancer? Why, no one.
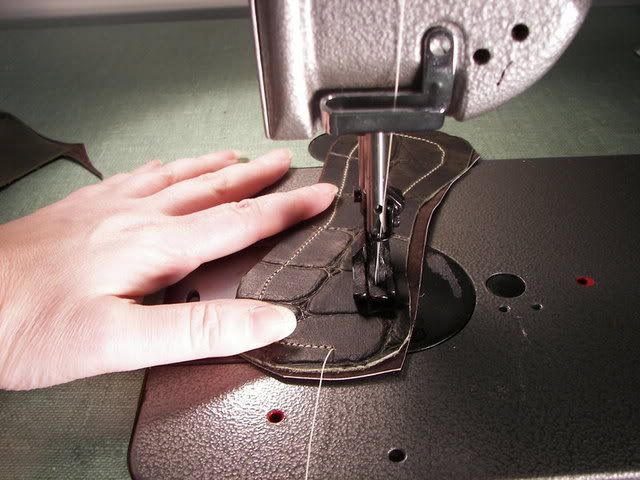
Stitching around the strap piece.
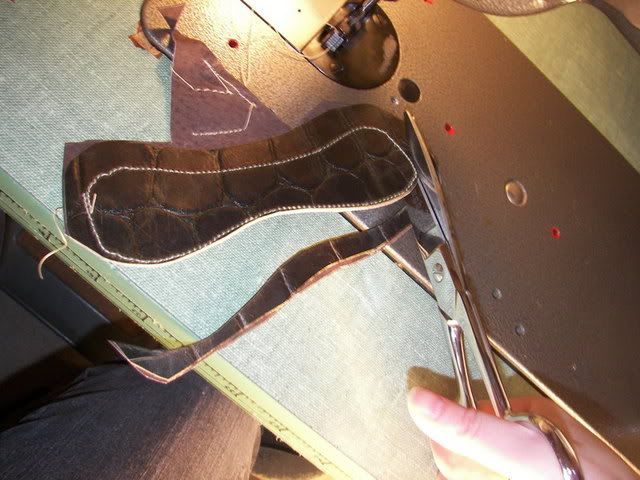
Here i am cutting away the excess, close to my stitching line.
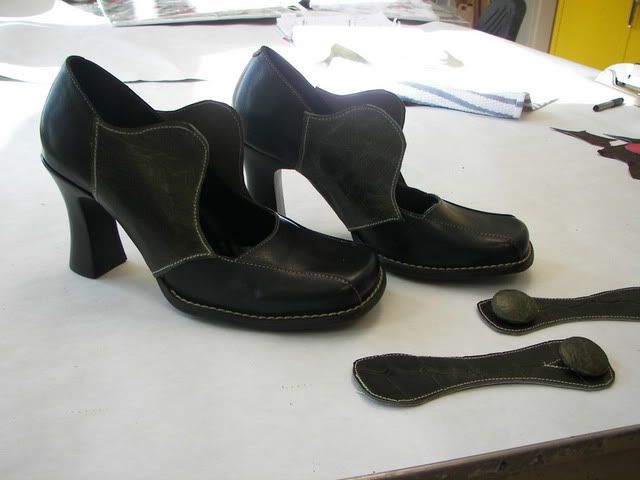
I then Barged the pieces onto the shoes themselves.
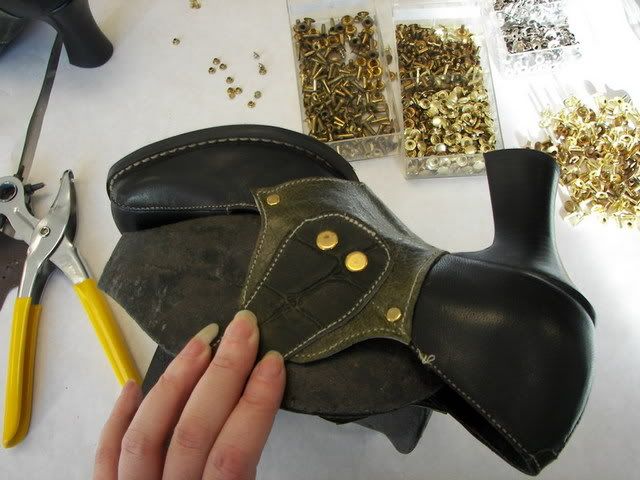
I decided to reinforce the interior of the saddle piece with two small tarnished-brass rivets, and to attach my strap with two more, slightly larger rivets. The above photograph shows this, and also is probably the best illustration of the two shades of green of the added leather pieces. I then punched a hole in the strap for the button's shank to go through, and the button itself is attached with a small piece of elastic. In this manner, the shoes can be slipped on and off easily without actually operating the button.
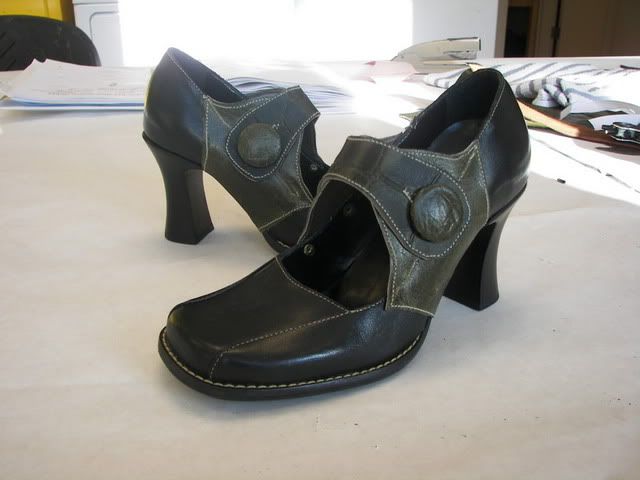
Here they are, my fabulous new shoes!
Total cost: $0
Incidentally, if you want to read about some easy fit-related shoe modification ideas that anyone with cobbler's access can do, check out this post on having elastic godets added to her bootshafts to accomodate wider calves by La Bricoleuse reader jacquez.

Here is my research photo. This is the shape/look i was shooting for.
Photo is of a pair sold on Zappos.com for $165.

Here are my base shoes.
These have sat in my closet for 3 years, entirely unworn but for once when i played an angry office-worker in a music video. (Don't ask.) I decided that, within the context of the project, i'd allow myself to expand the color range of the shoes, largely because there's no good way of turning black leather to brown leather. I could spray them with shoe spray, but i actually wanted to turn these shoes into ones i'd wear, and i feel that shoe-spray, while often fine for stagewear, is not something i care to have for streetwear shoes. I decided what was most important was to change the actual shape of the shoe into the maryjane-strap/button style, and incorporate the elements of textural leather and more decorative topstitching. I removed that little tiny buckle-strap and set to work.
I decided to add a sort of "saddle shoe" shape that would extend under the arch, and on top of which a strap would be added to create those big rounded strap-flanges, like this:

Note skanky pink vinyl couch cushion cannibalized for mock-up/pattern material. Whee!
I tried the shoe on at this point to make sure the shapes were good for my foot.

I used our industrial button press to create 1" leather-covered buttons.
The next thing i did was to trace the pattern pieces out onto some scraps of green upholstery leather that i found in storage, one plain-grain and one with a pressed faux-crocodile pattern. I then adhered my pieces to some thin pigskin as lining, and stitched them close to the marked edge.

Use proper respiratory protection when working with Barge adhesive!
It is a proven cancer-causing agent and who wants cancer? Why, no one.

Stitching around the strap piece.

Here i am cutting away the excess, close to my stitching line.

I then Barged the pieces onto the shoes themselves.

I decided to reinforce the interior of the saddle piece with two small tarnished-brass rivets, and to attach my strap with two more, slightly larger rivets. The above photograph shows this, and also is probably the best illustration of the two shades of green of the added leather pieces. I then punched a hole in the strap for the button's shank to go through, and the button itself is attached with a small piece of elastic. In this manner, the shoes can be slipped on and off easily without actually operating the button.

Here they are, my fabulous new shoes!
Total cost: $0
Incidentally, if you want to read about some easy fit-related shoe modification ideas that anyone with cobbler's access can do, check out this post on having elastic godets added to her bootshafts to accomodate wider calves by La Bricoleuse reader jacquez.