l0v3's super awesome Gimp tutorial!!
For my first Gimp tutorial ever, I'm gonna replicate the following sig as requested by Jiahe from Koei Warriors:

Some useful links....
Reminisce Color Effects Pack by ClaireJones from DeviantArt
Kingdom Hearts Image Stock
Green Piloww Font
I suggest downloading the Script Fu pack I linked. To install it, just unzip it and add it to the Script-fu folder in your GIMP folders. (If you don't know where that is, just search 'Gimp script-fu' in your computer's search engine XD)
I'll try to keep this as simple as I can, although you should be able to know how to use the Layers and the Colors dialogues. I've never ever ever ever ever EVER made a tutorial before, so sorry if your head spins while reading this.
Alrighty, let's get started!
1) Open a new canvas with the resolution as 350x150.
2) Now, open the stock image ( the Kingdom Hearts pic) as a new layer. Scale it so the ENTIRE image is 803 x 965, but center only the three people at the top right corner.
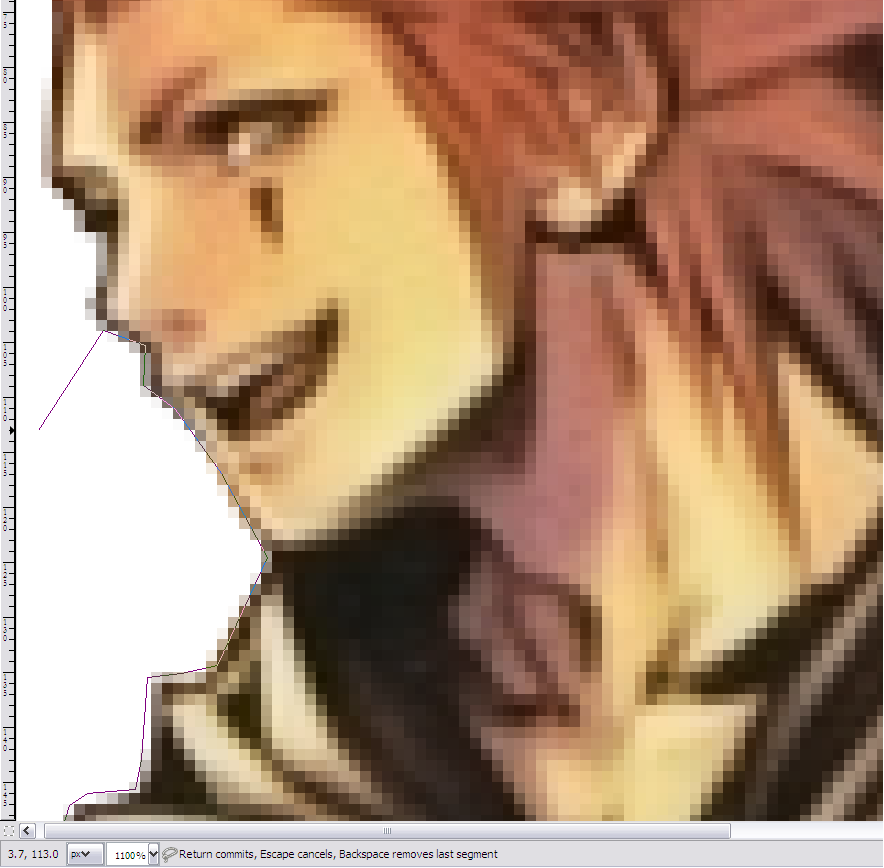
3) To render out the background, use the Free Select tool (it's the icon with the rope loop). Just make little lines around the people like so. To cut out a piece of background, circle around the part you want to cut out and click on the original dot. Once you see the little 'ants' running on where you drew just press Ctrl X. But if it's a bit too complicated for your liking just find an image that's already been rendered in another graphics site.
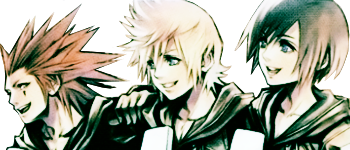
So now you should have something like this:
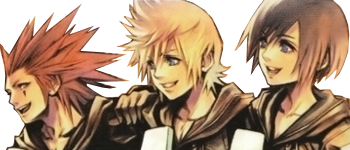
We will refer to this as your 'base image'.
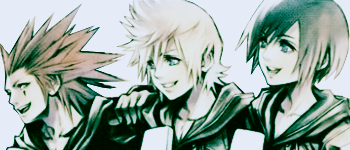
4) If you've got the Reminisce Color Effects Pack installed successfully, then just go to Script-fu > Actions > Color Effects > Reminisce > Reminisce Twilight and voila. Now you can just skip ahead to step 8.
BUT - if you're having problems installing it, or you just don't want to take up any more space on your computer, I can show you how to do it manually. With pretty pictures, of course.
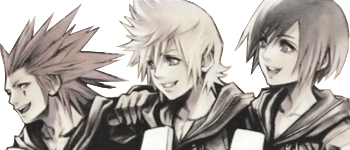
Duplicate your base image. At the top, go to Colors>Desaturate. From there you're given 3 options; choose luminosity. Now the second base image is black and white. Set it to Normal at 70% opacity.
5) Make a second copy of the desaturated layer and set it to Screen at 50% opacity.
What you should have so far is this.
6) Duplicate your base image and set it to Soft light at 100% Opacity.


7) Ok, now here's where you add the teal tinge. Make new layers of each color (HTML) and set it as so:
a) New Layer #2b2653 > Subtract at 5%
b) New Layer #ffe5de > Screen at 15 %
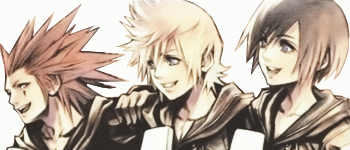
c) New Layer #f4ef6a > Subtract at 50%
So far....
d) New Layer #9be0d4 > Burn at 100%
e) New Layer #9eacc9 > Soft Light at 100%
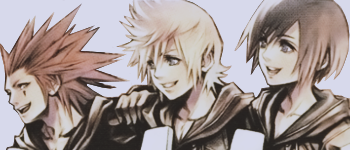
f) New Layer #eac3b8 > Soft Light at 80%
Now you have Mr. Blue Tinge!!!
8) Still alive? Then let's continue.
Duplicate your base image, then make the base copy and the background invisible by clicking on the eye icon. Then merge the visible layers. Confused?
(Note: if you see grey and white squares in the background that means that part is invisible)
9) Now make the base copy visible again and set it to Overlay at 100%. Merge the base and the duplicate.
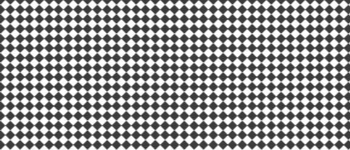
10) Take the new base image and make it invisible. Make the white background layer visible, then top it with a pattern brush (any that you have at your disposal).
You can use this one if you like.
Set the white-patterned background to 10% Opacity. Now it's translucent. Make your base layer visible again.
I also added some circle brushes to fancy it up.
11) With a grunge brush, erase the lower right corner of the BASE. (That means erase most of poor Kairi...)
12) Now add the username with the font 'Green Piloww'. I used the font at 40 px. I also added a heart brush on a cherry red color. Merge visible layers.
13) The border. Ack.
For this I used the pencil tool, using the smallest default circle brush. Create a new transparent layer and make a pattern around the image like this.
If you're planning to make a signature with this similar style, sometimes the pattern doesn't fit. Often you have to add another or delete a row of pixels in order for it to work. However, the pixel pattern DOES work with a 350x150 canvas so don't sweat it.
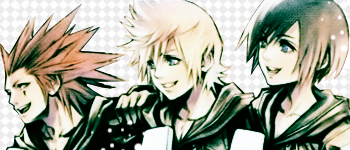
And you're done.
The finished product for you to see once more.

Some useful links....
Reminisce Color Effects Pack by ClaireJones from DeviantArt
Kingdom Hearts Image Stock
Green Piloww Font
I suggest downloading the Script Fu pack I linked. To install it, just unzip it and add it to the Script-fu folder in your GIMP folders. (If you don't know where that is, just search 'Gimp script-fu' in your computer's search engine XD)
I'll try to keep this as simple as I can, although you should be able to know how to use the Layers and the Colors dialogues. I've never ever ever ever ever EVER made a tutorial before, so sorry if your head spins while reading this.
Alrighty, let's get started!
1) Open a new canvas with the resolution as 350x150.
2) Now, open the stock image ( the Kingdom Hearts pic) as a new layer. Scale it so the ENTIRE image is 803 x 965, but center only the three people at the top right corner.
3) To render out the background, use the Free Select tool (it's the icon with the rope loop). Just make little lines around the people like so. To cut out a piece of background, circle around the part you want to cut out and click on the original dot. Once you see the little 'ants' running on where you drew just press Ctrl X. But if it's a bit too complicated for your liking just find an image that's already been rendered in another graphics site.
So now you should have something like this:

We will refer to this as your 'base image'.
4) If you've got the Reminisce Color Effects Pack installed successfully, then just go to Script-fu > Actions > Color Effects > Reminisce > Reminisce Twilight and voila. Now you can just skip ahead to step 8.
BUT - if you're having problems installing it, or you just don't want to take up any more space on your computer, I can show you how to do it manually. With pretty pictures, of course.
Duplicate your base image. At the top, go to Colors>Desaturate. From there you're given 3 options; choose luminosity. Now the second base image is black and white. Set it to Normal at 70% opacity.
5) Make a second copy of the desaturated layer and set it to Screen at 50% opacity.
What you should have so far is this.

6) Duplicate your base image and set it to Soft light at 100% Opacity.

7) Ok, now here's where you add the teal tinge. Make new layers of each color (HTML) and set it as so:
a) New Layer #2b2653 > Subtract at 5%
b) New Layer #ffe5de > Screen at 15 %
c) New Layer #f4ef6a > Subtract at 50%
So far....

d) New Layer #9be0d4 > Burn at 100%
e) New Layer #9eacc9 > Soft Light at 100%
f) New Layer #eac3b8 > Soft Light at 80%
Now you have Mr. Blue Tinge!!!

8) Still alive? Then let's continue.
Duplicate your base image, then make the base copy and the background invisible by clicking on the eye icon. Then merge the visible layers. Confused?
(Note: if you see grey and white squares in the background that means that part is invisible)
9) Now make the base copy visible again and set it to Overlay at 100%. Merge the base and the duplicate.

10) Take the new base image and make it invisible. Make the white background layer visible, then top it with a pattern brush (any that you have at your disposal).
You can use this one if you like.

Set the white-patterned background to 10% Opacity. Now it's translucent. Make your base layer visible again.
I also added some circle brushes to fancy it up.

11) With a grunge brush, erase the lower right corner of the BASE. (That means erase most of poor Kairi...)
12) Now add the username with the font 'Green Piloww'. I used the font at 40 px. I also added a heart brush on a cherry red color. Merge visible layers.
13) The border. Ack.
For this I used the pencil tool, using the smallest default circle brush. Create a new transparent layer and make a pattern around the image like this.
If you're planning to make a signature with this similar style, sometimes the pattern doesn't fit. Often you have to add another or delete a row of pixels in order for it to work. However, the pixel pattern DOES work with a 350x150 canvas so don't sweat it.
And you're done.
The finished product for you to see once more.