#71 - Matsumoto Jun Tutorial
Going from:
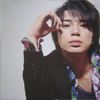
to
Involves selective color.
1. Begin with base:

2. Duplicate base and set the layer to SCREEN (mine is at 100%):

*3. Go to Layer>New Adjustment Layer>HUE/SATURATION, enter in:
MASTER: 0, 29, 0
*This is optional if your picture is too red/saturated, however, you can always adjust :)

4. Create a new layer filled with # and set the layer to SOFT LIGHT 52%:

>
5. Create a new layer filled with # and set the layer to SOFT LIGHT 100%:

>
6. Duplicate the previous SOFT LIGHT layer:

>
7. Go to Layer>New Adjustment Layer>HUE/SATURAION, enter in:
MASTER: 0, 29, 0
Again, if it comes out too saturated, adjust it. Also, if it's too red, then you can always for to the REDS and put in -10 in the SATURATION or something.

8. Go to Layer>New Adjustment Layer>SELECTIVE COLOR, enter in:
REDS: -100, 23, 24, 0
NO YELLOWS
NO GREENS
CYANS: 100, -100, -100, 0
NO BLUES
NO MAGENTAS
WHITES: 50, -29, 6, 0
NEUTRALS: 10, 0, 0, 11
NO BLACKS

And the icon is complete! If you have questions or comments to leave, please feel free to do so!! Also, you may join/watch my community for future updates.
.PSD file!!!
Other examples:

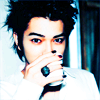
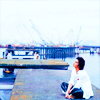

-Kelsey

to

Involves selective color.
1. Begin with base:

2. Duplicate base and set the layer to SCREEN (mine is at 100%):

*3. Go to Layer>New Adjustment Layer>HUE/SATURATION, enter in:
MASTER: 0, 29, 0
*This is optional if your picture is too red/saturated, however, you can always adjust :)

4. Create a new layer filled with # and set the layer to SOFT LIGHT 52%:

>

5. Create a new layer filled with # and set the layer to SOFT LIGHT 100%:

>

6. Duplicate the previous SOFT LIGHT layer:

>

7. Go to Layer>New Adjustment Layer>HUE/SATURAION, enter in:
MASTER: 0, 29, 0
Again, if it comes out too saturated, adjust it. Also, if it's too red, then you can always for to the REDS and put in -10 in the SATURATION or something.

8. Go to Layer>New Adjustment Layer>SELECTIVE COLOR, enter in:
REDS: -100, 23, 24, 0
NO YELLOWS
NO GREENS
CYANS: 100, -100, -100, 0
NO BLUES
NO MAGENTAS
WHITES: 50, -29, 6, 0
NEUTRALS: 10, 0, 0, 11
NO BLACKS

And the icon is complete! If you have questions or comments to leave, please feel free to do so!! Also, you may join/watch my community for future updates.
.PSD file!!!
Other examples:


-Kelsey