#38 - Spike & Dru Tutorial.
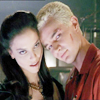
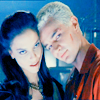
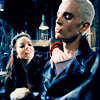
Going from:
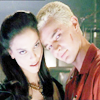
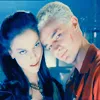
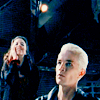
to
Involves Channel Mixer and Levels. Very simple, though.
Begin with base:

Duplicate your base and set the layer to SCREEN however many times needed (I did mine 5 times):
Go to Layers>New Adjustment Layer>COLOR BALANCE, enter in:
MIDTONES: -40, 0, 40
SHADOWS: -40, 0, 0
NO HIGHLIGHTS
Go to Layers>New Adjustment Layer>CHANNEL MIXER, enter in:
RED: 158, -64, 0, 0
GREEN: 0, 96, 0, 0
BLUE: -58, 58, 89, 0
Go to Layer>New Adjustment Layer>COLOR BALANCE, enter in:
MIDTONES: 6, -31, 17
SHADOWS: -40, 11, 0
NO HIGHLIGHTS
Create a new layer filled with # and set the layer to EXCLUSION:

>
Go to Layers>New Adjustment Layer>LEVELS, enter in:
RGB: LEAVE AS NORMAL
RED: 19, 1.00, 245
GREEN: 16, 1.00, 242
BLUE: 25, 1.00, 230
(leave OUTPUT LEVELS alone)
And it's done! The last layer is basically to give the icon more contrast, so it's not really necessary because the coloring is fine without it... If you have any questions or comments to leave or joining to do, please do so!
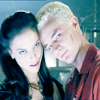
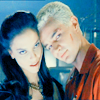
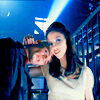
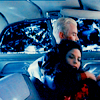
Other examples:
PSD?
-Kelsey
to
Involves Channel Mixer and Levels. Very simple, though.
Begin with base:
Duplicate your base and set the layer to SCREEN however many times needed (I did mine 5 times):
Go to Layers>New Adjustment Layer>COLOR BALANCE, enter in:
MIDTONES: -40, 0, 40
SHADOWS: -40, 0, 0
NO HIGHLIGHTS
Go to Layers>New Adjustment Layer>CHANNEL MIXER, enter in:
RED: 158, -64, 0, 0
GREEN: 0, 96, 0, 0
BLUE: -58, 58, 89, 0
Go to Layer>New Adjustment Layer>COLOR BALANCE, enter in:
MIDTONES: 6, -31, 17
SHADOWS: -40, 11, 0
NO HIGHLIGHTS
Create a new layer filled with # and set the layer to EXCLUSION:
>
Go to Layers>New Adjustment Layer>LEVELS, enter in:
RGB: LEAVE AS NORMAL
RED: 19, 1.00, 245
GREEN: 16, 1.00, 242
BLUE: 25, 1.00, 230
(leave OUTPUT LEVELS alone)
And it's done! The last layer is basically to give the icon more contrast, so it's not really necessary because the coloring is fine without it... If you have any questions or comments to leave or joining to do, please do so!
Other examples:
PSD?
-Kelsey