PhotoPlus 6.0 Tutorial for stare_at_walls
So stare_at_walls asked me a little while ago how I make the color/B&W icons and I said I'd do a quick tutorial....well I've been lazy and I'm just now getting to it. *lol*
Anyways...here ya go.
How to turn this:
Into this:
Ok, first of all I always make sure to do this first..
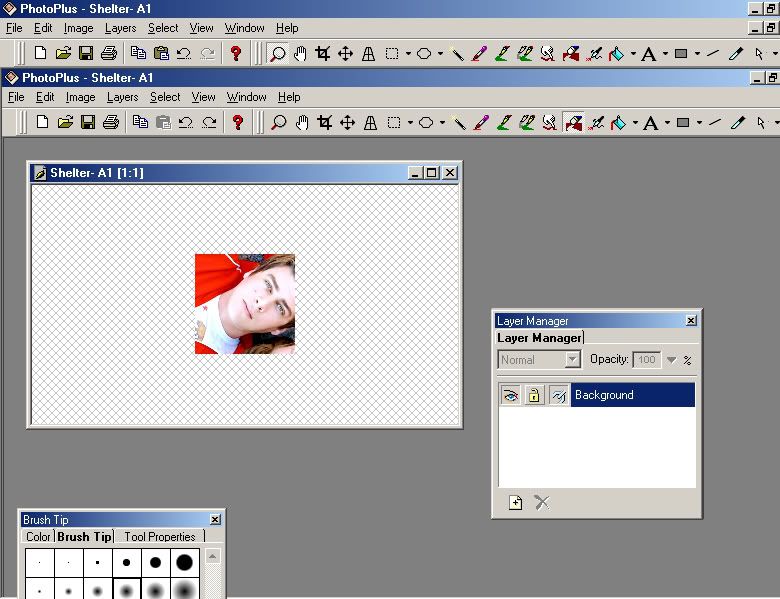
1. Click View -> check Tool Properties, Brush Tip Tool, Layer Manager Tab, Color Tab, Tools Toolbar & Standard Toolbar
2. Then go ahead and make your colored version of the icon:
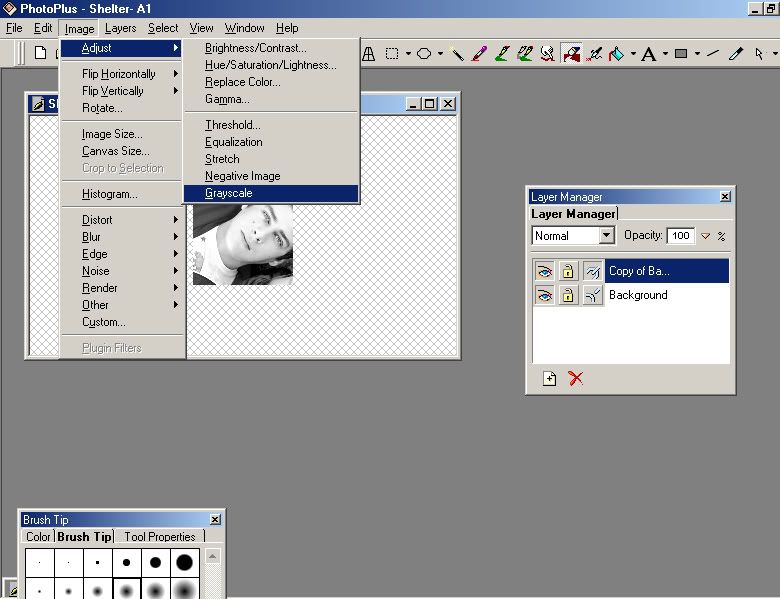
3. Then you're going to want to go 'Layers' -> 'Duplicate'

4. After you have the layer duplicated then 'Image' -> 'Adjust' -> 'Grayscale'
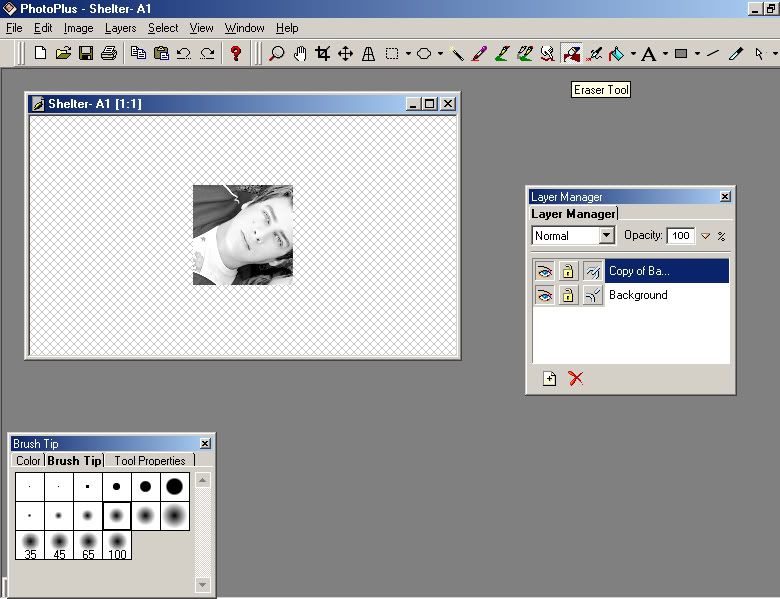
5. Go ahead and tweak the B&W coloring however you want and then click on the 'Eraser tool' and adjust your 'Brush Tip to whichever size you want...
6. Go ahead and erase whatever you want to show up as color...I obviously chose the bright red jacket...
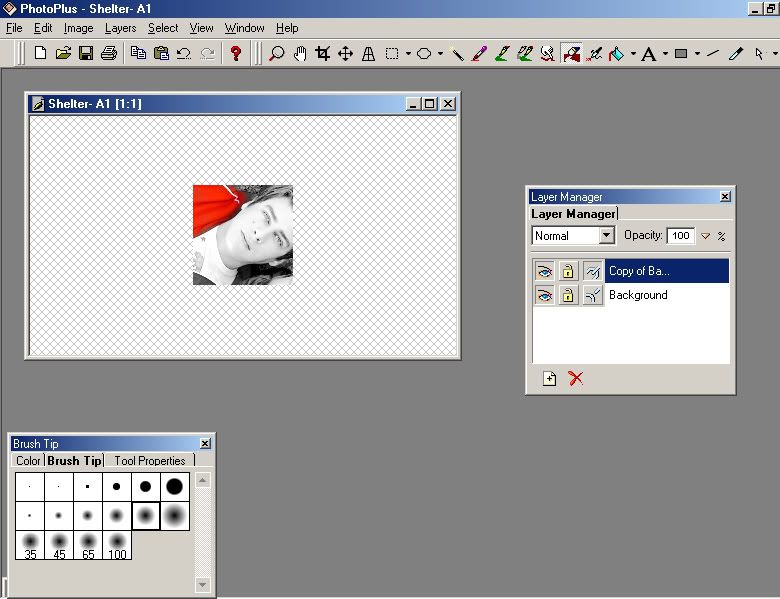
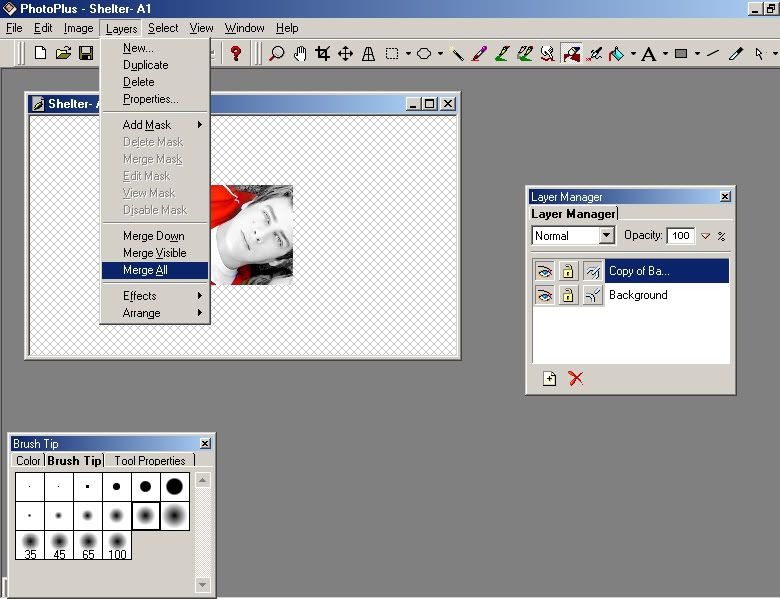
7. After you have the icon how you want it go 'Layers' -> 'Merge All'
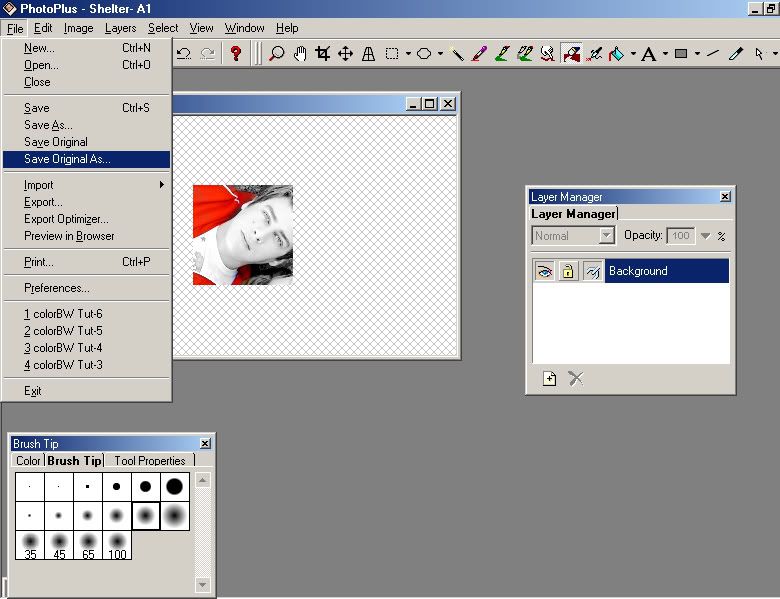
8. Then to save go 'File' -> 'Save Original As'
And then YAY!! You should be done and hopefully happy with whatever you've created. *lol*
That should hopefully help you, but if you still get stuck on anything just let me know and I'll try my best to help you out again....but really it's simple, I just mess around until I like what I make and then I backtrack to figure out how I did it. *lol*
*big hugs*
-C-
Anyways...here ya go.
How to turn this:
Into this:
Ok, first of all I always make sure to do this first..
1. Click View -> check Tool Properties, Brush Tip Tool, Layer Manager Tab, Color Tab, Tools Toolbar & Standard Toolbar
2. Then go ahead and make your colored version of the icon:
3. Then you're going to want to go 'Layers' -> 'Duplicate'
4. After you have the layer duplicated then 'Image' -> 'Adjust' -> 'Grayscale'
5. Go ahead and tweak the B&W coloring however you want and then click on the 'Eraser tool' and adjust your 'Brush Tip to whichever size you want...
6. Go ahead and erase whatever you want to show up as color...I obviously chose the bright red jacket...
7. After you have the icon how you want it go 'Layers' -> 'Merge All'
8. Then to save go 'File' -> 'Save Original As'
And then YAY!! You should be done and hopefully happy with whatever you've created. *lol*
That should hopefully help you, but if you still get stuck on anything just let me know and I'll try my best to help you out again....but really it's simple, I just mess around until I like what I make and then I backtrack to figure out how I did it. *lol*
*big hugs*
-C-