New Icon tutorial
Go from 
to
using PsCs2 uses selective colour sorry psp users
Step 1
crop and resize to 100x100, sharpen if needed.
Step 2 - Layers -> new adjustment layer -> curves
RBG
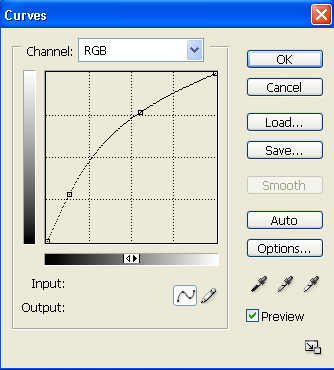
First point
33/71
Second Point
141/196
RED
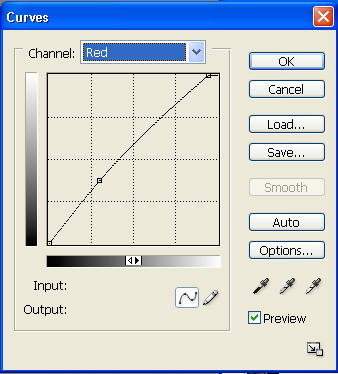
First point
76/96
Second Point
241/255
Green
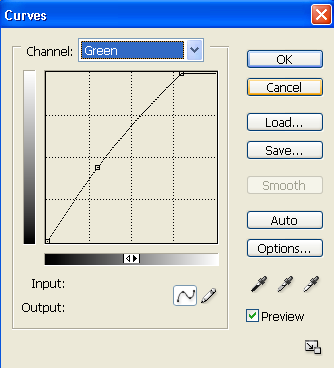
First Point
76/112
Second Point
203/255
Blue
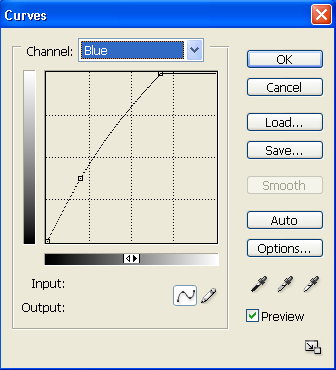
First Point
50/96
Second Point
172/255

Step 3 Layers -> New Adjustment layer -> colour balance
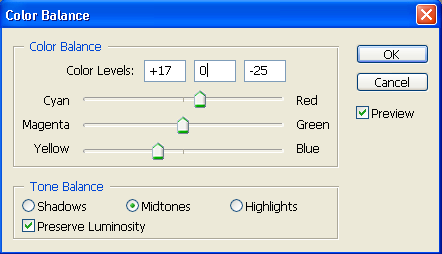

Step 4 Layers -> New Adjustment layer -> Selective colour
RED
-100/59/100/0
YELLOWS
-41/100/77/0
NEUTRALS
0/8/8/0

Step 5 Layers -> New Adjustment layer -> hue and saturation

And you're done!!

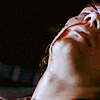
other icons made the same way

Click HERE to download the psd file
Comments are love, and I would love to see how this works out for everyone :D
my other icon tutorials here
to
using PsCs2 uses selective colour sorry psp users
Step 1
crop and resize to 100x100, sharpen if needed.
Step 2 - Layers -> new adjustment layer -> curves
RBG
First point
33/71
Second Point
141/196
RED
First point
76/96
Second Point
241/255
Green
First Point
76/112
Second Point
203/255
Blue
First Point
50/96
Second Point
172/255
Step 3 Layers -> New Adjustment layer -> colour balance
Step 4 Layers -> New Adjustment layer -> Selective colour
RED
-100/59/100/0
YELLOWS
-41/100/77/0
NEUTRALS
0/8/8/0
Step 5 Layers -> New Adjustment layer -> hue and saturation
And you're done!!
other icons made the same way
Click HERE to download the psd file
Comments are love, and I would love to see how this works out for everyone :D
my other icon tutorials here