(no subject)
as per request, here are four tutorials on coloring. most of my coloring now is based off a tutorial i once found a while ago (and sllightly modified), but i have no idea where that tutorial is now. D: i save all of my selective coloring layers so i guess i must have deleted the tutorial... ah well. :(
from this to
TUTORIAL ONE
step one: take your base image and multiply it. set the second layer (one on top) to screen, 44%.
step two: this is where it gets really annoying. go to layer > new adjustment layer > selective coloring, and imput these numbers, then set the layer to 85% opacity:
red: -100, 45, 100, 0
yellow: 100, 0, -100, 0
neutral: 10, -10, 35, 0
step three: another selective coloring, 100% opacity:
red: 0, 10, 80, 0
yellow: 0, 0, -50, 0
neutral: 10, -10, -40, 0
step four: another selective coloring, 100% opacity:
red: -20, 0, 70, 0
neutral: -5, -15, 0, 0
step five: yet another selective coloring, 100% opacity:
red: -100, 0, 100, 0
yellow: -100, 0, -100, 0
neutral: 25, 0, -30, 0
step six: last one, i promise, 25% opacity:
red: -100, 0, 100, 0
yellow: -100, 0, -100, 0
for this layer, you have to lower/raise the opacity depending on how much red in is the original image.
step seven: go to layer > new adjustment layer > hue/saturation. set the master saturation to +3.
and that's it!
from this to
TUTORIAL TWO
this one is extremely similar to tutorial one, with a few changes.
step one: start with your base image and go to layer > new adjustment layer > selective coloring, and imput these numbers, then set the layer to 75% opacity:
red: -100, 45, 100, 0
yellow: 100, 0, -100, 0
neutral: 10, -10, 35, 0
step two: another selective coloring, 100% opacity:
red: 0, 10, 80, 0
yellow: 0, 0, -50, 0
neutral: 10, -10, -40, 0
step three: another selective coloring, 100% opacity:
red: -20, 0, 70, 0
neutral: -5, -15, 0, 0
step four: yet another selective coloring, 100% opacity:
red: -100, 0, 100, 0
yellow: -100, 0, -100, 0
neutral: 25, 0, -30, 0
step five: last one, i promise, 44% opacity:
red: -100, 0, 100, 0
yellow: -100, 0, -100, 0
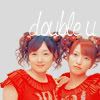
step six: fill your image with a color (i chose #D4D4D4) and set it to multiply, 85% opacity.
step seven: (optional) add text! i wrote "double u" in the font "zoon".
from this to
TUTORIAL THREE
this one is a little different from the previous two.
step one: take your base image and duplicate it. set the top layer to solf light, 36%.
step two: go to layer > new adjustment layer > selective coloring, and imput these numbers, then set the layer to 18% opacity:
red: -100, 45, 100, 0
yellow: 100, 0, -100, 0
neutral: 10, -10, 35, 0
Step three: another selective coloring, 100% opacity:
red: 0, 10, 80, 0
yellow: 0, 0, -50, 0
neutral: 10, -10, -40, 0
step four: another selective coloring, 100% opacity:
red: -20, 0, 70, 0
neutral: -5, -15, 0, 0
step five: last one, 100% opacity:
red: -100, 0, 100, 0
yellow: -100, 0, -100, 0
step six: fill your image with #ABABAB and set it to multiply, 50%.
step seven: go to layer > new adjustment layer > channel mixer. imput these numbers:
red
red: 128
green: -40
green
green: 100
blue
red: -55
green: 60
blue: 100
step eight: remember that second layer, the duplicate base set to soft light, 36%? duplicate it, and drag the copy all the way to the top.
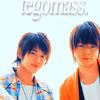
step nine: text! i wrote "tegomass." italicized in "times new roman". i also added a drop shadow effect.
from this to
TUTORIAL FOUR
step one: duplicate your base image and set the top layer to soft light, 25% opacity.
step two: go to layer > new adjustment layer > selective coloring, and imput these numbers, then set the layer to 100% opacity:
red: -100, 45, 100, 0
yellow: 100, 0, -100, 0
neutral: 10, -10, 35, 0
step three: another selective coloring, 100% opacity:
red: 0, 10, 80, 0
yellow: 0, 0, -50, 0
neutral: 10, -10, -40, 0
step four: another selective coloring, 100% opacity:
red: -20, 0, 70, 0
neutral: -5, -15, 0, 0
step five: yet another selective coloring, 37% opacity:
red: -100, 0, 100, 0
yellow: -100, 0, -100, 0
neutral: 25, 0, -30, 0
step six: last one, i promise, 100% opacity:
red: -100, 0, 100, 0
yellow: -100, 0, -100, 0
step seven: fill your image with a color (i chose #D4D4D4) and set it to multiply, 85% opacity.
step eight: go to layer > new adjustment layer > hue/saturation. set the master saturation to +15.
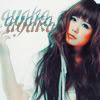
step nine: (optional) text! i wrote "ayaka" three time, all in the font "joshua".
i hope i wasn't too confusing, lol. i'm dead tired as i'm typing this up, so if there's anything i can clarify, just let me know! ♥
from this to
TUTORIAL ONE
step one: take your base image and multiply it. set the second layer (one on top) to screen, 44%.
step two: this is where it gets really annoying. go to layer > new adjustment layer > selective coloring, and imput these numbers, then set the layer to 85% opacity:
red: -100, 45, 100, 0
yellow: 100, 0, -100, 0
neutral: 10, -10, 35, 0
step three: another selective coloring, 100% opacity:
red: 0, 10, 80, 0
yellow: 0, 0, -50, 0
neutral: 10, -10, -40, 0
step four: another selective coloring, 100% opacity:
red: -20, 0, 70, 0
neutral: -5, -15, 0, 0
step five: yet another selective coloring, 100% opacity:
red: -100, 0, 100, 0
yellow: -100, 0, -100, 0
neutral: 25, 0, -30, 0
step six: last one, i promise, 25% opacity:
red: -100, 0, 100, 0
yellow: -100, 0, -100, 0
for this layer, you have to lower/raise the opacity depending on how much red in is the original image.
step seven: go to layer > new adjustment layer > hue/saturation. set the master saturation to +3.
and that's it!
from this to
TUTORIAL TWO
this one is extremely similar to tutorial one, with a few changes.
step one: start with your base image and go to layer > new adjustment layer > selective coloring, and imput these numbers, then set the layer to 75% opacity:
red: -100, 45, 100, 0
yellow: 100, 0, -100, 0
neutral: 10, -10, 35, 0
step two: another selective coloring, 100% opacity:
red: 0, 10, 80, 0
yellow: 0, 0, -50, 0
neutral: 10, -10, -40, 0
step three: another selective coloring, 100% opacity:
red: -20, 0, 70, 0
neutral: -5, -15, 0, 0
step four: yet another selective coloring, 100% opacity:
red: -100, 0, 100, 0
yellow: -100, 0, -100, 0
neutral: 25, 0, -30, 0
step five: last one, i promise, 44% opacity:
red: -100, 0, 100, 0
yellow: -100, 0, -100, 0
step six: fill your image with a color (i chose #D4D4D4) and set it to multiply, 85% opacity.
step seven: (optional) add text! i wrote "double u" in the font "zoon".
from this to
TUTORIAL THREE
this one is a little different from the previous two.
step one: take your base image and duplicate it. set the top layer to solf light, 36%.
step two: go to layer > new adjustment layer > selective coloring, and imput these numbers, then set the layer to 18% opacity:
red: -100, 45, 100, 0
yellow: 100, 0, -100, 0
neutral: 10, -10, 35, 0
Step three: another selective coloring, 100% opacity:
red: 0, 10, 80, 0
yellow: 0, 0, -50, 0
neutral: 10, -10, -40, 0
step four: another selective coloring, 100% opacity:
red: -20, 0, 70, 0
neutral: -5, -15, 0, 0
step five: last one, 100% opacity:
red: -100, 0, 100, 0
yellow: -100, 0, -100, 0
step six: fill your image with #ABABAB and set it to multiply, 50%.
step seven: go to layer > new adjustment layer > channel mixer. imput these numbers:
red
red: 128
green: -40
green
green: 100
blue
red: -55
green: 60
blue: 100
step eight: remember that second layer, the duplicate base set to soft light, 36%? duplicate it, and drag the copy all the way to the top.
step nine: text! i wrote "tegomass." italicized in "times new roman". i also added a drop shadow effect.
from this to
TUTORIAL FOUR
step one: duplicate your base image and set the top layer to soft light, 25% opacity.
step two: go to layer > new adjustment layer > selective coloring, and imput these numbers, then set the layer to 100% opacity:
red: -100, 45, 100, 0
yellow: 100, 0, -100, 0
neutral: 10, -10, 35, 0
step three: another selective coloring, 100% opacity:
red: 0, 10, 80, 0
yellow: 0, 0, -50, 0
neutral: 10, -10, -40, 0
step four: another selective coloring, 100% opacity:
red: -20, 0, 70, 0
neutral: -5, -15, 0, 0
step five: yet another selective coloring, 37% opacity:
red: -100, 0, 100, 0
yellow: -100, 0, -100, 0
neutral: 25, 0, -30, 0
step six: last one, i promise, 100% opacity:
red: -100, 0, 100, 0
yellow: -100, 0, -100, 0
step seven: fill your image with a color (i chose #D4D4D4) and set it to multiply, 85% opacity.
step eight: go to layer > new adjustment layer > hue/saturation. set the master saturation to +15.
step nine: (optional) text! i wrote "ayaka" three time, all in the font "joshua".
i hope i wasn't too confusing, lol. i'm dead tired as i'm typing this up, so if there's anything i can clarify, just let me know! ♥