Lines in the Snow~

Originally, I had intended to combine all three nation quest finales into one entry. However, as Bastok's took a ton of work, and was immensely satisfying to finish, I decided to break them up into their own entries (since I figure the other two will also have good closure). Also, I was on the cusp of discoveries for this quest-line, at least on BG, so I want some credit >.> <.< /ego~
Oh, and as always, spoiler warning.
When the Bastok storyline had left off, President Prien had tasked the Mythril Musketeers with discovering the truth behind the actions of their former captain, Klara. Upon arriving in Bastok and talking to Gentle Tiger following this update, my fears were confirmed as we were informed that our journey was headed straight to the heart of the Shadow Lord’s army, Castle Zvahl. Having previously exhausted my supply of OP credits doing Fiat Lux some time ago, I had an inkling to the distress these final two quests would entail, but the first quest managed to take despair, and submerge it in a sea of desolation and despondency with very little to comfort and console. Now, before you head out there, be it alone, hoping to team up with someone, or in a group, let me stress that the fights in this storyline are designed for melees. Going into them with a party of only mages will not work, and you’ll just have to climb through hell again, so save yourself the effort and just take my word for it.
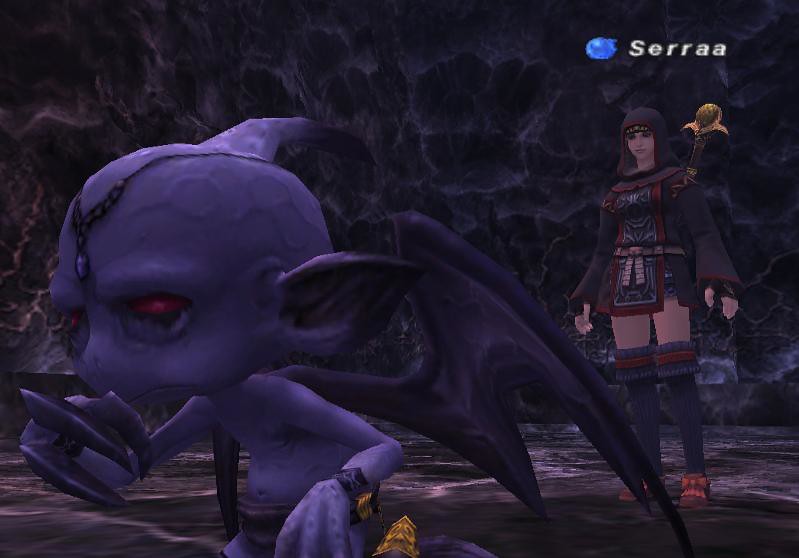
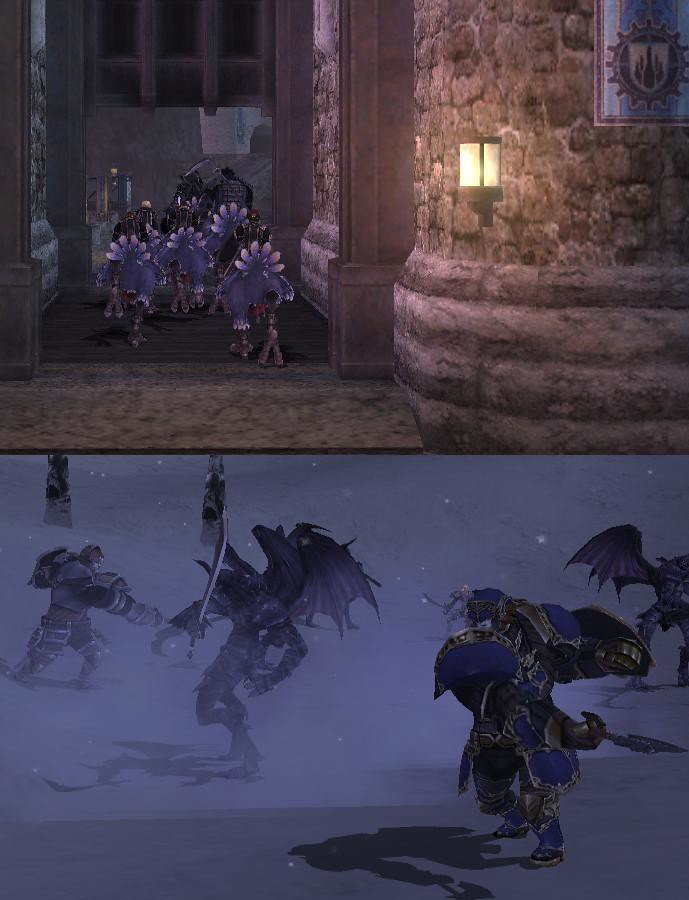
Anywhoo, when you zone into Castle Zvahl Baileys (S), you’re greeted to a cutscene featuring members of the Hydra Corps (and a failWar who only gets AF1) currently working their way through the Shadow Lord’s fortress. After verifying our allegiances and exchanging the typical pleasantries you’d expect inside a fortress seeping with the repugnant stench of evil, they left us to interrogate an Imp who had been recently immobilized (NPCs using actual abilities, who knew~). While the imp itself knows nothing of our wayward captain, he does suggest that one of his friends further in the Keep might have a clue to help us discern her whereabouts. As our band hurries deeper into the fortress, the imp lets out a laugh that his three friends will have fun with us before collapsing under the effects of Nicolaus’ ‘care’. This begins the first, and in my opinion, worst part of this quest. Remember back when you were attempting to acquire Rank 5, and there was a sequence of Iron Gates and Ore Doors in Castle Zvahl Keep with Goblins in them that you had to travel through to progress to the second level? Well, they’re back. But this time, the Goblins have been replaced Gargouilles that aggro both sound and sight. However, that’s not all. If you recall, the path to the second floor was in the north-east corner, and you would never have had a reason to go towards the other three corners. Well... there were Orcs, and presumably more Goblins (now Gargouilles) in the other directions. Hordes and hordes of Goblins... And guess where the Imp’s friends are... There are three Imps, Rakke (G-10), Rokke (H-10) and Rikke (G-7) (behind Gargouilles). Each Imp will ask for an elixir and will either claim one of his comrades is a liar, that he is honest, or that another of them is honest. Thus begins a challenge to your ability to discern logic. Everyone loves logic games, right? Well, not if you don’t realize you’re dealing with one... Also, if you screw up and pick the wrong one, it takes your elixir, and then the other two won’t talk to you. I’m not exactly sure how to reset them, but I think if you talk to all three again in the same day, without zoning, they’ll give you their cutscenes again, and reset the game, but I’m not 100% sure on that or if it’s working properly. Now, let’s break apart some of the choices -- it seems to be different for everyone, so you’ll have to pay attention to what they all say. Let’s say A claims B is honest; B says C is a liar; and C says B is a liar. If any of them claims another is honest, that one must be lying. In this example, if A was correct and B is honest, that means A is also telling the truth, and you only want one of them to be telling the truth. So, by association, neither A or B can be honest, so C is telling the truth. I can’t confirm this, but I think if any of them says anything about being honest, that one is probably lying. Let’s say A says it’s honest; B says A is honest; and C claims B lies. Once again, for A to be honest, B would be telling the truth as well. I think these are the two patterns you can potentially get (and by that, I mean the two patterns I’ve seen), so I hope this helps.

After solving the Imps’ game, testing your nerves and MGS skill, and giving the correct one the elixir, he indicates that Klara was spotted in the SW corner of the second floor. One more sequence of doors to go through! Unfortunately, this is the worst section as Gargouilles on the other side of Ore Doors can see through the doors when you drop invis to open them.. so good luck. In my experience, the fastest tactic is to have someone kite all the mobs through and just die on the stairs (not too far though as there are eyes past the first set) and then get up after the Gargouilles return. If you have all the time in the world though or are low on buffer, by all means, play it safe. While solving the Imps’ puzzle, I had teamed up with a Taru Blm, Prorian who was also working on the quest so we took turns opening doors, hoping not to get eaten alive. After reaching the top floor, we realized there were two SW corners, one after reaching the top floor (and full of Yagudo), and one in the sequence of teleporters. After searching the Yagudo’s corner and finding nothing but more mobs that can aggro through solid doors, we headed to the cycle of teleporters surrounded by demons. When we first arrived in the SW chamber, we found a blank spot that opened a door that led to a chamber with a Vampyre and some Bats. But there was nothing else, and so we began to wonder if maybe there was another SW chamber we weren’t thinking of. However, after emerging from the hidden room, we found a ??? to the north at (G-10). We’re finally reunited with Klara who soon leaves to spring a trap on some additional guests she’s found. This sent us back to the NE chamber (just drop down and take the central teleport once) to click the Displaced Block at (H-7) for another cutscene. I was actually expecting this to lead into a BC (one that would summarily crush the two of us), but it was not to be as our group and the Hydra Corps soldiers also managed to emerge relatively unscathed. Afterwards, the Hydra Corps’ commander Allenberge gave us a Sanctus Rosary (Mp+10, Darkness+20, Enhances Demon Killer effect) and completes the first quest. Yes, it looks like a piece of garbage, but DO NOT throw it out. This might arguably be the most important reward you’ll receive for completing a Bastok quest (more on that later).
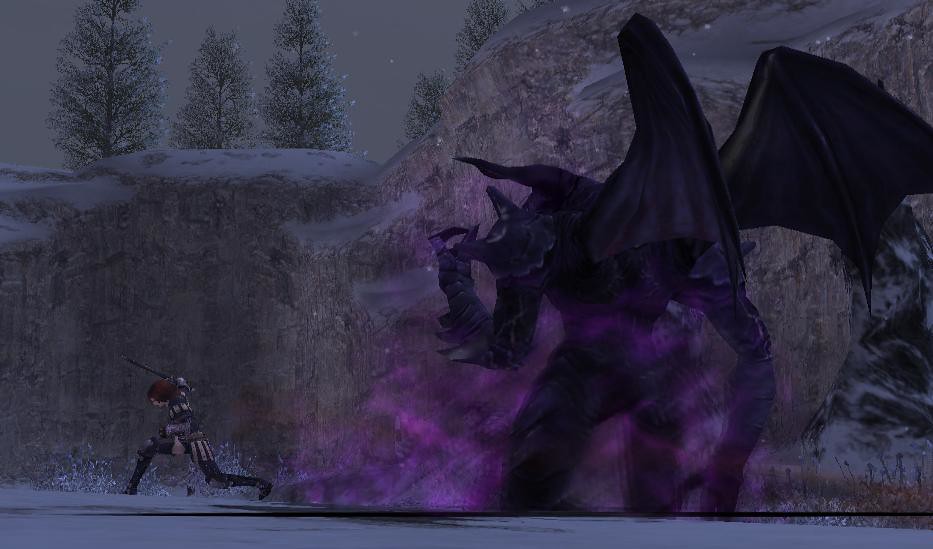
It took us about an hour, but after wandering around halls full of Demons, we finally started the second quest by zoning from Castle Zvahl Keep (S) to the Baileys (S). This cutscene finally featured the back-story between Zeid and Klara, revealing the foundation of their bond. Having witnessed our resolve, we returned to the Keep with Zeid and Volker. After a bit more aimless wandering, we got the next cutscene from clicking the same ??? in the SW room and were reunited with Five Moons and Nicolaus. Zeid is forced to sacrifice himself for the team, and we’re left despondent in the brooding chamber. But once our Hydra Corps allies show up, a plan is devised to procure a key into the Shadow Lord’s throne room to mount a harrowing rescue of both Zeid and Klara. The plan is to slaughter a lot of Imps (therapeutic after the earlier logic game) to draw out a Gargouille to procure a key. And so we began killing the four Imps nearby… For three hours we killed Imps... At first, we thought maybe this would be similar to Ix’Drg since there was a ??? in the room, and if we killed enough Imps, we’d get a message about Imp hate. After dealing with three hours of killing Imps with ten minute respawns, I decided to go wander in search of a secret hallway or something we might have missed. Upon returning to the familiar SW room and clicking the ??? though, a Gargouille Warden proceeded to spawn and tear through me (hit my unbuffed Sch for 350 dmg, crit of nearly 450). Knowing where our NM was, we assembled our now larger group and prepared to have Titan tank it while three of us nuked it down. That didn’t go so well as it’s apparently super resistant to magic... Remember when I said bring melees? As we collected ourselves off the cold stone, we enlisted the aid of an exp party passing through the zone, and so I can’t thank those guys enough. Melees definitely were the better choice as they tore through him pretty quickly. Just some notes on the Warden, Prorian reported doing around 200-300 damage with his nukes, and Aumaan, our Rdm, said he could only get slow to stick, even with full acc gear, and that even dispel got resisted once, so he’s very resistant to magic. He didn’t use a 2hr, but he does double attack a lot and spams a move that gives him an attack bonus, so I’d recommend at least two blink tanks. He also has a random additional effect stun that can proc on his melee hits which lasts around fifteen seconds and a terrorize move that can be debilitating if you’re trying to low-man it -- something I wouldn’t recommend. Oh, and one final note, all four imps in the central chamber must be killed by your party. It doesn’t matter if they’re all dead, if they weren’t killed by your party, the NM won’t spawn when you click the target.
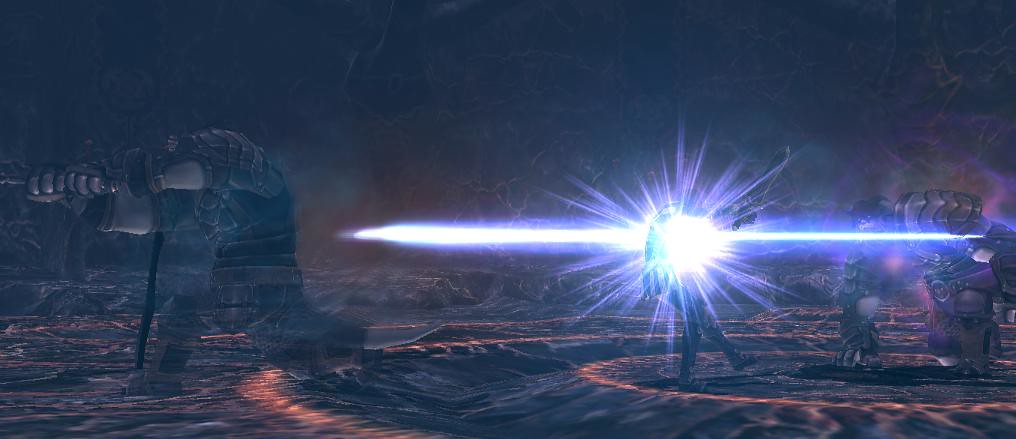
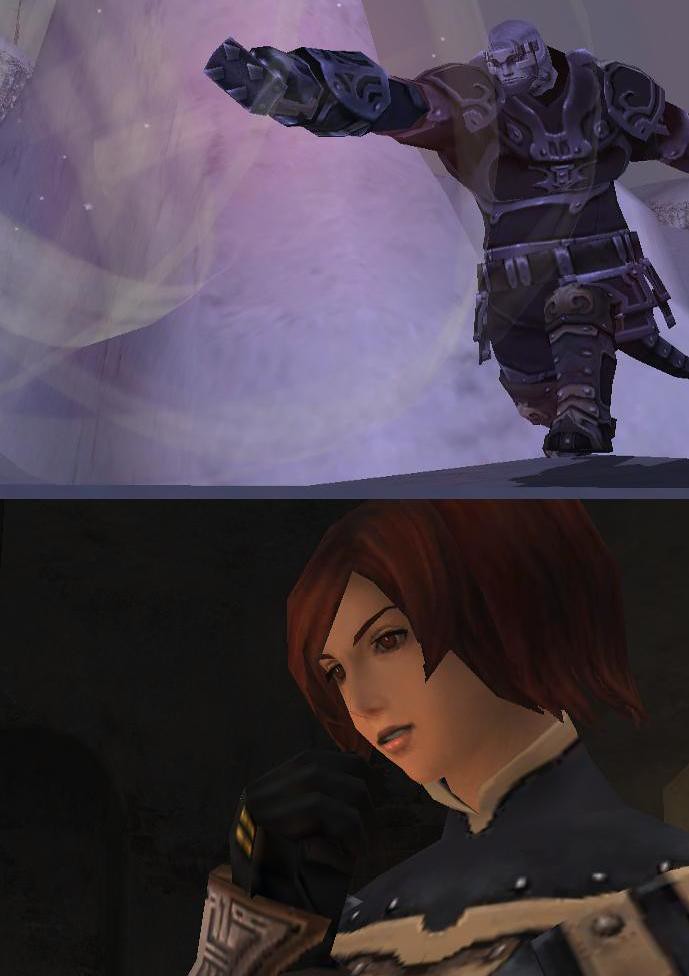
Clicking the ??? one last time gives the key to the Shadow Lord’s Throne Room and access to the final BC (does this mean I can do Fiat Lux whenever now?). We were very concerned about whether we’d have to return to the ??? or fight the NM again for another key if we failed, but luckily, you’ll never have to leave the Throne Room if your jobs work and have enough meds. Going into this BC, we were all expecting a ‘heal this NPC while it fights the enemy and wins for you’ type of fight as Bastok was long overdue... Not so much... We arrived in time to confront Marquis Amon and the Shadow Lord who are in the process of turning Zeid into a puppet of their dark army. Our disruption stops the ceremony, and Zeid returns to stand with us against the embodiment of his previous rage. Said rage however decides to play dirty and repossess Klara, raising fears about whether she’d demonstrate the same ferocity as her earlier battle, but Klara is definitely easier than the BC against her in the previous sequence. In our initial attempt with Smn, Blm, Rdm, and Sch, Zeid was a little bitch. He struggled to hold hate, and when he did have hate, his defense was paper thin. In fact, we ended up losing because we couldn’t heal him without stealing hate. After failing the first time, we decided to change and have me come Nin to tank and for the added damage. We were thinking of having Prorian switch to either Blu or Sam as well, but in the end, I think it worked better only having one person in range as Klara has access to a lot of AoE WSs and having me stand opposite Zeid worked out well. She can use all sword WS, but I think she only uses multi-hit ones, or ones that wipe shadows. In addition, her awesome Tremor Blade returns, although it doesn’t affect Zeid who managed to steal hate afterwards which ended up working nicely as we had no one with Stona. She has one new WS, Darkling Blade, an AoE WS that curses anyone it hits. I’d say this is her biggest threat, because if you’re cursed, and she follows it with a multi-hit WS when low on shadows, she’ll kill ya -- at least she did me. It took us three attempts, but we finally managed to beat Klara without any random bad luck.
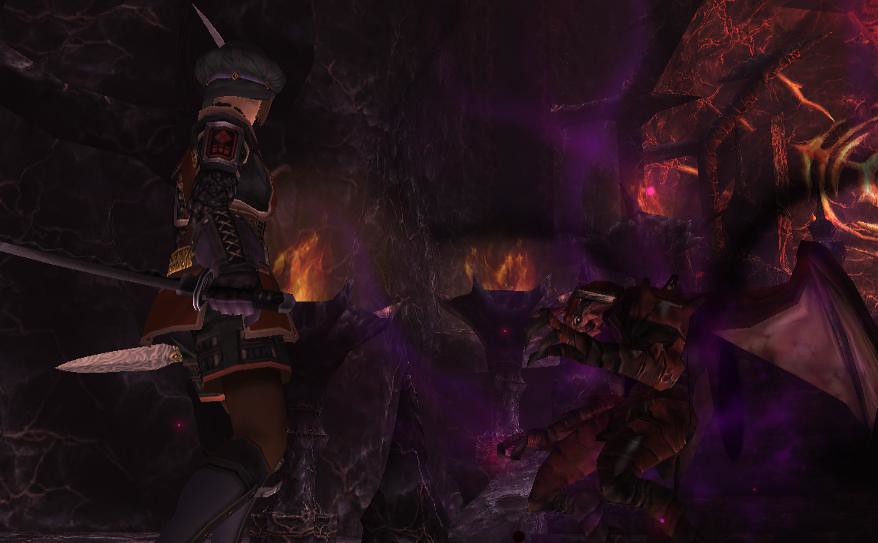
As Klara battles the demon within, Zeid takes her pause to strike the demon out from her with a crazy shadow-slash technique. While he protects her, we’re tasked with fighting the recently crimsoned Marquis Amon. Amon is a Blm Demon who uses a scythe, has access to T4 spells, T3 -gas which obviously need to be stunned, and typical demon moves. Thankfully, he attacks pretty slowly so keeping shadows up is not a problem although he was pretty accurate. He can use Manafront, at which point he seemed to become immune to stun, but he only tried one -ga during this phase, so I can’t confirm if that was a fluke or not. Afterwards there was no problem stunning, but during Manafront, I’d recommend saving Tp. As you can see, Amon is actually pretty tame... ...Oh, except he has this draw-in, AoE move that hits everyone with doom... Yeah, I said doom. We were completely unprepared with holy water, so this ended up causing us to wipe the first time. I can’t be entirely certain, but it seemed that he pulled this move out every 25%, and then had free access to it under 25%. After Aumaan changed to /Drk and filled up on a plethora of Holy Waters, we attempted this BC again. This time, I equipped the Sanctus Rosary in hopes that it’d intimidate Amon occasionally and was worth a shot as I’d probably never use it again. Now, remember when I said to hold onto it? I can’t confirm if this will work outside this BC, but while wearing the Rosary, Amon’s doom would not affect me. Yes, that’s right. The seemingly worthless item actually removes the final boss’ most powerful ability and makes him pathetically easy. With his strongest ability incapacitated, we managed to quickly and efficiently finish him off without any concerns of wiping.

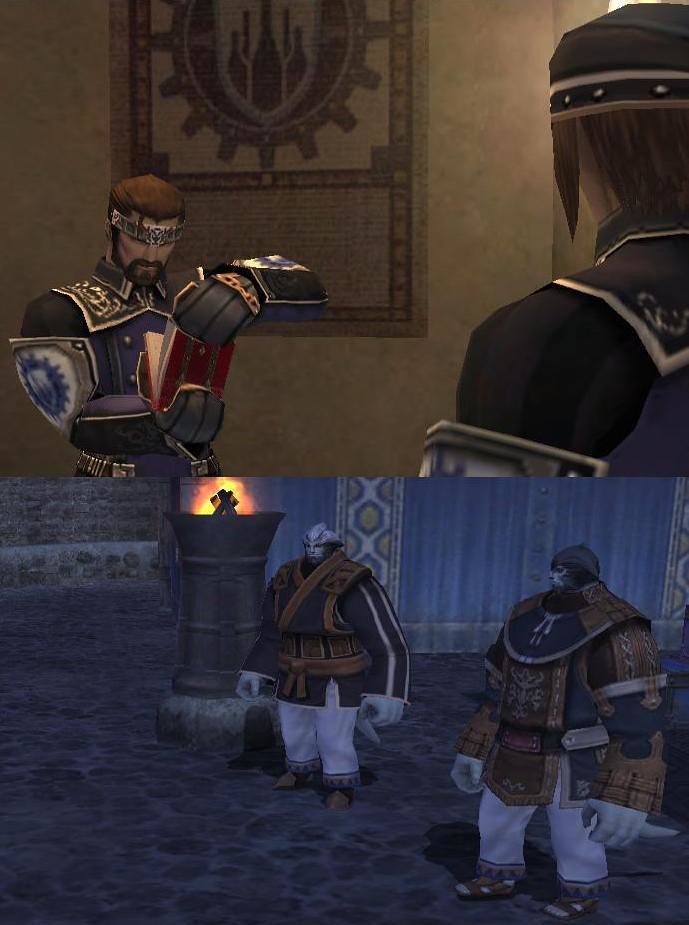
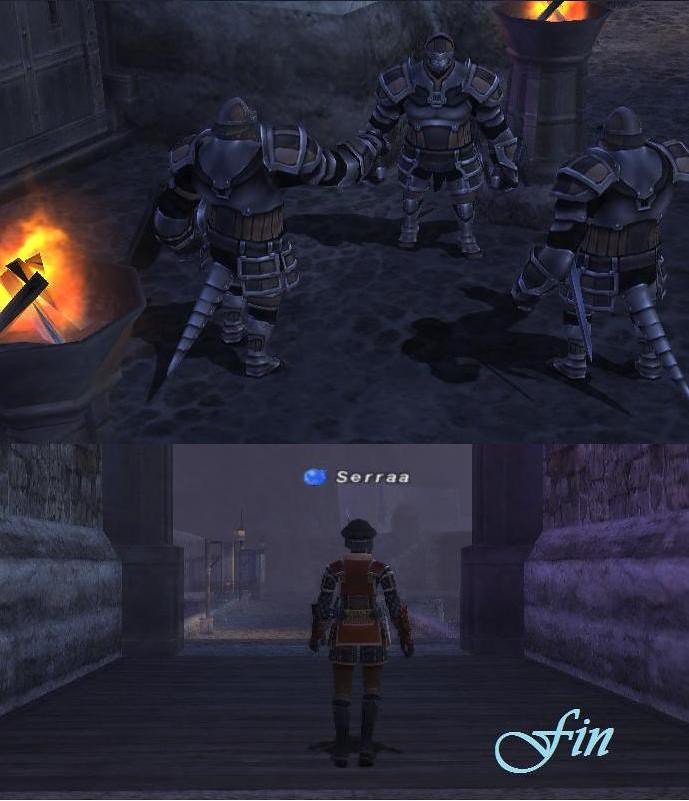
In the aftermath, we returned to Bastok to much praise by the now fully reinstated Mythril Musketeers and President Prien. Prien goes so far as to make us the official sixth member of the Musketeers, the Mythril Musketeer Zero, a title reserved for only the elitist of soldiers (something tells me it still won’t matter as I’m still gonna have to do campaign evaluations...). He also rewards us with the Excelsis Ring, my first level 80 item, so yay for that. While Klara is given some time to recover, Zeid is given command of the squad as the Republic prepares to launch their offensive against Castle Zvahl and the Shadow Lord. The final cutscene is filled with battle in the north, so I’m hopeful that our reality will manage to win out in the end against Lilith’s dark future. Initially, I had my doubts about Bastok’s story. It seemed like it was just going to focus on the same racial issues we dealt with during the original rank missions. However, once the whole affair with the possessed Klara began, it definitely jumped leaps and bounds. I thoroughly enjoyed the progression. Probably largely due to having to figure nearly everything out with this last sequence and devise all these strategies on the go, I had a lot of fun finishing Bastok’s story. In the end, will it manage to surpass Windy’s? Probably not as that Fenrir cutscene was amazing, but I’d rank it just under that. And finally, a big thank you to Prorian, Aumaan, and Hanna for sticking through failures and pulling out the win. Couldn’t have done it without you guys~
Even when engulfed in the darkest shadow, be steadfast of heart and there will always be a ray of light to be found.
Stay true to yourself, and to your friends, and there is no battle that cannot be won--no shadow that cannot be quenched. ~Klara