Tutorial #1
I was messing with some other tutorial last night and took part of it and mixed it with my own ideas. and created a pretty icon. So here's my first tutorial. Basically its in 6 steps not including the 7th that is optional. I hope you guys enjoy it ^^! btw. Made with Photoshop CS2 any other versions, think reasonably if its in text different command. I haven't ever really used any other version of ps @_@ so sorry.

>>
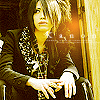
\1- Start off with your image, I used this uruha base from
jrock_bases, bases by
yoroshii.If you decide to use a larger image, crop to 100x100

2- sharpen your icon filter>sharpen>Sharpen

3-create a new layer and fill with white or black and set to hue 19% or 20% ethier you desire, theres no big difference
4-Now create another new layer and fill it with #e4ebe8 set to soft light 100%

5-Create another layer and fill with #ffd88d set to color burn 100%

6-now add your textures as you wish, I used 4 textures
7- Add text if you wish
Ta Da! Heres your avatar!

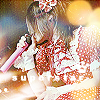
Other examples:


I would like to see results ^^ Post them up if you like to.Don't use my icons without crediting back. All bases from
yoroshii
>>
\1- Start off with your image, I used this uruha base from
jrock_bases, bases by
yoroshii.If you decide to use a larger image, crop to 100x100
2- sharpen your icon filter>sharpen>Sharpen
3-create a new layer and fill with white or black and set to hue 19% or 20% ethier you desire, theres no big difference
4-Now create another new layer and fill it with #e4ebe8 set to soft light 100%
5-Create another layer and fill with #ffd88d set to color burn 100%
6-now add your textures as you wish, I used 4 textures
7- Add text if you wish
Ta Da! Heres your avatar!
Other examples:
I would like to see results ^^ Post them up if you like to.Don't use my icons without crediting back. All bases from
yoroshii