(no subject)
Going from 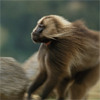
to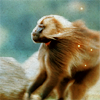
in 6 easy steps (:
1.) Duplicate your base and set it to screen.
2.) New Adjustment Layer > Selective Coloring
Reds: -39, +100, +100, +90
Yellows: -23, +56, +39, -8
Neutrals: -11, -11, -11, +15
Blacks: 0, 0, 0, +15
3.) New Adjustment Layer> Color Balance
Midtones: +14, +13, +19
Shadows: -27, -9, -22
4.) New Adjustment Layer> Channel Mixer
Red Channel: +116, -14, +4, 0
Green Channel: -10, +114, +10, 0
Blue Channel: -28, +40, +100, 0
5.) New Adjustment Layer> Curves
RGB:
1. Input:183
Output: 196
2. Input: 75
Output: 101
Red:
1. Input: 181
Output: 190
2. Input: 48
Output: 67
Green:
Input: 174
Output: 186
Blue:
1. Input: 172
Output: 190
2. Input: 51
Output: 49
If that confused you any, just tell me, and I'll take a screen cap (:
6.) Duplicate your base, drag it to the top and set it to soft light.
Filter>Blur>Gaussian Blur
Anywhere from 3 to 5px.
Whatever looks best for you :]
Now you can add textures/text
I'd love to see your results :D
Other Examples:


to

in 6 easy steps (:
1.) Duplicate your base and set it to screen.
2.) New Adjustment Layer > Selective Coloring
Reds: -39, +100, +100, +90
Yellows: -23, +56, +39, -8
Neutrals: -11, -11, -11, +15
Blacks: 0, 0, 0, +15
3.) New Adjustment Layer> Color Balance
Midtones: +14, +13, +19
Shadows: -27, -9, -22
4.) New Adjustment Layer> Channel Mixer
Red Channel: +116, -14, +4, 0
Green Channel: -10, +114, +10, 0
Blue Channel: -28, +40, +100, 0
5.) New Adjustment Layer> Curves
RGB:
1. Input:183
Output: 196
2. Input: 75
Output: 101
Red:
1. Input: 181
Output: 190
2. Input: 48
Output: 67
Green:
Input: 174
Output: 186
Blue:
1. Input: 172
Output: 190
2. Input: 51
Output: 49
If that confused you any, just tell me, and I'll take a screen cap (:
6.) Duplicate your base, drag it to the top and set it to soft light.
Filter>Blur>Gaussian Blur
Anywhere from 3 to 5px.
Whatever looks best for you :]
Now you can add textures/text
I'd love to see your results :D
Other Examples:
