Tutorial 2
So the other day my dad sent me an e-mail with some pictures of my sisters. The coloring wasn't all that great so I decided I'd fix that, thus this tutorial.
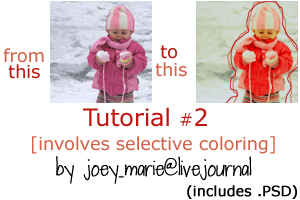
1. Start out by selecting/cropping your image. I chose my youngest sister, who will remain unnamed just in case my step-mother flips for publishing her daughter on the internet.

2. Duplicate your base and set it to screen 100% opacity.

3. Layer > New Fill Layer > Solid Color > bdc1fd - set to color burn 100% opacity.
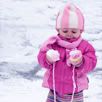
4. Layer > New Fill Layer > Solid Color > efb2d2 - set to soft light 100% opacity.

5. Layer > New Fill Layer > Solid Color > eff587 - set to color burn at 87% opacity.

6. Layer > New Fill Layer > Solid Color > ac9745 - set to multiply at 63% opacity.

7. Layer > New Fill Layer > Solid Color> bdc1aa - set to color burn at 25% opacity.
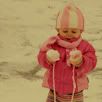
8. This is for her coat, it'll bring out the pinks later with the final outcome, as well as the blue-ish part of the snow.
Layer > New Adjustment Layer >Selective Color -
Reds:
C: -42
M: +11
Y: +35
B: 0
Yellows:
C: -10
M: -27
Y: -30
B: 0
Neutrals:
C: +17
M: +6
Y: +5
B: 0
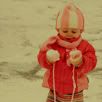
9. Layer > New Fill Layer > Solid Color > d8ebfc - set to soft light at 68% opacity.

10. Layer > New Adjustment Layer > Selective Coloring-
Reds:
C: -61
M: -23
Y: +32
B: +27
Yellows:
C: +100
M: +52
Y: -41
B: -30
Whites:
C: 0
M: 0
Y: 0
B: +100
Neutrals:
C: -1
M: -12
Y: -14
B: +8

11. This step and the one following could be a little tricky, it matters on what kind of picture you're dealing with. But the outcome will have the skin lightened and looking more saturated.
Using the quick selection tool, select anywhere that shows skin. I chose the small area that her face shows. With the selection still around the face, go to Layer > New Adjustment Layer > Selective Coloring-
Yellows:
C: -35
M: -57
Y: +30
B: 0
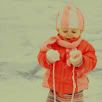
12. Again, use the quick selection tool to highlight the skin shown. Right click on the highlighted skin and click select inverse. Now the whole box excluding the skin should be highlighted in moving dashes. With the selection still around the face, go to Layer > New Adjustment Layer > Selective Coloring-
Yellows:
C: -30
M: -51
Y: -73
B: +11
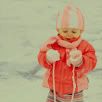
13. Layer > New Adjustment Layer > Hue/Saturation > Saturation +20

14. Go back down to your base, duplicate it, bring it to the top of all the layers and set it to soft light 100% opacity.
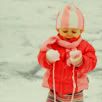
15. The next step doesn't work with all images, so it's optional. Duplicate your top layer (step 14) and set it to pin light at 57% opacity. It gives the snow a more blue-ish look to it.
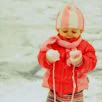
You can stop here if you were only looking for the coloring, but if you also want to add lines to your image, continue reading.
16. To make the lines, I'm sure there are many easier ways, but this is my version. Create a new layer and select the pen tool on the sidebar.
Carefully select the path you want the lines to make- for more rounded lines, make more points closer together and for pointier ones, make them further apart.
Once you've closed your path (brought your final point back to the starting point), right click the path and choose "fill path" and choose whatever color you want, it doesn't matter.
Underneath the opacity adjuster, there's one that says fill. Bring your fill percent down to 0.
Go to Layer > Layer Style > Stroke... and choose the thickness and color you want.
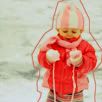
I added another line layer, this time more curved.
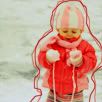
17. Add any other brushes/textures/text you want and you're finally done.
And remember, you may have to/want to change certain steps around for a better outcome.
Honestly, I hope this made some sense, and if it didn't let me know and I'll try to make it more in depth.
.psd here.
I'd love to see results. And a happy holidays to all who is reading this.

1. Start out by selecting/cropping your image. I chose my youngest sister, who will remain unnamed just in case my step-mother flips for publishing her daughter on the internet.

2. Duplicate your base and set it to screen 100% opacity.

3. Layer > New Fill Layer > Solid Color > bdc1fd - set to color burn 100% opacity.

4. Layer > New Fill Layer > Solid Color > efb2d2 - set to soft light 100% opacity.

5. Layer > New Fill Layer > Solid Color > eff587 - set to color burn at 87% opacity.

6. Layer > New Fill Layer > Solid Color > ac9745 - set to multiply at 63% opacity.

7. Layer > New Fill Layer > Solid Color> bdc1aa - set to color burn at 25% opacity.

8. This is for her coat, it'll bring out the pinks later with the final outcome, as well as the blue-ish part of the snow.
Layer > New Adjustment Layer >Selective Color -
Reds:
C: -42
M: +11
Y: +35
B: 0
Yellows:
C: -10
M: -27
Y: -30
B: 0
Neutrals:
C: +17
M: +6
Y: +5
B: 0

9. Layer > New Fill Layer > Solid Color > d8ebfc - set to soft light at 68% opacity.

10. Layer > New Adjustment Layer > Selective Coloring-
Reds:
C: -61
M: -23
Y: +32
B: +27
Yellows:
C: +100
M: +52
Y: -41
B: -30
Whites:
C: 0
M: 0
Y: 0
B: +100
Neutrals:
C: -1
M: -12
Y: -14
B: +8

11. This step and the one following could be a little tricky, it matters on what kind of picture you're dealing with. But the outcome will have the skin lightened and looking more saturated.
Using the quick selection tool, select anywhere that shows skin. I chose the small area that her face shows. With the selection still around the face, go to Layer > New Adjustment Layer > Selective Coloring-
Yellows:
C: -35
M: -57
Y: +30
B: 0

12. Again, use the quick selection tool to highlight the skin shown. Right click on the highlighted skin and click select inverse. Now the whole box excluding the skin should be highlighted in moving dashes. With the selection still around the face, go to Layer > New Adjustment Layer > Selective Coloring-
Yellows:
C: -30
M: -51
Y: -73
B: +11

13. Layer > New Adjustment Layer > Hue/Saturation > Saturation +20

14. Go back down to your base, duplicate it, bring it to the top of all the layers and set it to soft light 100% opacity.

15. The next step doesn't work with all images, so it's optional. Duplicate your top layer (step 14) and set it to pin light at 57% opacity. It gives the snow a more blue-ish look to it.

You can stop here if you were only looking for the coloring, but if you also want to add lines to your image, continue reading.
16. To make the lines, I'm sure there are many easier ways, but this is my version. Create a new layer and select the pen tool on the sidebar.
Carefully select the path you want the lines to make- for more rounded lines, make more points closer together and for pointier ones, make them further apart.
Once you've closed your path (brought your final point back to the starting point), right click the path and choose "fill path" and choose whatever color you want, it doesn't matter.
Underneath the opacity adjuster, there's one that says fill. Bring your fill percent down to 0.
Go to Layer > Layer Style > Stroke... and choose the thickness and color you want.

I added another line layer, this time more curved.

17. Add any other brushes/textures/text you want and you're finally done.
And remember, you may have to/want to change certain steps around for a better outcome.
Honestly, I hope this made some sense, and if it didn't let me know and I'll try to make it more in depth.
.psd here.
I'd love to see results. And a happy holidays to all who is reading this.