2 Icon Tutorials
>>

Translatable: Yes
Difficulty: Easy
8 Steps
PSD: Yes
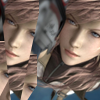
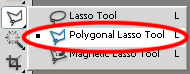
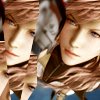
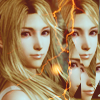
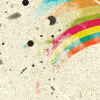
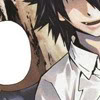
Step1~ This step is mianly optional, what I first did was use the polygonal lasso tool to select mostly triangular shapes of her face, hit ctrl+J on the keyboard to duplicate that selection, and tesselate it on the other side beside the main focus of the icon.
Mind you this was not done perfectly in any way :)
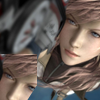
1st cutout
2nd cutout
3rd cutout
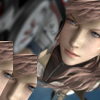
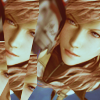
Step 2~ I merged (shift+ctrl+E) my layers and noticed that my base was kinda dull. Duplicate your base 2 times.
First one set to screen 70%
Second one set to softlight 100%
This will already improve our icon in terms of quality quite a bit.
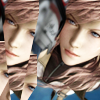
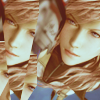
Step 3~ Create a new fill layer (layer>>new fill layer>> solid colour...). #fff6df set to colour burn. This will begin to deepen the colour and let a more yellow colour pop out from the shadows of the icon.
Step 4~ Let's put a little more red into this. Open up a colour balance layer (layer>>new adjustment layer>>clour balance...), and input the following settings.
Midtones: +61, +38, +36
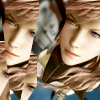
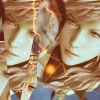
Step 5~ Lookin' good. Add these next two fill layers.
#1eff00 set to saturation with its opacity lowerd to 17%, for a bit of saturation.
#a43728 set to exclusion at 35%, to get that crazier colour in the end result.
Step 6~ Create a new levels layer (layer>>new adjustment layer>>levels...) and input the following settings:
RGB: 0, 1.26, 255
Lightens up the overall image, especially the shadows.
Step 7~ Add these next two textures by 99mockingbirds and set them both to screen.
Rotate them however you wish and erase any parts covering up the face.
Step 8~ Looking a little washed out there, so we'll finish this off with a simple softlight layer. Duplicate your base and drag it to the top. Set this layer to the softlight at 40%
And you're basically done~
I enjoy seeing any comments/feedback/results :)
Get the PSD here.
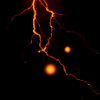
Other results:

>>

>>


>>

Translatable: Yes
Difficulty: Easy
7 Steps
PSD: Yes
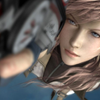
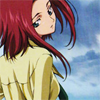
Step One~ If your base has a background that isn't all white, use any extracting tool like the polygonal lasso too, pen tool, etc to trace your main focus. Then when it's selected completely, press ctrl + shift to reverse the slection so that everything else besides the main focus is selected instead, then hit the delete botton on your keyboard to get rid of it :)

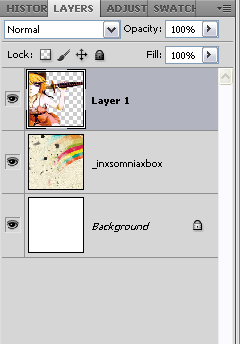
Step Two~ Then put this texture by inxsomniax behind your image by putting it under the first layer as seen here.

Step Three~ Add these next three colour layers (Layer>>New Fill Layer>Solid Colour...):
d79090 set to softlight 100%, Duplicate this layer
c8f7ff set to colourburn 100%
This'll start to give the icon a more nicer and less dull colour compared to when we first started.

Step Four~ Add this texture by ? (if you know, please tell me so I can give credit) and set it to screen 100%. Our icon will come out a bit grungy in the end and this texture will lead up to that look :)
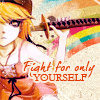
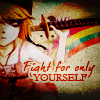
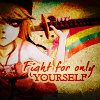
Step Five~ This will be the right step to add your text :) This step is optional, of course.
I put "Fight for only" in dearJoe 5 CASUAL trial
and "YOURSELF" In Garamond, which is a default font.
I added a 2 px stroke outline on both of them in f8f0e0 (matches the background)
Step Six~ Add these next two textures by bambinainnero . This will complete the grungy look I was looking for.
(Tweaked in colour by me) Set this to linear burn and lower the opacity to 80%
Set this texture to colourburn 80%
Step Seven~ Add a new Hue/Saturation layer (New adjustment layer>>hue/saturation...)
Up the saturation by +40
I erased some of the saturation around her face and hair since she stood out a little too much :)
And you're basically done !
I enjoy seeing comments/feedbacks and/or results :D
PSD Can be found here
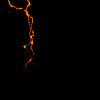
Other results:
>>

>>