okay, first tutorial
Tutorial Type: icon tutorial; color correction
Skill level: beginner/intermediate
Program used: ps7
Notes: Hopefully the steps are clear!
it's going from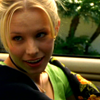
to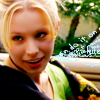
.
01. take a cap and crop it to 100x100.

02. I then used curves to correct the image's color and light, which is done by image>>adjustments>>curves, I think. My image was pretty dark and had a lot of green in it, so I adjusted the "Green" curves level and the "RGB" curves level. This step will be different for everyone.
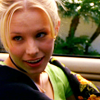
03. There was one part that was bothering me (that little green spot on her chin, see?) so I went over it in new layer with a color that matched her skin tone and set that layer's mode to "Color."
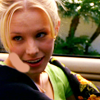
&
04. I set a new layer filled with #e9e9e9 to color burn, which kind of makes the image more... vivid, i guesss? I also made a new layer and set it to screen.
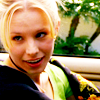
05. This part is sort of complicated, I think. I pressed Ctrl+A, then Ctrl+shift+C, which takes a screenshot of your image, kind of, with all the layers. I pasted (Ctrl+V) this "screenshot" onto a new layer at the top of this image. I deleted the screen layer, and set my SCREENSHOT to Screen 50%.

06. Then, I used the sharpen tool on places like her eyes, her lips and her collarbone, places I wanted to make stand out more. You can also blur her skin a bit to make it more smooth.
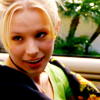
07. You're done with the major part of the tutorial! I just added text and such. It sort of comes out in a cone shape from her mouth in a lot of different fonts, which to me looks like she's speaking, heh. The finished product:

Remember:
A. Don't copy the tutorial exactly! It's slightly different for every image! Toy around with it!
B. Pimp the community iconifixation! Friend it! Become our affilate! YAY.
I hope you enjoyed it ;)
Skill level: beginner/intermediate
Program used: ps7
Notes: Hopefully the steps are clear!
it's going from

to

.
01. take a cap and crop it to 100x100.

02. I then used curves to correct the image's color and light, which is done by image>>adjustments>>curves, I think. My image was pretty dark and had a lot of green in it, so I adjusted the "Green" curves level and the "RGB" curves level. This step will be different for everyone.

03. There was one part that was bothering me (that little green spot on her chin, see?) so I went over it in new layer with a color that matched her skin tone and set that layer's mode to "Color."

&

04. I set a new layer filled with #e9e9e9 to color burn, which kind of makes the image more... vivid, i guesss? I also made a new layer and set it to screen.

05. This part is sort of complicated, I think. I pressed Ctrl+A, then Ctrl+shift+C, which takes a screenshot of your image, kind of, with all the layers. I pasted (Ctrl+V) this "screenshot" onto a new layer at the top of this image. I deleted the screen layer, and set my SCREENSHOT to Screen 50%.

06. Then, I used the sharpen tool on places like her eyes, her lips and her collarbone, places I wanted to make stand out more. You can also blur her skin a bit to make it more smooth.

07. You're done with the major part of the tutorial! I just added text and such. It sort of comes out in a cone shape from her mouth in a lot of different fonts, which to me looks like she's speaking, heh. The finished product:

Remember:
A. Don't copy the tutorial exactly! It's slightly different for every image! Toy around with it!
B. Pimp the community iconifixation! Friend it! Become our affilate! YAY.
I hope you enjoyed it ;)