Tutorial #4: windmill
from this
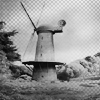
to this
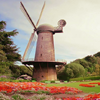
or this
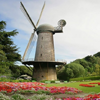

1. Take your picture, resize it and crop it.

2. Create a selective color layer:
reds: -65 -6 +68 0
greens: +100 -100 +100 0
cyans: +100 0 +77 0
whites: 0 0 +78 0
neutrals: -27 +7 -4 0
3. Set this texture by innocent-lexys to overlay.

4.Set this texture by innocent-lexys to darken 54% opacity. I erased some parts of the texture to avoid the icon look very dark and yellowish.

5.Set this texture by innocent-lexys to overlay. In this case I also erased some parts of the texture.

6. Add this texture to get the squares effect. Now erase the parts of the texture you want, to see some parts without squares. And this is the first result. Set the layer to darken, with 33% opacity.

7. To get the b&w one, create a black and white gradient map in the top. And that's all.

.psd
more examples
more tutorials here