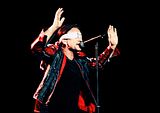
Tutorial #14 [Bono Vox]
Today we'll be correcting some majorly yellow/orange/red pics.
Going from:

To:

Made in PS7 as requested by steph_leeds Uses Selective colour, Levels and Curves. Not translatable.
Remember that this tutorial is nothing more than guidelines. My exact setting aren't going to work with every pic you try it on. The idea is to use it a guideline and play about as needed. :)
Duplicate your base, set it to soft light, 100%. Desaturate that soft light duplicate. Duplicate it once or twice. It's going to depend on your pic. I did twice. Duplicate the base again, set it to screen 100% and duplicate the screen layer. Now comes the long winded adjustment layer explanation.
New adjustment layer - Selective Colour
REDS:
+100, +12, +25, - 10
YELLOWS:
+100, -15, -55, -75
NEUTRALS:
+100, -32, -100, -38
New adjustment layer - Selective Colour
REDS:
-100, -11, +13, +40
YELLOWS:
+100, -18, -47, +55
CYANS:
+100, -44, -40, +100
BLUES:
0, 0, 0, +100
NEUTRALS:
+24, -5, -8, +50
New adjustment layer - Selective Colour
REDS:
+16, -12, +20, +100
YELLOWS:
+100, -18, -51, +52
NEUTRALS:
+18, -12, -27, +20
New adjustment layer - Levels
Red:
Input: 70, 1.07, 255
Output: 37, 250
Green:
Input: 4, 1.19, 255
Output: 16, 245
Blue:
Input: 16, 1.20, 242
Output: 12, 255
New adjustment layer - Curves
RGB:
Point one:
Input: 210 Output: 207
Point two:
Input: 18 Output: 41
Make sure all your soft light layers are above the screen and adjustment layers and make sure the screen layers are below the adjustment layers.
Add any other effects you want and you're done!
Other examples:


(Icons may be used with credit.)
Going from:

To:

Made in PS7 as requested by steph_leeds Uses Selective colour, Levels and Curves. Not translatable.
Remember that this tutorial is nothing more than guidelines. My exact setting aren't going to work with every pic you try it on. The idea is to use it a guideline and play about as needed. :)
Duplicate your base, set it to soft light, 100%. Desaturate that soft light duplicate. Duplicate it once or twice. It's going to depend on your pic. I did twice. Duplicate the base again, set it to screen 100% and duplicate the screen layer. Now comes the long winded adjustment layer explanation.
New adjustment layer - Selective Colour
REDS:
+100, +12, +25, - 10
YELLOWS:
+100, -15, -55, -75
NEUTRALS:
+100, -32, -100, -38
New adjustment layer - Selective Colour
REDS:
-100, -11, +13, +40
YELLOWS:
+100, -18, -47, +55
CYANS:
+100, -44, -40, +100
BLUES:
0, 0, 0, +100
NEUTRALS:
+24, -5, -8, +50
New adjustment layer - Selective Colour
REDS:
+16, -12, +20, +100
YELLOWS:
+100, -18, -51, +52
NEUTRALS:
+18, -12, -27, +20
New adjustment layer - Levels
Red:
Input: 70, 1.07, 255
Output: 37, 250
Green:
Input: 4, 1.19, 255
Output: 16, 245
Blue:
Input: 16, 1.20, 242
Output: 12, 255
New adjustment layer - Curves
RGB:
Point one:
Input: 210 Output: 207
Point two:
Input: 18 Output: 41
Make sure all your soft light layers are above the screen and adjustment layers and make sure the screen layers are below the adjustment layers.
Add any other effects you want and you're done!
Other examples:
(Icons may be used with credit.)