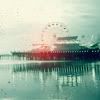
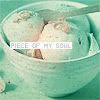
Tutorial #12
A new tutorial, because there wasn't any in a very long time. A lot of people commented on this icon and said they like it so I guess this tut will be usefull. Few steps of the coloring were already posted in my previous tutorials but I rewrited it in here, I suppose rewriting is easier than explaing from where the changes are starting.
We'll be going from this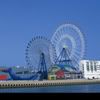
to this
1. We start with this base:
2. New adjustment layer->curves
input: 49
output: 70
RESULT: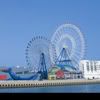
3. Create a new layer and fill it with #ffcc66. Set this layer to multiply at 20% opacity
RESULT: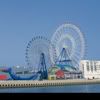
4. New adjustment layer->selctive color
REDS: -100, +35, +40, 0
YELLOWS: -20, -35, -70, 0
NEUTRALS: 20, 5, 10, -20
RESULT: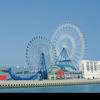
5. New adjustment layer->color balance
MIDTONES: -28, -15, -16
SHADOWS: -13, 0, -16
RESULT: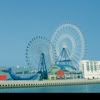
6. Copy backround layer and drag it on top of everything. Go to Filters->Blur->Gaussian blur. Set radius to 1,0 and click 'OK'. Set the blurred layer to soft light 100% opacity
RESULT:
7. New adjustment layer->selective color
REDS: -100, 50, 50, 0
NEUTRALS: 65, -30, -20, 0
RESULT:
8. New adjustment layer->Gradient map-> black&white. Set the layer to soft light opacity 50%
RESULT:
9. Duplicate the backround layer and set it on top of everything, desaturate it and set to screen 100%opacity
RESULT:
10. Create a new layer and fill it with c9f0ff, set the layer to color burn 100%opacity
RESULT:
11. Create a new layer and fill it with 00031c, set the layer to exclusion 100%opacity
RESULT:
12. New layer filled with 8cd980 set to soft light 100%opacity
RESULT:
13. New adjustment layer->Hue/saturation
SATURATION: -14
RESULT:
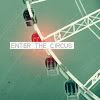
14. Add some effects if you want, I added a grunge texture from dusty_memories and set it to multiply, I also added a red blurb set to screen to make it look more interesting and a text at the top of everything
RESULT:
OTHER ICONS MADE WITH THIS TUTORIAL:


We'll be going from this

to this

1. We start with this base:

2. New adjustment layer->curves
input: 49
output: 70
RESULT:

3. Create a new layer and fill it with #ffcc66. Set this layer to multiply at 20% opacity
RESULT:

4. New adjustment layer->selctive color
REDS: -100, +35, +40, 0
YELLOWS: -20, -35, -70, 0
NEUTRALS: 20, 5, 10, -20
RESULT:

5. New adjustment layer->color balance
MIDTONES: -28, -15, -16
SHADOWS: -13, 0, -16
RESULT:

6. Copy backround layer and drag it on top of everything. Go to Filters->Blur->Gaussian blur. Set radius to 1,0 and click 'OK'. Set the blurred layer to soft light 100% opacity
RESULT:

7. New adjustment layer->selective color
REDS: -100, 50, 50, 0
NEUTRALS: 65, -30, -20, 0
RESULT:

8. New adjustment layer->Gradient map-> black&white. Set the layer to soft light opacity 50%
RESULT:

9. Duplicate the backround layer and set it on top of everything, desaturate it and set to screen 100%opacity
RESULT:

10. Create a new layer and fill it with c9f0ff, set the layer to color burn 100%opacity
RESULT:

11. Create a new layer and fill it with 00031c, set the layer to exclusion 100%opacity
RESULT:

12. New layer filled with 8cd980 set to soft light 100%opacity
RESULT:

13. New adjustment layer->Hue/saturation
SATURATION: -14
RESULT:

14. Add some effects if you want, I added a grunge texture from dusty_memories and set it to multiply, I also added a red blurb set to screen to make it look more interesting and a text at the top of everything
RESULT:

OTHER ICONS MADE WITH THIS TUTORIAL:
