The Mano-mano School of Costume Making
Once upon a time, about 20 years ago, there was an ancient Mantaring Family tradition of having a costume party on the Sunday closest to Halloween. It wasn't a Halloween party per se, since everyone in the party gets together every Sunday of the year, regardless. There's no trick or treating and you don't have to be scary. It was just an annual chance to dress up silly and make the most horrendously embarrassing home videos ever.
Anyway, there was one rule. No BUYING costumes. Every year for about... maybe 10-12 years, we all made our own costumes, trooped to my grandparents house and made fools of ourselves in front of a video camera. Yes, including our grandparents. The tradition died when most of my cousins became too old to embarrass themselves AND have fun, and also a new tradition emerged, that is to travel as a family during sem break. And when it became a choice between dress up silly or go to the beach, well, that was a no brainer.
What I took away from that old tradition was enjoying dressing up, and a creativity to make costumes instead of buying. My family relied on me to think up and create their costumes every year. I guess everyone took for granted I was the artsy-craftsy one in the family. Plus I really enjoyed it. Once I tore everyone's closets apart and dressed all seven of us up as characters from Peter Pan, using just construction paper and staples. More or less. No sewing, of course, because what ever clothes we used to make costumes had to revert back to wearable clothes after the costume party.
Which is why when Lia's school sent me a letter saying she had to dress up as a Native American, well, I took it as a personal challenge. The letter even said, use what you already have. After googling images of Native American costumes, I searched my closet for something I could re-purpose into a costume for her. Fortunately I found an old brown shirt which I borrowed from my Mom and never returned. Hi Mom! I owe you a shirt. I'll buy you a better one. This old one was unflattering anyway.
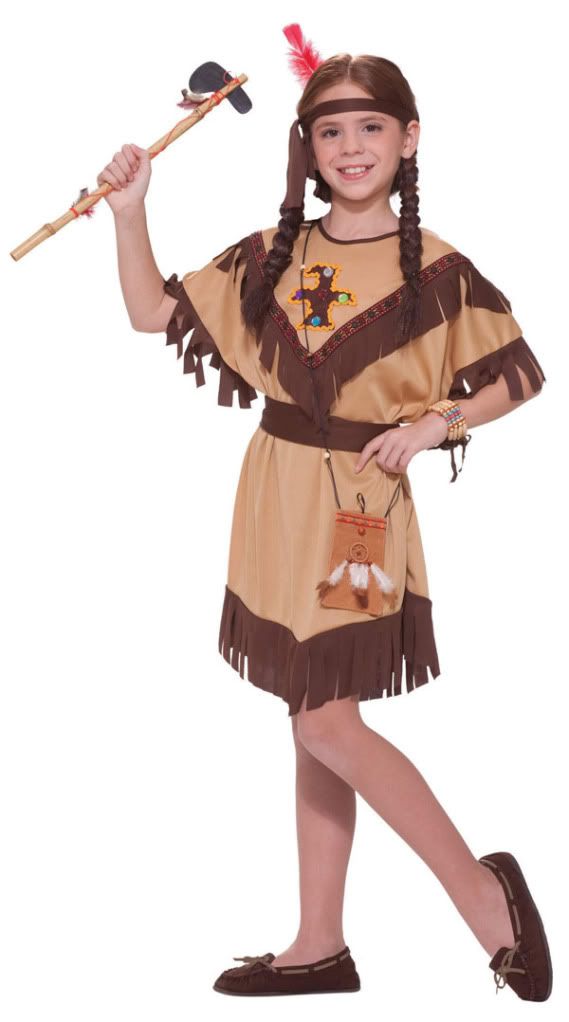
I chose this image as my inspiration, bought some supplies and got cracking. It took me about a day. But I paused a lot, for meals, snacks, nursing, playing with the kids... plus I was stitching while watching TV with Mike, so I'm sure if I was totally focused (and if I wasn't making it up as I went along), I'd have done it in less time.
These were the materials I used:
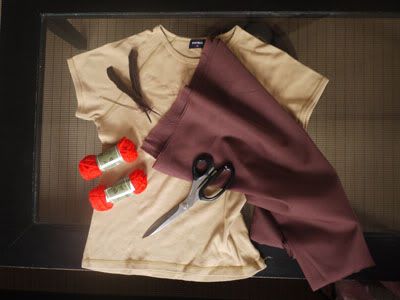
So, I had an old shirt. I bought one yard of brown fabric in Cardam's for P30. Some yarn. I only used on of those small skeins. They're P9 each in Metro Market! Market!. A giant needle with a giant eyehole so that I could sew with yarn. It cost P10. The feathers I bought in Cardam's too. Optional, but a nice touch. They come in packs of 10 for P100. Of the 10, I only used 3. Pwede na. Total cost = P140. If I have feathers lying around at home, it would have only cost P40.
I didn't have a tape measure or a sewing machine, so this was all mano-mano to the extreme. Martha Stewart would be horrified. First, I figured I wanted the fringe to be about a hand's length, the distance between my outstretched thumb and pointer. I measured as much on the cloth, folded it double, and cut enough length to go around the bottom of the shirt and around the sleeves. And then pinned them on like so.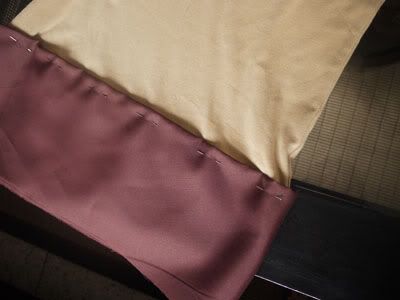
Up close it looks like this. I just made the fringe double so that, well, so there's more fringe. And also because I did't want to sew any seams.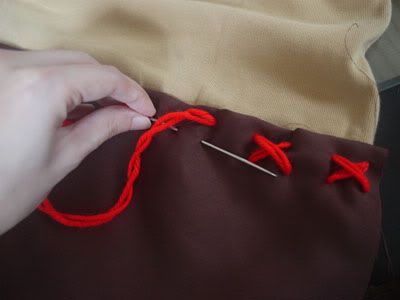
After pinning, I sewed the cloth on to the shirt with my giant needle and yarn, using a sort of broken cross stitch. Bright red and big so that the detail can be seen from the stage.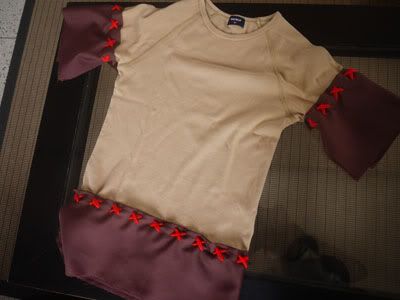
All around the bottom of the shirt and around the sleeves, so it looked like this.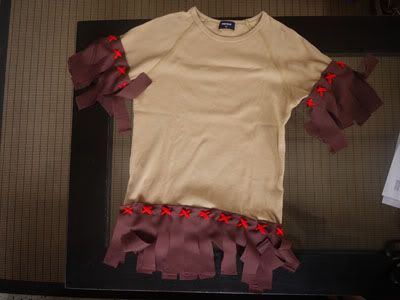
And then without measuring, I just cut them into strips, about 2cm wide. maybe a cm below the cross stitches. I'm not really sure. I was making this up as I went along.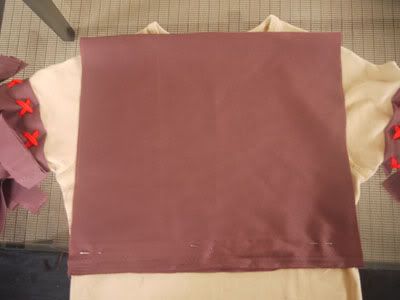
And then for the chest part, I looked at the shirt, and based on how long I wanted the fringe to be, (one hand's length) I folded more cloth in double and cut a rectangle about as wide as the body of the shirt. And then I pinned the bottom together so the fold wouldn't move around while I was working on it.
Then I folded it across, in half. And then diagonally, at the corner to mark the v-shaped neckline I intended to cut out.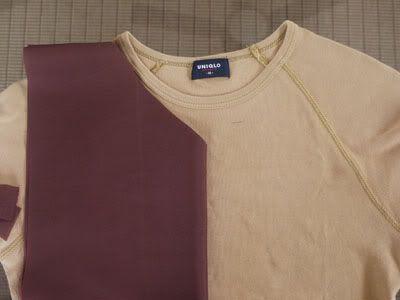
I cut out that triangle corner.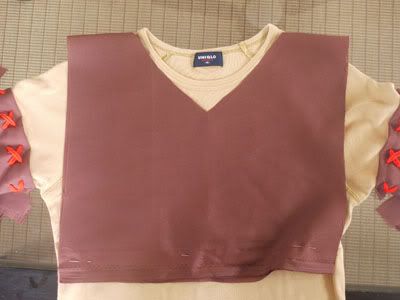
And when I opened it, it looked like this.
Stitched more X's, front and back. Not together this time. Remember, this cloth is folded in double, so that you could have fringe in the back and front of Lia's costume.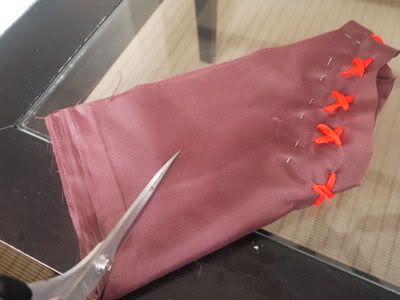
I folded it in half again, and cut the lower diagonal, following the angle of the neckline.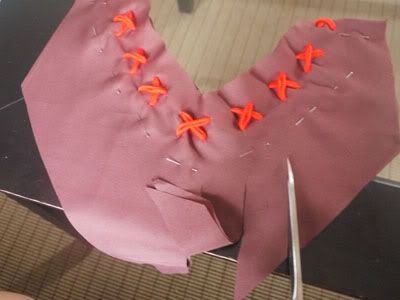
Opened it up and cut the fringe. Same width and length as the bottom of the shirt and the sleeves. More or less. As much as possible without actually measuring. Hehe. Then I opened it up and attached it to the shirt on the shoulders, with two safety pins. Easy to remove, in case I want to use the costume as something else. Like maybe a lion, or... something.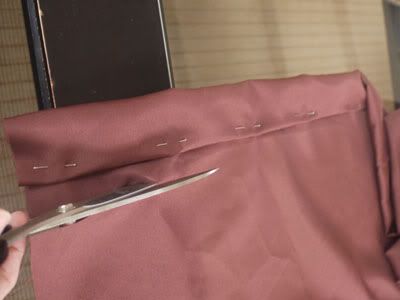
For the belt and headband, I rolled some more fabric, about 3.5cm wide, long enough to go around Lia's waist and/or head. Two lengths.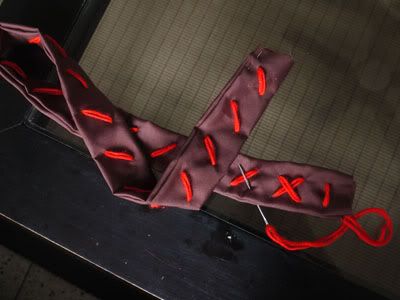
Again, I didn't want to sew any seams, so I just tucked in the edges of the fabric and then made big alternating cross stitches, all the way down, and all the way back. Pwede ring tuloy-tulooy, it doesn't really matter. These were tied around Lia's waist and head. The one for the head, i attached a feather.
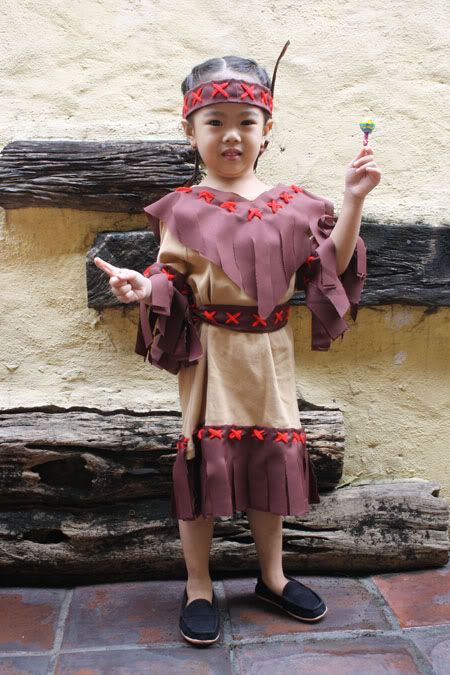
And here was the final product, Lia's costume on UN Day:
More pictures of the UN Day celebration here:
UN Day 2010.
I used to watch these American shows, like Desperate Housewives and think how crazy it is that these mothers have to slave away at costumes for their kids several times a year. And then I found myself sewing a costume for mine.
I can't even decide if I want to sew something again next year. :-) I think if I have the right old shirt to re-purpose, I wouldn't mide doing something like this again.
Anyway, there was one rule. No BUYING costumes. Every year for about... maybe 10-12 years, we all made our own costumes, trooped to my grandparents house and made fools of ourselves in front of a video camera. Yes, including our grandparents. The tradition died when most of my cousins became too old to embarrass themselves AND have fun, and also a new tradition emerged, that is to travel as a family during sem break. And when it became a choice between dress up silly or go to the beach, well, that was a no brainer.

What I took away from that old tradition was enjoying dressing up, and a creativity to make costumes instead of buying. My family relied on me to think up and create their costumes every year. I guess everyone took for granted I was the artsy-craftsy one in the family. Plus I really enjoyed it. Once I tore everyone's closets apart and dressed all seven of us up as characters from Peter Pan, using just construction paper and staples. More or less. No sewing, of course, because what ever clothes we used to make costumes had to revert back to wearable clothes after the costume party.
Which is why when Lia's school sent me a letter saying she had to dress up as a Native American, well, I took it as a personal challenge. The letter even said, use what you already have. After googling images of Native American costumes, I searched my closet for something I could re-purpose into a costume for her. Fortunately I found an old brown shirt which I borrowed from my Mom and never returned. Hi Mom! I owe you a shirt. I'll buy you a better one. This old one was unflattering anyway.
I chose this image as my inspiration, bought some supplies and got cracking. It took me about a day. But I paused a lot, for meals, snacks, nursing, playing with the kids... plus I was stitching while watching TV with Mike, so I'm sure if I was totally focused (and if I wasn't making it up as I went along), I'd have done it in less time.
These were the materials I used:

So, I had an old shirt. I bought one yard of brown fabric in Cardam's for P30. Some yarn. I only used on of those small skeins. They're P9 each in Metro Market! Market!. A giant needle with a giant eyehole so that I could sew with yarn. It cost P10. The feathers I bought in Cardam's too. Optional, but a nice touch. They come in packs of 10 for P100. Of the 10, I only used 3. Pwede na. Total cost = P140. If I have feathers lying around at home, it would have only cost P40.

I didn't have a tape measure or a sewing machine, so this was all mano-mano to the extreme. Martha Stewart would be horrified. First, I figured I wanted the fringe to be about a hand's length, the distance between my outstretched thumb and pointer. I measured as much on the cloth, folded it double, and cut enough length to go around the bottom of the shirt and around the sleeves. And then pinned them on like so.

Up close it looks like this. I just made the fringe double so that, well, so there's more fringe. And also because I did't want to sew any seams.

After pinning, I sewed the cloth on to the shirt with my giant needle and yarn, using a sort of broken cross stitch. Bright red and big so that the detail can be seen from the stage.

All around the bottom of the shirt and around the sleeves, so it looked like this.

And then without measuring, I just cut them into strips, about 2cm wide. maybe a cm below the cross stitches. I'm not really sure. I was making this up as I went along.

And then for the chest part, I looked at the shirt, and based on how long I wanted the fringe to be, (one hand's length) I folded more cloth in double and cut a rectangle about as wide as the body of the shirt. And then I pinned the bottom together so the fold wouldn't move around while I was working on it.

Then I folded it across, in half. And then diagonally, at the corner to mark the v-shaped neckline I intended to cut out.

I cut out that triangle corner.

And when I opened it, it looked like this.

Stitched more X's, front and back. Not together this time. Remember, this cloth is folded in double, so that you could have fringe in the back and front of Lia's costume.

I folded it in half again, and cut the lower diagonal, following the angle of the neckline.

Opened it up and cut the fringe. Same width and length as the bottom of the shirt and the sleeves. More or less. As much as possible without actually measuring. Hehe. Then I opened it up and attached it to the shirt on the shoulders, with two safety pins. Easy to remove, in case I want to use the costume as something else. Like maybe a lion, or... something.

For the belt and headband, I rolled some more fabric, about 3.5cm wide, long enough to go around Lia's waist and/or head. Two lengths.

Again, I didn't want to sew any seams, so I just tucked in the edges of the fabric and then made big alternating cross stitches, all the way down, and all the way back. Pwede ring tuloy-tulooy, it doesn't really matter. These were tied around Lia's waist and head. The one for the head, i attached a feather.
And here was the final product, Lia's costume on UN Day:

More pictures of the UN Day celebration here:
UN Day 2010.
I used to watch these American shows, like Desperate Housewives and think how crazy it is that these mothers have to slave away at costumes for their kids several times a year. And then I found myself sewing a costume for mine.
I can't even decide if I want to sew something again next year. :-) I think if I have the right old shirt to re-purpose, I wouldn't mide doing something like this again.