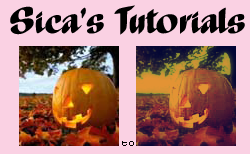
Coloring Tutorial #4

you can use psp and ps for this tutorial!!!
STEP ONE:
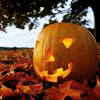
Select your base and make 3 layers. [unless you have psp; then make one copy of the base layer & skip step 3!!!]
LAYER 2
LAYER 1
BASE
Is what your layer pallette should look like.
STEP TWO:
Go to layer 1; set it to soft light & desaturate it to -25/-30 it depends on the base
STEP THREE:
Go to layer 2 and make it pin light [not on psp; you can skip this step!] Then MERGE YOUR LAYERS

STEP FOUR:
Duplicate the base layer 2 times again; so your layer palette should look like:
LAYER 2
LAYER 1
BASE
STEP FIVE:
Gaussian Blur your base layer: I used 3.0 for the strength.
STEP SIX:
Make layer 2 invisible and on layer 1 erase everything around your main image [the pumpikin in my icon] or whatever you want the focus to be.
STEP SEVEN:
Now make layer 2 visible and change it to 50% opacacy.

STEP EIGHT:
Create two new layers
BLANK LAYER 2
BLANK LAYER 1
LAYER 2
LAYER 1
BASE
STEP NINE:
On BLANK LAYER 1 fill it will the color #01043d & set the layer to EXCLUSION!
STEP TEN:
On BLANK LAYER 2 fill it will the color #e39334 & set the layer to DARKEN! You might have to play with the opacacy to get it to look good!
AND YOU ARE DONE!!!!
YAY!
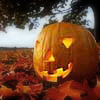
Other examples of the same technique!

Sica
X_x
Feel Free To JOIN the comm or WATCH the comm for updates!
Also; PLEASE make suggestions on what you wish to see [tutorials/brushes..etc] here!